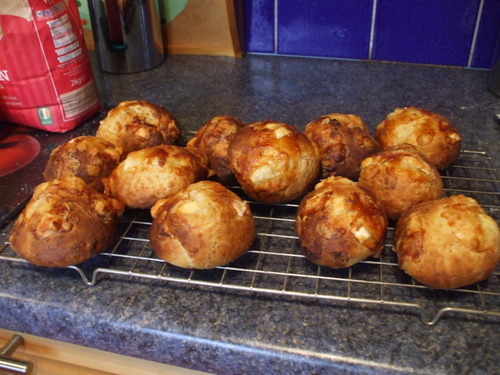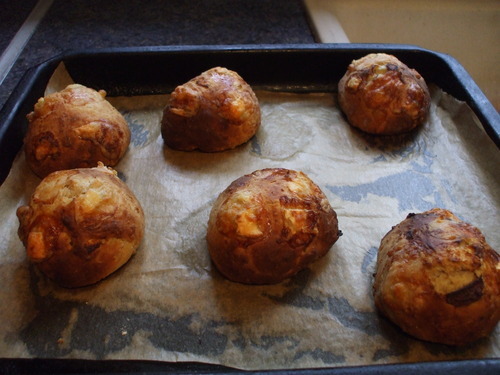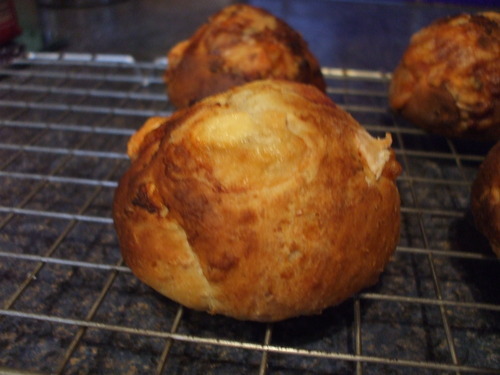


Yesterday, a smell that is generally rarely detected in the kitchen of Ganache-Elf could indeed be found to be floating from that well-used oven, filling the whole house and causing...well, mixed reactions really. My mam was not impressed...it's bizarre, but my mam, who is most certainly one of those people who can be described, in general, as a cheese fanatic...well, I say in general, because she absolutely detests both the smell and taste of goat's cheese. So accordingly, she found the aromas of my fresh goat's cheese buns somewhat off-putting. So obviously, please don't make these if you are of a similar opinion about goat's cheese...I know that sometimes when raw ingredients are baked in something they lose some of their strength of flavour or whatever, but this is certainly not the case with these little fellows. But I love them, all the same. As I mentioned before, they always remind me of my roommate and our baking nights last year - I still maintain that my buns aren't as nice as hers, but this second attempt at making them was, I'm pleased to say, generally more a successful one than my first. They were, for one thing, the correct size - I made twelve buns this time and though they still make quite a substantial snack, they aren't quite as huge as the last ones I made; which was what I really intended. And I think they tasted that bit nicer, too - they were lovely and moist and the tops were interspersed with plenty of studs of lovely molten cheese. I felt quite defensive when I heard Mam's grumbles as I lifted the buns from the oven, tenderly wrapping them in a little tea towel before stacking them on a wire rack to cool...to me, the smell is gorgeous! But each to their own, and I wasn't going to insist on Mam trying one...or anyone else, in fact; for I don't think anyone else in my family is too crazy for goat's cheese; except my auntie and granny over in England, really. But for once I had actually baked these with one person in mind...well, myself. It's rare that I do this, but my goat's cheese buns do make a really good morning snackrel for me that isn't too high in sugar and that, when spreaded with a nice dollop of peanut butter, is arguably quite good for protein too. :) And finally...goat's cheese buns also, of course, make me think of the Hunger Games...one of my favourite ever films. (haven't read the books yet...it's on my reading list...) So I feel quite justified in making them really, despite their unpopularity amongst my family members. But anyway, hopefully what I intend on whipping up today will help me to make it up to them...or indeed, it might be a complete disaster, as I have never made Cornish pasties before, so I am currently feeling that sort of nervous excitement I always get before trying out something new and completely different. Burt hey, I got this feeling when I made goat's cheese buns for the first time three months ago, and look at them now! So let's hope today will be just as successful:)
And because I feel that I have
actually adapted my own little recipe for these - I made them for the first
time using the one my roommate always used, but now I have sort of formulated
my very own recipe for them which I am now really happy with - I think it is
time to share it and hopefully make lots of kitchens across the world smell
like the Mellark's bakery, I suppose. Apologies in advance, Mam! ;)
To make 12
goat's cheese buns you will need...
·
50
g butter, melted.
·
60
g caster sugar
·
100
g Wholemeal flour
·
200
g plain flour
·
7
g sachet instant yeast/ 1 ½ tsp easy-blend yeast.
·
1
tsp salt
·
250
ml tepid water
·
About
125 g goat’s cheese. (I use the one that comes in a tube in Lidl.:) )
·
1
large egg.
1. Sift the white flour and the salt
into a big mixing bowl, then add the wholemeal flour. Stir in the yeast.
2. Take the goat’s cheese out of its
wrapper and flour your hands lightly. Break the goat’s cheese into little studs
about the size of your little fingernail. Set aside about ¼ of the cheese for
the tops of the buns, and put the remainder in the bowl with the flours. Mix
together well.
3. Whisk the egg in another big mixing bowl,
and then whisk in the butter and the sugar, and the warm water.
4. Add half of the flour and cheese mix
to the wet ingredients and mix together with a wooden spoon. Gradually
incorporate in the rest of the flour and cheese, mixing well with lightly
floured hands. You should end up with a soft and slightly sticky dough. Ensure
that it isn’t too dry – if it is a little on the moist side that’s ok. But if
it is very sticky add a little more flour. Add more water if it feels too dry.
5. Shape the dough into a ball. Grease a
clean bowl with a little vegetable oil and then place the dough in it, turning
once to grease the top. Cover with greased clingfilm and leave in a warm,
draught-free place for 1-2 hours until it has increased in volume and should feel
slightly springy to the touch. You don’t need to worry too much about it being
doubled in size, but do make sure that it has increased its volume somewhat. I
usually give it 2 hours to be on the safe side. J
6. Preheat the oven to 200c/fan 180c. Grease
two big baking trays and line them with baking paper if they are not non-stick.
7. Very lightly flour your work surface.
Take the clingfilm off the dough and give it a good punch with your fist to
knock out the air. Turn the dough out onto the work surface. Cut into 12 equal
pieces.
8. Shape the pieces of dough into balls
by rolling them underneath a cupped hand until they are smooth and not lumpy,
and are a nice round shape. Place the balls on the prepared baking trays,
spacing them well apart.
9. Place the remaining studs of goat’s
cheese that you reserved from step 2 in the top of the buns, pressing them down
gently.
10. Bake the buns in the preheated oven
for 20-30 minutes, until well-risen and golden brown. They should sound hollow
when tapped on the base. Remove from the trays and place on a wire rack to
cool.
11. Eat warm, cut in half and buttered
(or in my case…peanut buttered ;) ) ,
or leave to cool completely on the wire rack, and reheat for a half a minute in
the microwave later on during the day. They don’t keep any longer than a day,
so freeze any leftover buns and reheat them in the microwave on defrost
whenever you fancy one. J
No comments:
Post a Comment