At first glance it might seem that I am just a happy, normal girl who loves to bake and walk her dog. However, I have suffered with an eating disorder since I was 13. It was only in May 2014 when I realised that this Voice in my head was slowly but surely trying to kill me. And so began the long, hard, and painful journey which is recovery...

I want My Cocoa Stained Apron to be a special place...a place for reflection, memories, shared stories...and of course a little bit of cocoa-staining ;) Recovery might be the hardest thing you ever choose to do in this life. But it is also the bravest and best decision you will ever make.:)

Showing posts with label milk chocolate. Show all posts

Saturday, 18 July 2015

Dappled cupcakes!!:)

Yes!!! Yet MORE cupcakes were made in the kitchen of Ganache-Elf today!! And you know, the best thing about these is, that they look ever so exquisite, with a delightful, dainty prettiness to them which makes them all but irresistible to anyone who you might consider lucky enough to ask to sample one of your heavenly delights - well, despite all of that, they are remarkably simple to make, and don't need any pricey ingredients. Just check to see if you have some little choccies in the house for decorating!! ;) I used cadbury dairy milk buttons, but it is, of course, entirely up to you which ones you use - as is the way which you choose to apply the most heavenly concocoction ever created by humankind, surely (that being GANACHE of courese. ;) to your buns. Swirls? Smiley faces? A polka dot or chessboard patterns? The possibilities are as endless as your imagination!! Ganache in itself, once mastered, is never really any hardship to make - don't let the fancy-sounding name fool you if you are unfamiliar with the delights of ganache-making. But anyway, never fear - the recipe is included below complete with Ganache-making instructions!! ;)


  • 125 g butter/margarine, softened
  • 150 g caster sugar
  • 2 large eggs
  • 150 g self-raising flour
  • About 1 tbsp cocoa powder
  • 1/2 tsp vanilla essence/extract
  • 2 tsp milk 
For the ganaches...
  • 4 tbsp single cream
  • 100g white chocolate, chopped
  • 100 ml single cream
  • 100g plain chocolate, chopped
  • a few chocolate dairy milk buttons (or whatever small chocolates you prefer )

Method:)
  • Preheat the oven to 180c/fan 160. Line a muffin pan with 12 muffin cases.
  • Beat the butter or margarine in a bowl until really soft, then add the sugar, the eggs, and the flour. beat well for about 2 minutes until smooth and well blended.
  • Transfer half the mixture to a clean bowl and add the vanilla essence to one of them.

  • Distribute alternative spoonfuls of the different coloured batters amongst the 12 paper cases, filling them about three quarters full. When you're done, take a little thin skewer and swirl it round in each case to get that gorgeous, swirly marbled effect.
  • Bake the cupcakes for about 17-20 minutes, until well-risen and springy to the touch - if you press the top of one gently with a fingertip, it should spring back. If an indention is left bake for a few more minutes and then test again.
  • Leave in the muffin pan for about two or three minutes, and then move to a wire rack to cool. While they are cooling make the ganaches, starting with the dark chocolate ganache. ;)
  • Make the dark choc ganache by melting the 100g plain chocolate with 100 ml single cream, on a very low heat in a small saucepan. Stir until smooth and then refrigerate for about 1 ½ - 2 hours, checking after 1 ½ hours…you don’t want it very hard, just a nice spreadable consistency.
  • Next make the white choc ganache: in a small heatproof bowl set over a pan of simmering water, melt the white choc with the 4 tbsp single cream. Stir now and again and watch it very closely – the white choc will temper easily if it is overheated. As soon as the choc has melted remove from the heat and stir until nice and smooth. Refrigerate for about 1 hour – 1 ½ hours, checking after an hour, until the ganache is thicker and more spreadable.
  • When the cupcakes are completely cold, decorate them with the two ganaches...in whatever way you heart desires. To get swirls or rosettes of course, you will need an icing bag or small piping bag fitted with a star-shaped nozzle. I created flowerheads and circular patterns upon my own batch, and then added a few buttons to some of them. Very pretty, very cute, and very, very yummy, of course. <3 xxx

Friday, 7 November 2014

Ice cream....cake!???


How can you bake ice cream in a cake!? is the question I am always asked when I blah on about how wonderful this concoction of mine is to any of my friends. Heehee...well. The name IS a little deceptive I freely admit. As the only thing at all cakeish about this cake is the fact it is, well, a cake shape. Unfortunately my friends, even Ganache-Elf hasn't worked out how to bake icecream in a acake just yet. But before you turn away from my blog in disgust, just have a look at this recipe. And yes, please, do give it a go. You won't regret it - I PROMISE you. Yes, I know it's not as cool as actually being able to boast that you actually DID bake ice cream into a cake. But I can assure you now the taste of this will make you forget all that. This is going to be one of the most amazing and heavenly desserts you will ever, ever taste...


Now the sauce IS optional, of course. But is there really, if you think about it, anything more heavenly then pouring a warm, golden sauce over ice cream and seeing all start to seductively melt and merge together...? Need I say anymore... ;)

Ingredients.... (but remember the golden rule...you can add MORE to this ;) :) But these are the ESSENTIAL ingredients in my view so try to remember to add these to your shopping basket. ;)


  • 1 litre tub of your favourite ice cream flavour. (I usually use either vanilla, honeycomb, raspberry ripple, or Neapolitan...but it's pretty much up to you...everyone has their own favourite ;)
  • 150 g or more (no less ;) ) bourbon cream biscuits. (it's about half a pack? :o )
  • 150 g milk chocolate, chopped into chunks/chips. 
  • 2 regular-sized Crunchie bars.
Hmmmmmm...and now what else can potentially be added??
  • Well, usually I like to throw in some Maltesers (about half a big pouch, you know the ones you are supposed to "share"? (yeah, right. ) or maybe some Minstrels/Rolos/Munchies/Chocolate Buttons/Cadbury Nibbles etc etc etc. Or a mix...it all depends on what you have in your cupboard/secret stash ;)
  • And also I sometimes vary the type of chocolate I put in for the chips...sometimes I like to have white chocolate and milk chocolate chips...so half a big bar of Milky bar gets thrown in there too with the milk choc ;)
  • And smashed up flakes/ripples/twirls occasionally find themselves twirled about in the mix as well. ;) 
  • Also, I sometimes like to add more biccies too...along with the bourbons, I'v added half a pack of chocolate digestives in the past...and once, yes, double stuff oreos. Now that really IS pure indulgence. But boy does it taste good. ;)
You will also need a 20 cm cake tin - it's best to use a springclip one for this, or one with a removable bottom, for ease of releasing your ice cream cake from its "mould". ;)  

And for the butterscotch sauce? Well all you need for that is...
  • 160 ml single cream
  • 160 g light brown soft sugar
  • 50 g butter, diced
  • 2 tsp vanilla extract/essence
And now...let's make some magic happen. ;) No excuses now: I don't have the time, I'm no good at baking etc - nope, none of those are applicable in this context I'm afraid my friends. For yes you DO have the time (this takes so, so quick to make...to be honest it's the actual waiting for it to harden up in the freezer which is the the most time-consuming step (and the most painfully excruciating, of course... ;) ) And even if you say you aren't good at baking (which I am pretty certain is not true...I'm of the opinion that no one can be "bad" at baking...it's just all a matter of practice as is the case with so many other things too ;) )...well believe me, there is absolutely nothing difficult at all in the process outlined below. All that's involved, essentially, is a bit of smashing, chopping, mixing...and, err, waiting. Poo! (But that stage can be skipped of course. You then just wouldn't have, well, that tidy cake shape. But if you are like me and are of the opinion that melted, runny ice cream is one of God's gifts to mankind? Well...you get the idea. 

Anyway, let us proceed on to the recipe..and instant fame and reverence for you, the icecreamcakemaker, amongst all those incredibly fortunate individuals that you are going to share this gorgeous creation with. If that's what you intend on doing, of course... (another advantage of ice cream cake making...there's no fear that it's going to go mouldy or stale or whatever, hence removing the pressure to use it up as soon as possible, and distribute it amongst friends, family etc. So yes, you could make it just for yourself, though be prepared to put up with extremely guilty feelings for keeping such a divine dessert secret from your nearest and dearest... ;) 

Method :)
  • Line your cake tin well with cling film.
  • Take the ice cream out of the freezer to soften slightly (but don't let it melt completely!!) while you set about preparing the other ingredients.
  • Crush the biscuits in freezer bags with a rolling pin or a big wooden spoon. 
  • Crush the Crunchie bars: you can either do this in freezer bags with the biscuits or simply crush them still in their wrappers ( just be very careful when you open them...wouldn't it be a terrible thing to lose any of that lovely rubble. :o )
  • tip the softening ice cream into a big mixing bowl. (don't just throw away that tub though: they are ever so handy, I find, in storing cakes/biccies/nibbles etc. ;) 
  • Tip in all the other ingredients for the cake: the chocolate, the crushed biccies, the Crunchies, Maltesers etc. Then mix it all together with a big spoon. 
  • Tip the mixture into the tin and smooth the top. (Note to those who do not want to wait/who have a heart like Ganache-Elf's which literally...well, melts when it comes to melted ice cream. : you don't need to proceed any further at this point...you can go and get your spoon/eating utensil. But for those of you who do want an actual ice cream CAKE, please read on.
  • Put the tin into the freezer to harden slightly. In my freezer, an hour usually would suffice. It all depends on the coldness of your freezer and how hard/perfectly-shaped you would like the finished outcome to be ;)
  • When you think the cake is nearly ready/you think you have waited well long enough, you can now, if you feel so inclined, make the butterscotch sauce. (and again, I would just like to stress that all those excuses as I mentioned above won't work here either...this is sooo quick and easy to make too so please don't be shy. ;)
  • Measure all the ingredients for the sauce into a small saucepan and place on a very low heat until the butter has melted. Turn the heat up to low-medium, stirring occasionally, until a few bubbles appear on the surface. 
  • Simmer very gently for about 5 minutes, stirring occasionally. Be very careful it doesn't spit as you as toffee leaves quite a nasty burn. :(
  • Take off the heat and leave it for about 5 mins to cool slightly. And now...now you are almost ready...
  • Take the icecreamcake out of the freezer and tip it gently out onto a large plate. carefully take off the clingfilm. And there, ta-da....you've done it. Be proud. ;)
  • You might need to leave it to soften for about 5 minutes if the ice cream has become very hard as cutting rock-hard ice cream is rather tricky as I am sure you know. Anyway, once it's soft enough, cut into triangles with a big knife and serve with generous spoonfuls of beautiful butterscotch drizzled/slathered/poured on top. Ahhhhh...bliss. ;)
Note on amounts: It's hard to say exactly how much this will serve...as often I find people do tend do go back for seconds...so do take that into account ;) but roughly, I would say aim for about 6...(if you are planning on sharing that is. ;) xxxx


Monday, 3 November 2014

Chocolate-studded cookies.:)


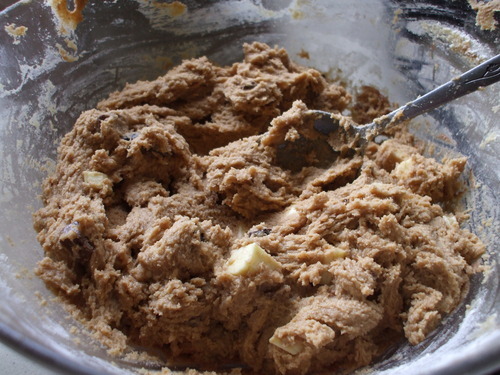
I know these might look suspiciously similar to my Crazily Chocolatey double choc chip cookies (if you haven't baked them yet then please please pleaseeee consider doing so...check them out HERE if you feel so inclined ;) ), but no, I can assure you that these are a totally different cookie altogther. For starters, the cookie dough itself is entirely different. It is much sweeter as yes, there is a very cheeky amount of gorgeous light brown soft sugar in this recipe. (I adore this type of sugar...it just lends such a delicate caramelly flavour to the completed product. Almost always before I mix it with the other ingredients when I bake with it, I sift through the sugar grains with my fingers, primarily to break up any hard little clumps you occasionally get in it when it's been densely packed...and also to give myself some sort of excuse to inhale that fabulous sugary aroma. :) They aren't quite as dark as the other cookies, either, as there is less melted chocolate in the cookie dough. But rest assured, all ye chocaholics (yes I am including myself in this category, rest assured...) for this is undoubtedly very much made up for in the very, very, very generous amount of chocolate chips - some of which are reserved for studding in the tops of the cookies before baking. So what we end up with is a scrumptiously sweet, chewy, chocolatey cookie with lots of delightful chunks of heavenly milk and dark chocolate within, and on top of, each one.
 Like my Crazily Chocolatey Cookies, these biccies will have a slightly crack, rugged appearance, which all adds to their charm. And as always, feel free to increase the amount of chocolate chips if you so desire. ;)

Ingredients

  • 255 g light brown soft sugar
  • 125 g butter, softened
  • 1 large egg, beaten
  • 1/2 tsp vanilla essence/extract
  • 225 g plain flour
  • 30 g cocoa powder
  • 75 g plain chocolate, broken into pieces
  • 1 tsp bicarbonate of soda
  • 1/2 tsp salt
  • 100 g milk chocolate, chopped into large chips
  • 75 g plain chocolate, chopped into large chips
Makes about 20 big cookies.:)
Method:)
  • Preheat oven to 190c/fan 170. Grease two large baking trays and line them with baking paper.
  • Cream the butter in a large bowl with a wooden spoon or electric mixer until very soft. Add the sugar and mix together well until light and fluffy.
  • Bring a small saucepan of water to the boil on the hob. Place the 75 g plain chocolate in a heatproof bowl/dish and balance it over the simmering water. Allow to melt, stirring occasionally. Once melted remove from the heat and allow it to cool for a few minutes.
  • Mix the vanilla with the egg in a jug and gradually beat into the creamed mixture.
  • Sift in the flour, cocoa, bicarbonate and salt. Mix together with a large metal spoon. Mix in the melted dark chocolate.
  • Set aside about one third of the chocolate chips for studding the tops of the cookies. Add the remainder to the cookie dough and mix together.
  • Using a dessertspoon, scoop balls of cookie dough onto the prepared trays. Press the reserved chocolate chips gently into the tops of the cookies, but don't push them in too far - just enough so that you can still see them peeking out. ;) Space the balls of cookie dough well apart from one another so that they don't join up when they bake. These cookies are quite substantial so give them plenty of room to grow to their maximum potential. ;) 
  • Bake the cookies in the preheated oven for 10-12 minutes: they should have increased in size and should have a slightly cracked appearance. They will be fragile to the touch at first: but this is normal so don't fret. Leave them on the trays for about 4 or 5 minutes.
  • Use a metal spatula (or, as we in the Snelgrove house call it...the "fish slice" :o [no I don't know why exactly...as it is not used to slice fish under any circumstances...I don't believe in mixing crockery for savoury and sweet recipes ;) ]) to carefully transfer each cookie to a wire rack. And then of course, we have the usual dilemma: of whether to let them cool completely before consumption, so one can appreciate their delightful chewiness; and to not have to worry too much about the terrible risk of the cookie disintegrating; having been unceremoniously dunked into some form of hot liquid... or the other option of eating them when they are warm and gorgeously soft...with the chocolate chips having not yet hardened...yes, they are still gooey and molten and oozing, like miniscule exploded bombs of divine chocolate stickiness. Solution? I suggest you have both one now and later, so that the qualities of both cookie states can be adequately comprehended. After all your hard work with your wooden spoon and chopping board (all that chocolate chopping does take time, I know, I appreciate that all too well ;) ), it's too tiring and stressful a decision to have to be faced with for sure. ;) 

Saturday, 1 November 2014

Rockley Road Muffins :)

These have to be one of my signature bakes...and they are very special to me, as they remind me of the earliest stages of my baking adventure ;) I remember so well the first day I made these... my brother's eyes nearly popping out of his head as I lifted them proudly from the oven, resplendant in their gorgeous, gooey glory. He requested extra chocolatey muffins and boy, did he get them...honestly, take my word for it, these guys are HUGE. And yes, of course they are very chocolatey...this is what makes them so speical, after all...that and the marshmallows which give them a pretty molten top and a deliciously squidgy texture.
They are named after where my Granny lives in Leicester… I needed a name for them and since they are sort of like Rocky Road Muffins, I stuck with that one. And I can always rely on my granny to never turn down an offer of homemade cakes, so I thought I would dedicate this recipe to her. <3 They are AWESOME muffins but they are very big so be warned. ;)
 Makes 12 BIG muffins. 
Ingredients
·         225g plain flour
·         55g cocoa powder
·         1 tablespoon baking powder
·         1/8 teaspoon salt
·         50 g white chocolate, roughly chopped
·         75 g milk chocolate, roughly chopped
·         150g caster sugar
  • 60 g marshmallows, cut into thirds
  • 2 large eggs
  • 250ml full-fat milk
  • 90g butter, melted
Method
·         Preheat oven to 200 C / fan oven 180/Gas 6. Grease a 12 hole muffin tin (you may want to grease the top too!).
·         Sift the flour, cocoa, baking powder and salt into a large bowl. Stir in the chocolate, sugar and marshmallows.
·         Beat the eggs lightly in another large bowl. Beat in the milk and melted butter.
·         Make a well in the dry ingredients and pour in the liquid ingredients. Use a spoon to mix gently until just combined and there are no pockets of dry flour visible. Don't overmix or beat! Spoon the mixture in to the holes of the muffin tin.
·         Bake for 15-20 minutes. The muffins should be well risen and firm to the touch.
·         When you take the muffins out of the oven leave them to cool in the tin for 5 minutes, then remove them from the tin by gently running a small knife around the holes and lifting them onto a wire rack.

·         They are so yummy eaten warm with the chocolate all oozing and gooey…but they will keep in a tin for a few days too and they can be frozen and warmed in a microwave before serving. For an extra indulgent chocolate treat…warm them in the microwave with a few chocolate buttons or other small chocolates pushed into the tops. Very naughty but undeniable nice. ;)


Friday, 5 September 2014

Because one type of choc is never enough. ;) thus we have the triple choc chip cookie.

image
image
image

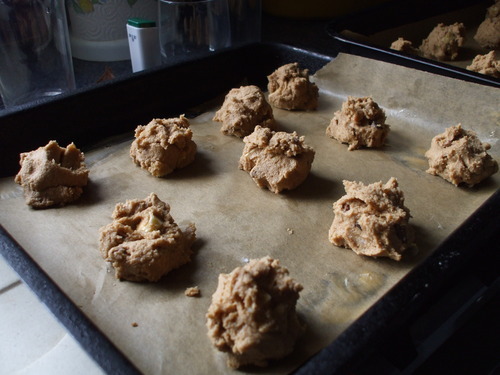
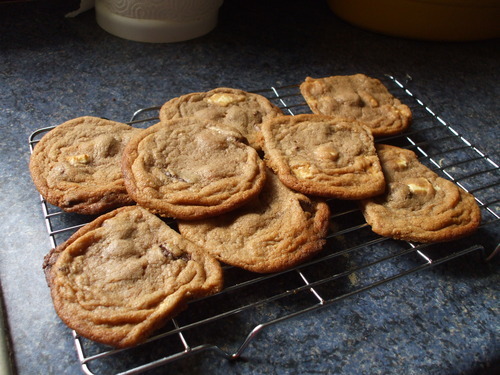
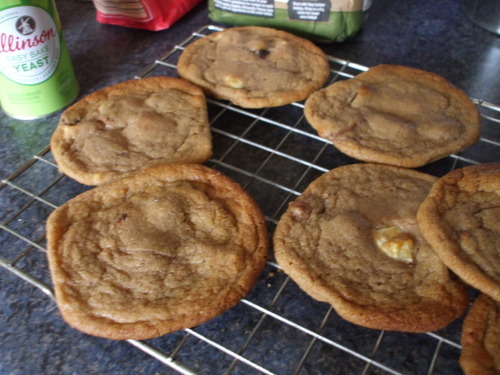
And now it is time to introduce my favourite EVER cookie, the triple choc chip. Of course being triple means that the three different types of chocolate, plain, white and milk, are all involved...all three are present in chip form, it's true to say, but 75 g of melted milk choc is incorporated into the cookie dough itself, too, which lends a gorgeous sweetness to the biccies themselves....probably the reason why I can never really resist them. I just adore cleaning the bowl of cookie dough while my little creations are baking happily away in the oven...and when they come out with the chocolate all melty and soft I can feel my heart melt in a similar sort of way. But don't forget to leave them to harden just a little before attempting to eat one! They will be very tender and fragile; so please please don't make the mistake of browning them to much. I have never baked mine any longer than 10 minutes; but I know all ovens are different.
I've given quantities for all the different chocolate types for the chips, but really you can fiddle about with them as you see fit...and don't worry, of course you can exceed the given amount if you so wish. I often find that along the way chocolate chips are lost, anyway...but all for a good cause, to keep the baker's energy levels up while she does all that stirring and beating and cleaning, you see. ;)
Ingredients
  • 120 g butter, softened
  • 120 g light brown soft sugar
  • 120 g caster sugar
  • 1 large egg
  • 1 tsp vanilla essence/extract
  • 200 g plain flour
  • 100 g milk chocolate
  • 75 g white chocolate
  • 75 g plain chocolate
Method
  • Preheat oven to 190c/fan 170 and grease two big baking trays. Line them with baking paper.
  • Beat the butter with a wooden spoon or an electric mixer until very soft. Add the sugars and beat well until fluffy and lighter in colour. (Ganache Elf tip. Perhaps this is just an Irish or Tesco thing, but I’ve noticed that in the packs of light brown soft sugar, especially if it comes in a tightly sealed bag, that there are often just a few small, hardish lumps of sugar amongst the finer grains. They’re easily broken up if you crush them between your fingers. So when you weigh out the borwn sugar, sift through it with your fingers to check for these lumps before adding it to the butter.
  • Beat the egg in a jug with the vanilla.
  • Place 75 g of the milk choc in a small bowl placed over a pan of simmering water. Allow to melt, stirring now and again till smooth. When melted remove from the heat and leave to cool slightly.
  • Chop the plain chocolate, the white chocolate and the remaining 25 g milk chocolate into large chips.
  • Pour about a third of the egg mixture into the bowl with the creamed butter and sugar. Mix together well, scraping down the sides of the bowl with a metal spoon or spatula every so often so that it’s all incorporated. Add another third and repeat the process until all the egg has been used up.
  • Sieve in the flour and gently fold in with a metal spoon, along with the melted milk chocolate. Then add in the chocolate chips.
  • Scoop up dessertspoonfuls of this heavenly cookie dough and place them, spaced well apart, on the prepared trays, shaping into balls with your hands or with the spoon. Aim for about 20 – 22 even-sized balls. (and leave some cookie dough for yourself of course. ;) )
  • Bake for 8 – 10 minutes until pale golden brown…make sure you check after 8 minutes to ensure they aren’t going too dark. They will be fragile and delicate at first…but don’t fret, they will harden on cooling ;) remove from the oven and leave on the trays for about 5 minutes, and then carefully transfer to wire racks using a metal spatula. Eat warm  (well eat at LEAST one anyway...don't forget the importance of sampling ;) ) and leave the rest to cool (may need to hide them) and store in an airtight tin when completely cold. They will keep for about 5 - 7 days.
  • image
    image

Tuesday, 26 August 2014

More brownies, more goo, more chocolate. ;)

image
image
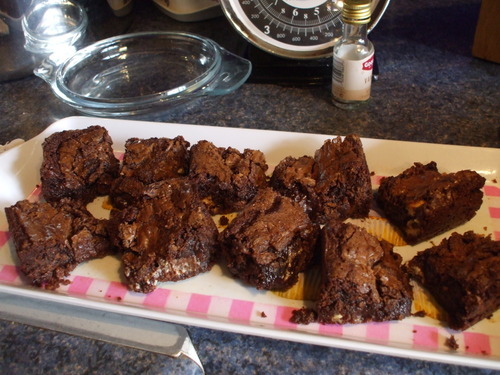
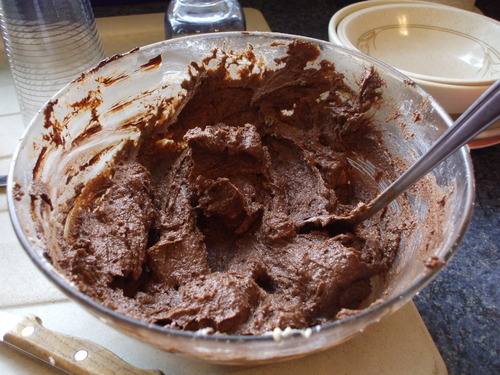
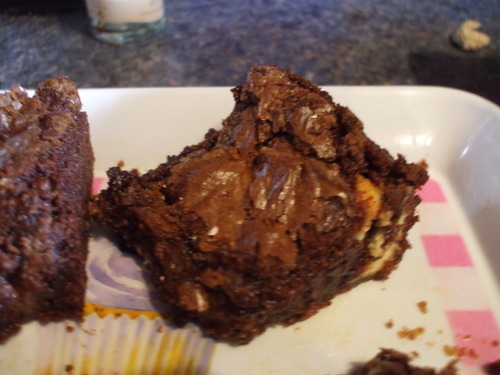
Yes, indeed. When Ganache-Elf decides to make brownies, there will inevitably be a large quantity of both chocolate and gooiness involved. Now I felt a little mean the last time I put up a post about brownies as there was no recipe featured...the reason being of course that the chocolate chunk brownies are not my own recipe! But these ones are, though, so I just HAD to share :) I like to call them fudgy double chocolate brownies, as they are exceedingly fudgy and contain both milk and white choc chips...and there is melted dark choc in the mixture, of course. Just remember the golden rules of brownie making...1.)be very, very careful not to overbake; and 2.) do let your brownies cool before cutting and removing from tin; to try and keep your brownies as neat and as even-shaped as their gooiness will permit; and 3.)do not let any of that lovely chocolate mixture go to waste under any circumstances...don't forget to clean that mixing bowl. ;)
Ingredients 
  • 150 g plain chocolate
  • 125 g butter, softened
  • 300 g caster sugar (preferably golden...but white is ok too though:) )
  • 2 large eggs, beaten
  • 1/2 tsp vanilla extract
  • 75 g plain flour
  • 2 tbsp cocoa powder
  • 75 g white chocolate, roughly chopped
  • 50 g milk chocolate, roughly chopped
Method...
  • Preheat oven to 180c/fan 160c. Grease and base line a deep 20 cm square cake tin. Put a pan of water on the hob to boil. 
  • Beat the butter in a big bowl until very soft, then tip in the sugar and continue to beat until light and fluffy. Use a wooden spoon or an electric mixer for this. :)
  • Mix the vanilla with the beaten eggs in a jug. Put the 150 g plain choc in a heatproof bowl and set it over the water on the hob once it's simmering away. Allow it to melt, stirring occasionally, until smooth. Once melted remove it from the heat and set aside to cool slightly.
  • Add a little of the egg mixture to the butter and sugar. Mix well, scraping down the sides of the bowl every so often with a spatula or a metal spoon so everything gets mixed nicely together. Add another small quantity of the beaten eggs, mix well once more, and then repeat  until all the egg has been used up. Scrape off all batter from your wooden spoon/mixer and then use a large metal spoon to fold in the melted plain choc. Sieve over the cocoa powder and the flour and fold in along with the chopped chocolate. 
  • Transfer to the prepared tin and bake for 20-25 minutes. A sugary crust should have formed on top of the brownies, but they should still be fudgy in the centre. Keep a very good eye on them towards the end of their cooking time...don't put the fudginess of your brownies at risk. :o
  • Leave to cool in the tin before marking into 16 squares...though of course, if a substantial amount of nibbling has been involved on the part of the baker...perhaps it would be best to mark out 15, 14, 12...? ;) dust with cocoa powder if you like for a pretty little finishing touch..oh, and if any little bits fall of the squares, you can either a.) attach them back to the square as they will become harder and firmer the longer you leave them, or b.) collect these little "stray pieces", squidge them into a ball, and "sample" your brownies for yourself. And hey don't feel guilty!! It's good practice for a baker to check that their produce is up to standards before serving to anyone else, right? ;) 
image