At first glance it might seem that I am just a happy, normal girl who loves to bake and walk her dog. However, I have suffered with an eating disorder since I was 13. It was only in May 2014 when I realised that this Voice in my head was slowly but surely trying to kill me. And so began the long, hard, and painful journey which is recovery...

I want My Cocoa Stained Apron to be a special place...a place for reflection, memories, shared stories...and of course a little bit of cocoa-staining ;) Recovery might be the hardest thing you ever choose to do in this life. But it is also the bravest and best decision you will ever make.:)

Showing posts with label biscuit. Show all posts

Monday, 27 April 2015

Jammy Dodgers!! :)

A childhood favourite of mine!!! I LOVE jammy dodgers and they always remind me of picnics when Iwas little <3 I dedicate this recipe to a special friend of mine who also shares my love for these delightful little biccies...she showed me a pic of her own and OMG they were exquisite!! Needless to say, mine didn't look quite so professional ;) but there was no compromise on taste though..they were as yummy as I had intended ;)


Ingredients

  • 125 g butter, diced
  • 160 g plain flour
  • Good pinch of salt
  • 100g caster sugar
  • 1 tsp vanilla extract
  • 1large egg yolk
  • About half a pot of any jam of your choice – raspberry is the traditional filling and is quite possibly my ultimate favourite ;) but you could try using strawberry, apricot, blackcurrant, blackberry…whichever takes your fancy ;) and for extra prettiness why not use a number of different coloured jams? One point of note, though: smoother jams so generally work better than chunky ones in these biccies!! ;)

Method 
  • Sieve the flour and salt into a big bbowl and stir in the sugar.
  • Add the diced butter and rub lightly in, using your fingertips, until the mixture ressembbles fine breadcrumbs.
  • Make a little well in the centre of the mixture, and then add the egg yolk, pouring the teaspoon of vanilla extract on tip of the egg yolk.
  • Gently Draw the flour around the edges of your "well" into the centre where the yolk is. Mix very gently with your hands, until a soft, moist dough is formed. 
  • Wrap the ball of dough tightly in clingfilm and then pop it in the fridge for a minimum of half and hour.
  • Preheat the oven to 170c/fan 150c. Line three trays (or two large) with bbaking paper.
  • Take the dough out the fridge and remove the clingfilm. Cut into two equal sized pieces. Roll out one of the halves, using a rolling pin, between two pieces greaseproof paper, which should both be dusted very lightly with a sprinkling of flour. You should roll it into a neat little oval or rectangle, and the dough should be a thickness of about 5mm.
  • Use a 7 cm round cutter, lightly dusted with flour, to stamp out little circles of dough. Gather up the scraps of leftover dough and then roll them out again with the other unrolled half ball of dough. Cut out more circles using the same cutter. In total, I got about 20 little circles. 
  • Place 10 of the circles of dough on the baking trays.
  • Now you need to cut smaller holes in the centre of the other 10 circles!! Of course if you have a very small cutter (about 2cm  or there abouts in diameter), this is definitely the best thing sto use. I on the other hand am not so fortunate to own such a marvellous baking utensil;) ...so what did I use instead..? The plastic top of a 1 l milk cardboard carton , dipped in flour!! ;)
  • Place the "holy" :p cirles on the baking trays too, allowing room between all circles to allow for spreading. ake for 10-15 minutes. When cooked, they should be a very pale golden. The shortbready biscuits will still be slightly soft at first - not too hard or dark in colour - but they will harden as they cool. 
  • After about 15 minutes transfer the biccies until a wire rack to cool.
  • When the biscuits are cool, (or this can still be done when they are slightly warm, just not too near their removal from the oven as at that point the biscuits will be still quite delicate ) spread a generous dessert spoonful of jam over the top of each on of the shortbread rounds(the ones WITHOUT the little holes at their centre). 
  • Sandwich each one of the jam-covered rounds with the remaining shortbread circles (the ones with the little hole at their centre). Sprinkle with a little icing sugar if you like. :) xxx


Monday, 30 March 2015

Chocolate oat cookies!! :)

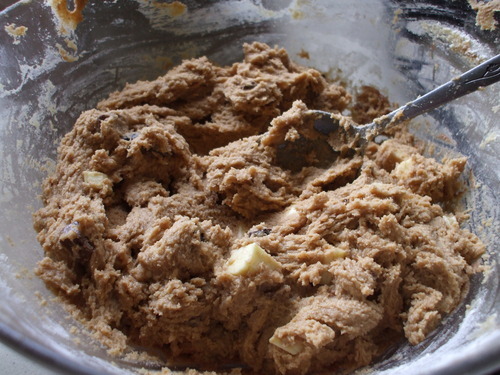
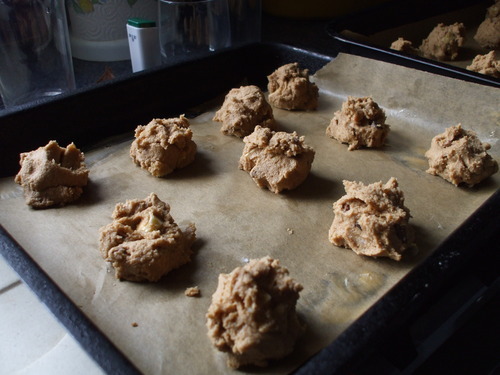
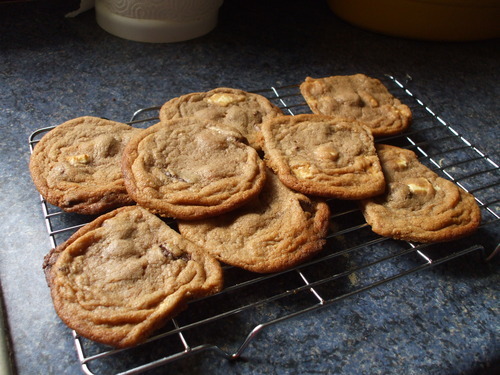
As you all know I am somewhat partial to the odd oaty cookie with my hot choc...but of course I am equally a fan of the classic chocolate chip cookie with its thick studs of plain, milk or white chocolate, and the chewy, scrumptiously sweet cookie dough. And so, on this wet, windy March day here in Ireland, I had plenty of time to bbe as experimental with my baking as I liked, and so my mission hereby was, of course, to see if i could unite both oaty and chocolate chip cookie in one delightful little biccie. The resulting cookies still had the pleasing crunchiness of my favourite oaty treats, but were made ever the more irresistible by the addition of an assortment of chocolate chips., and the flavouring of the cookie dough itself with just a wee bit of melted dark choc... ;)


And need I mention these little bites accompany tea/coffee/hot choc ;) all too well??? <3 xxxx

Ingredients (for about 20 yummy cookies! :) <3


  • 75 g plain chocolate
  • 1 large egg, beaten
  • 125 g butter, softened
  • 125 g light muscovado sugar
  • 100 g porridge oats
  • 1 tsp vanilla extract
  • 125 g plain flour
  • 1/2 tsp baking powder
  • 1 tbsp cocoa powder
  • 250 g plain chocolate, chopped into small chunks or chips.


Method :)
  • Preheat the oven to 180c/160c fan. Line two or three baking trays with baking paper. 
  • Soften the butter in a bowl with an electric mixer or a wooden spoon until very soft. Tip in the sugar and beat until light and fluffy.
  • In a jug, beat the egg lightly with a fork. Add  the vanilla to the egg and mix well.
  • Gradually, bit by little bit, add the beaten egg into the creamed mixture, scraping down the sides of the bowl every now and again, until it is all nicely incorporated.
  • Place the 75 g plain chocolate in a heatproof bowl set over a pan of simmering water. Allow to melt, stirring occasionally. Remove from the heat once melted and let it cool for a few minutes. 
  • Sift together the flour, baking powder and cocoa. Gently fold this into the creamed mixture along with the oats and melted chocolate. Use a large metal spoon to do this, twirling it up, across and down through the cookie dough in a figure-or-eight pattern. Finally, mix in the chocolate chunks or chips.
  • Now you need to transfer balls of the cookie dough to the prepared trays. Scoop up a dessertspoonful of cookie dough and place on a tray, shaping it into a rough ball shape using your fingers or the spoon. Repeat with the rest of the cookie dough until it is all used up. Make sure the balls are spaced well apart to allow room for spreading.
  • Bake the cookies for 12-15 minutes.  They should still be slightly soft, not hard. 
  • Leave them on the trays for about 5 minutes once you've removed them from the oven, and then carefully transfer them to a wire rack with a metal spatula. And of course, any remaining cookies (if any!!! ;) can be stored in an airtight tin for up to a week. :) xxxx

Thursday, 25 December 2014

My Christmas Eve surprise :) and a little wish for all my special readers :)

Yesterday morning as I was sitting in the lounge, gathering up my thoughts to make my next blog post, the doorbell rang. Glancing up, I saw the kindly, slightly weather-worn face of the postman peering through the porch window, a bundle of paper packages and stamped envelopes in his gloved hands.

I hurried to the door and quickly flung it open, curious as to know whether any of the carefully handwritten addresses were headed by my own name; and were accordingly meant for me to open. I didn't expect that any of them would be, of course...but to my surprise and delight not one, but two of these packages had Emily Snelgrove written on them in two very different scripts.

Leaving the other mail on the kitchen table, I carried these two envelopes into my room as tentatively and as carefully as if they were vases filled with diamonds. And there in the quiet, still warmth of my little room I gently tore through the paper of the first package. The very same package which had been sealed, with so much love and care and thoughtfullness, by a very special friend of mine all the wya across the North Sea. <3


Inside as you can see, were lots of traditional German foods eaten at Christmas time, from gingery lebkuchen, fragrantly-spiced cinnamon stars, little chocolate pralines...and even two small bars of hot chocolate powder. <3

I was like a little girl then, at that one wonderful precious little moment on Christmas Eve. I had given a soft squeal of delight when I had opened this exquisite little box to reveal the delightful contents that lay within....which had travelled, across all those hundreds of hundreds of miles, from Augsburg in Germany to the very heart of the Irish Midlands, to now nestle safely in my hands.

And if this wasn't so incredibly generous and kind-hearted enough...accompanying this beautiful little Christmas gift was a hand-written letter, just for me.

The thoughts and words of this little letter served to both touch my heart and bring happy tears to my eyes. One sentence in particular struck me, and the little illustration drawn alongside it. My reader...who is so, so much more to me than that; she is an inspiration, a heroine to me - and, above all, a true and very special friend - drew her beautiful composition to a close with the following group of words before she signed off.

Sometimes we just need to let things go.

Beside this one little sentence, a little balloon on a string was being wafted gently away. I didn't have to read the two letters on the balloon itself to know and understand what it exactly symbolised.

Letting go...something which the past few years have taught me is a very hard thing to do, in many different situations.

It's hard to let your loved ones go when you hold them in your arms at the bus shuttle, knowing that many a week and a month might pass before you are able to see them again.

It's hard to let go when you are forced to make that excruciating, painful decision at the vets when they tell you your faithful furry friend is dying and the kindest thing you could do for them right now would be to let her go. 

And it's hard, to let go of that voice which has controlled you, held you, manipulated you for so, so long....so long, it has taken over you, become part of you, has become part and whole of your identity, so that your whole life is bent to revolve around it. You hate it, you detest it with all your heart and soul - but at the same time, letting go of that voice - pushing away its icy, cold hand and struggling upright by yourself - seems so, so hard it appears to be almost impossible....

But I know that WE can do it. :)

Now it's evening time and I'm sitting in the lounge by the fire, the fairy lights glistening in the smoky warmth, the smell of the pot pourris on the mantlepiece in my nostrils. The sound of laughter and happiness fill the air. Such a simple, but perfect little moment. My presents lie in a pile at my feet, Frozen siting atop of them, awaiting to be opened for my little movie session after dinner.

Thanks to the beautiful letter sent to me from my dear friend and reader, I suddenly do feel like Elsa in my favourite ever Disney movie. I am going to let it go. I can be strong and unique and beautiful - and I want YOU to realise this too. So please, please remember that, and that in this one short, brief little span of time known as life...you deserve, for every single day of that life, to be happy.

I just want to take this opportunity to thank all of you, my readers. You have been there for me ever since I embarked upon this long and challenging journey, and for that I will never be able to thank you enough. <3

For every little comment, message, words of advice or encouragement...you will never be able to comprehend just how much this all means to me. And some of you have gone even further than that...I think you know who you are, but now, if I could, I would just love to reach out and hug you all, and thank you personally from the heart. Thank you, thank you, thank you -  you are all AMAZING and I hope you all have a truly magical Christmas full of happiness and joy, and I would like to wish you all best for 2015 and beyond. <3

And before I sign off with my hot choc with one of my little German biccies for dunking alongside ( a little Spitzbuaba in the shape of a christmas tree :) ), I just want to send a special thank you out to the sender of my little Christmas Eve surprise...the box and letter which I will cherish forever. (the edile goodies, I'm afraid I can't guarantee they will be still around by the end of this week...;) but that is what they are intended for of course ;) ). I am so, so touched by your kindness and generosity Ange, and words will never be able to properly express how special our friendship is to me. <3 I would also like to mention that Ange too is the creator of her very own unique and truly amazing blog, How Nutella Saved My Life (Click HERE to see it :) ) . She writes with both enthusiasm and a positivity with is infectious, and she has made me laugh and smile when I have felt like crying and everything seems hopeless. She is an incredible inspiration and if you haven't read her blog yet, please do take a look. :) She will have you all reaching for the Nutella jar in no time.... ;)

Anyway, I MUST go now, or's my hot choc will be going cold. :o Happy Christmas everyone - Ganache-Elf sends you all her love and best wishes, at Christmas and always. <3


ps. I have been baking LOADS and I am so sorry I haven't put my recipes up yet. They will be up in the next few days, I promise. ;) xxxxxxxxxxxxxxxxxxxxxxxxxxxxxxxxxxxxxxxxxxxxxxxxxxxx


Saturday, 15 November 2014

An AUTHENTIC NEO cake (even Benny and Maisy want a wee slice... ;) )

Do you recall my much, much earlier post with the rather grand title of NEO cake, which I wrote a few months back during the summer? Now I'm not saying that I was unhappy with the cake, or anything - it was everything a good chocolate cake should be; so no problems on that score. Though it has to be said, as I published that particular post, I felt a teeny-tiny sense of guilt...why? Well, I suppose I thought the post title was a little misleading. Due to the fact that, despite being adorned with Neos on its top and sides, the actual sponge of the cake - light, chocolatey and utterly scrumptious as it was - was sadly devoid of all trace of these beautiful little biccies.
 BUT today yet another development took place in the never-ending saga of Ganache-Elf's bakery. That being, of course, the infiltration of approximately a hundred grams of Neo into a divine vanilla and chocolate marbled sponge. So yes today, I am feeling rather smug indeed. I'm just kicking myself for not having made such an attempt before now...but trying out your own recipe for the first time ever is always - for me anyway - both an exciting and extremely nerve-wracking experience. Hwat if the Neos all sank to the bottom of the sponge? Or if they all stuck to the sides and bottom of the cake tins? Or if they went hard and brittle or squidgy and soggy? The very thought of permitting my beloved Neos (for yes, as I have specified before, Oreos and any biscuit in the guise of an Oreo (J-Os, Neos, etc.) are most definitely on my top 10 list of biscuits and anything of dunking potentiality. ) to such a terrible fate makes me shudder with repulsion. So I suppose yes, I did have some sort of, erm, excuse for not endeavouring to make an AUTHENTIC NEO CAKE sooner. Anyhow, today, my stash of Neos were destinied for a somewhat more spectacular fate than just being dunked in hot choc, as I believe the pics below fully testify. ;) 

No, your eyes aren't deceiving you - those little black specks in that sponge are indeed chopped Neos. ;) I chopped them into little pieces the size of my little fingernail. Just be careful when you do this of course, for as with all culinary tasks that require knives; but also because the Neos seem to have a whole mind of their own when they are being broken up in this way. Or maybe it was just the way I was cutting them (rather tenderly, as I almost felt bad breaking up them up..) but with each chop the broken up chunk of Neo often would go halfway across my chopping board. A couple fell upon the floor, much to my disconcertation. (but not to my two little furry friends'...who saved me the trouble of picking them up, needless to say. ;)

(well they were also awaiting their dinner too as I just happened to be making my Neo Cake around doggy feeding time so hence the cow eyes and the pitiful countenances...but they weren't going to turn their noses up to a wee bit of Neo of course. ;) ) 
And so, I had finally succeeded into getting my all-time favourite biscuits actually into my baking in the very literal sense of the word. But of course, to be completely Neo-fied, another 100 g of Neos were applied to the exterior of the cake too. And so, if your Oreo (or equivelent of. ;) ) addiction is as serious as mine is, I think you are going to like this cake. So please feel free to try out the recipe for yourself as outlined below. ;) 

To make an authentic, no-nonsense NEO Cake (or even perhaps, you are using actual Oreos, so that should be OREO Cake? ;) you will need...

  • 225 g softened butter/margarine
  • 225 g caster sugar
  • 225 g self-raising flour
  • 2 tbsp cocoa powder
  • 4 eggs
  • 2 tsp baking powder
  • 4 tsp full-fat milk
  • 1 tsp vanilla extract/essence
  • 100 g Oreo/Neo/J-O biscuits (I used original, but of course, there is absolutely nothing to stop you from using Double Stuff, Double Choc, Vanilla, Chocolate Creme...etc/ ;) (they are all the Oreo flavours I have thus discovered so far...are there any others in existence? If so please do let me know...partially for the spreading of baking ideas amongst my readers of course...but also, of course, because Ganache-Elf would dearly love to try them out for herself. ;)

  • 200 g plain chocolate, broken into chunks.
  • 200 ml single/double cream
  • 100 g Oreos/Neos/J-Os etc. :) (This amount is a guide only...don't be shy, add more if you think more is required. :)
Method. :)

  1. First, make the sponge. Preheat the oven to 180 c/fan oven 160 c. Grease a 20 cm sandwich cake tin and line the bottom with baking paper.
  2. Chop 100 g of the Oreo biscuits carefully into pieces about the size of your fingernail.
  3. Put the softened butter, the sugar, baking powder, flour and eggs into a bowl. Beat well with an electric mixer until smooth and well blended. Add a few drops of water, if necessary, to create a soft dropping consistency.
  4. Transfer half of the cake batter into a separate big bowl. Sieve in 2 tbsp cocoa powder and stir in the milk. Fold gently in with a metal spoon.
  5. Add the vanilla to the plain cake batter and fold in.
  6. Distribute the chopped biscuits amongst the two different cake mixtures. I put slightly more Neo in the vanilla batter, simply because I think the black pieces against the yellowy sponge looks ever so pretty. :) )
  7. Fold the biscuit pieces in with a metal spoon. 
  8. Transfer large spoonfuls of each mixture into the prepared tins. Dot the spoonfuls alternatively around each tin until each mixture is used up completely. Then use a skewer to swirl around the surface of the uncooked sponge to create a pretty marbled effect.
  9. Bake for 20 – 25 minutes in the preheated oven until the sponge is well-risen and springs back beneath the fingertip when pressed gently on the top. If an indent is left when you do this, bake for a few minutes more before testing again.
  10. Leave in the tins for a few minutes before turning out onto a wire rack, peeling off the paper and leaving to cool.

  • Next, make the dark choc ganache by melting the 200g plain chocolate with 200 ml single cream, on a very low heat in a small saucepan. Stir until smooth and then refrigerate for about 1 ½ - 2 hours, checking after 1 ½ hours…you don’t want it very hard, just a nice spreadable consistency.
  • when the sponges are completely cold, place one on a plate spread a thick layer of ganache on the top. Place the other sponge on top of it and the cover its top with another layer of ganache.
  • Spread the remaining ganache around the sides of the sponges, so that the whole cake is coated in a gorgeous thick layer of chocolate ganache. ;)
  • Use the remaining 100 g (or more..) of Oreos etc. in order to ensure you have absolutely no scruples whatsoever in claiming your cake as being, well and truly, a real Oreo Cake in every sense of the word . As you can see from the pic, I scattered a load of crushed Neos on the top of my cake and then applied whole ones to the sides as well (I split them in half so that you end up with two flat black discs which more easily stick to the sides. ) And then...? get a spoon, a knife and a big, big bowl...and try to decide what is going to be the est way to eat your well-deserved slice of Oreo/Neo etc cake. Which part to tackle first...the soft sponge, to silky ganache layer, or perhaps the actualy crowning glory of Neos itself? Or maybe even you are like me and like to remove your whole Neo piece from your piece and save it till the very last. ;) Anyway, whichever way you choose to have your cake and eat it,enjoy. I feel safe enough in saying that you are going to.  ;) xxxx

Tuesday, 11 November 2014

Healthy sunflower oat cookies. :)

ATTENTION ATTENTION ATTENTION. Major changes have occurred in the bakery of ganache-Elf this week. The reason for this being...?
My Daddy (being one of the main consumers of my baked goodies. ;) ) has just got his blood test results from a month ago. And unfrotunately, his cholesterol was a little too high for our liking...which means, yes, it brings a hard lump to my throat to say it...sniff, sniff...there are to be no more cakes. No more buns or cupcakes. for Daddy, that is. All together: awwwwww.
 BUT. All is not lost!!!
 I CAN still make Daddy nie things for his lunchbox etc. They just have to be...well, healthy. And kind to the heart <3
 So yes, this is my new mission (amongst other things, of course. ;) ) I am going to put all my heart into making heart-healthy things for Daddy dearest.

And so I started off with these delightful little biccies yesterday. ;) I've called them sunflower oat cookies though please don't be disappointed that they don't, appearance wise, look anything like those gorgeous golden blooms of high summer. ut they are golden in colour, though!! Haha. No, the reason why I christened them thus is that I made them with Tesco Healthy Living Sunflower Spread instead of butter.
 And they have raisins in them of course, and oats. Two things which I feel safe enough in classifying as healthy. But the best thing abbout these is that even though they are that wee bit better for you, they are, trust me, still undeniably scrumptious. I had one with my hot choc yesterday and I couldn't resist going back for seconds. The recipe yields roughly about 25 cookies, you see, so I wasn't too worried about there not being enough left for Daddy's coffee breaks during the week.:)


Ingredients:)

  • 140 g sunflower spread (I use Tesco, but I am sure that other shops do their own version, too, and then of course there is Flora spread too, an excellent equivelent. Just make sure it says "suitable for baking" on the tub as some of these healthy-living spreads have a high percentage of water, which will yield disappointing results.)
  • 50 g demerara sugar (the bigger granules of this brown sugar give a lovely crunch to the cookies. :)
  • 100 g light brown soft sugar.
  • 75 g caster sugar 
  • 1 tsp vanilla essence/extract
  • 1 large egg
  • 2 tbsp water
  • 100 g self-raising flour
  • 75 g raisins/sultanas
  • 250 g rolled oats
Method :)
  • Preheat the oven to 180c/160c fan. Line two big baking trays with baking paper. 
  • Soften the sunflower spread in a bowl with an electric mixer or a wooden spoon until very soft. Tip in the sugars and beat until light and fluffy.
  • In a jug, beat the egg lightly with a fork. Add the water and the vanilla to the egg and mix well.
  • Gradually, bit by little bit, add the beaten egg into the creamed mixture, scraping down the sides of the bowl every now and again, until it is all nicely incorporated.
  • Sift in the flour and the salt. Add the oats and the sultanas/raisins, and then mix all of it together with a large metal spoon until you have a sticky, oaty cookie dough. :)
  • Now you need to transfer balls of the cookie dough to the prepared trays. Scoop up a dessertspoonful of cookie dough and then roll it into a ball in the palm of your hand. Place them on the trays, spacing them well apart to allow for spreading. 
  • Bake the cookies for 12-15 minutes. They should be pale golden and still slightly soft in the centre...don't let them get too brown. ;) burnt oats don't taste too good. :( And the gorgeous chewiness of the little biccies augments their charm ever further. :)
  • Leave them on the trays for about 5 minutes once you've removed them from the oven, and then carefully transfer them to a wire rack with a metal spatula.
  • Leave them to cool completely or eat warm..just be careful if you go for the latter option as they will be a little fragile at first. ;) Now who said healthy biscuits taste like cardboard which has been baked? (to quote my brother. ;) ) Just give these a try and see for yourself. ;)


Friday, 7 November 2014

Ice cream....cake!???


How can you bake ice cream in a cake!? is the question I am always asked when I blah on about how wonderful this concoction of mine is to any of my friends. Heehee...well. The name IS a little deceptive I freely admit. As the only thing at all cakeish about this cake is the fact it is, well, a cake shape. Unfortunately my friends, even Ganache-Elf hasn't worked out how to bake icecream in a acake just yet. But before you turn away from my blog in disgust, just have a look at this recipe. And yes, please, do give it a go. You won't regret it - I PROMISE you. Yes, I know it's not as cool as actually being able to boast that you actually DID bake ice cream into a cake. But I can assure you now the taste of this will make you forget all that. This is going to be one of the most amazing and heavenly desserts you will ever, ever taste...


Now the sauce IS optional, of course. But is there really, if you think about it, anything more heavenly then pouring a warm, golden sauce over ice cream and seeing all start to seductively melt and merge together...? Need I say anymore... ;)

Ingredients.... (but remember the golden rule...you can add MORE to this ;) :) But these are the ESSENTIAL ingredients in my view so try to remember to add these to your shopping basket. ;)


  • 1 litre tub of your favourite ice cream flavour. (I usually use either vanilla, honeycomb, raspberry ripple, or Neapolitan...but it's pretty much up to you...everyone has their own favourite ;)
  • 150 g or more (no less ;) ) bourbon cream biscuits. (it's about half a pack? :o )
  • 150 g milk chocolate, chopped into chunks/chips. 
  • 2 regular-sized Crunchie bars.
Hmmmmmm...and now what else can potentially be added??
  • Well, usually I like to throw in some Maltesers (about half a big pouch, you know the ones you are supposed to "share"? (yeah, right. ) or maybe some Minstrels/Rolos/Munchies/Chocolate Buttons/Cadbury Nibbles etc etc etc. Or a mix...it all depends on what you have in your cupboard/secret stash ;)
  • And also I sometimes vary the type of chocolate I put in for the chips...sometimes I like to have white chocolate and milk chocolate chips...so half a big bar of Milky bar gets thrown in there too with the milk choc ;)
  • And smashed up flakes/ripples/twirls occasionally find themselves twirled about in the mix as well. ;) 
  • Also, I sometimes like to add more biccies too...along with the bourbons, I'v added half a pack of chocolate digestives in the past...and once, yes, double stuff oreos. Now that really IS pure indulgence. But boy does it taste good. ;)
You will also need a 20 cm cake tin - it's best to use a springclip one for this, or one with a removable bottom, for ease of releasing your ice cream cake from its "mould". ;)  

And for the butterscotch sauce? Well all you need for that is...
  • 160 ml single cream
  • 160 g light brown soft sugar
  • 50 g butter, diced
  • 2 tsp vanilla extract/essence
And now...let's make some magic happen. ;) No excuses now: I don't have the time, I'm no good at baking etc - nope, none of those are applicable in this context I'm afraid my friends. For yes you DO have the time (this takes so, so quick to make...to be honest it's the actual waiting for it to harden up in the freezer which is the the most time-consuming step (and the most painfully excruciating, of course... ;) ) And even if you say you aren't good at baking (which I am pretty certain is not true...I'm of the opinion that no one can be "bad" at baking...it's just all a matter of practice as is the case with so many other things too ;) )...well believe me, there is absolutely nothing difficult at all in the process outlined below. All that's involved, essentially, is a bit of smashing, chopping, mixing...and, err, waiting. Poo! (But that stage can be skipped of course. You then just wouldn't have, well, that tidy cake shape. But if you are like me and are of the opinion that melted, runny ice cream is one of God's gifts to mankind? Well...you get the idea. 

Anyway, let us proceed on to the recipe..and instant fame and reverence for you, the icecreamcakemaker, amongst all those incredibly fortunate individuals that you are going to share this gorgeous creation with. If that's what you intend on doing, of course... (another advantage of ice cream cake making...there's no fear that it's going to go mouldy or stale or whatever, hence removing the pressure to use it up as soon as possible, and distribute it amongst friends, family etc. So yes, you could make it just for yourself, though be prepared to put up with extremely guilty feelings for keeping such a divine dessert secret from your nearest and dearest... ;) 

Method :)
  • Line your cake tin well with cling film.
  • Take the ice cream out of the freezer to soften slightly (but don't let it melt completely!!) while you set about preparing the other ingredients.
  • Crush the biscuits in freezer bags with a rolling pin or a big wooden spoon. 
  • Crush the Crunchie bars: you can either do this in freezer bags with the biscuits or simply crush them still in their wrappers ( just be very careful when you open them...wouldn't it be a terrible thing to lose any of that lovely rubble. :o )
  • tip the softening ice cream into a big mixing bowl. (don't just throw away that tub though: they are ever so handy, I find, in storing cakes/biccies/nibbles etc. ;) 
  • Tip in all the other ingredients for the cake: the chocolate, the crushed biccies, the Crunchies, Maltesers etc. Then mix it all together with a big spoon. 
  • Tip the mixture into the tin and smooth the top. (Note to those who do not want to wait/who have a heart like Ganache-Elf's which literally...well, melts when it comes to melted ice cream. : you don't need to proceed any further at this point...you can go and get your spoon/eating utensil. But for those of you who do want an actual ice cream CAKE, please read on.
  • Put the tin into the freezer to harden slightly. In my freezer, an hour usually would suffice. It all depends on the coldness of your freezer and how hard/perfectly-shaped you would like the finished outcome to be ;)
  • When you think the cake is nearly ready/you think you have waited well long enough, you can now, if you feel so inclined, make the butterscotch sauce. (and again, I would just like to stress that all those excuses as I mentioned above won't work here either...this is sooo quick and easy to make too so please don't be shy. ;)
  • Measure all the ingredients for the sauce into a small saucepan and place on a very low heat until the butter has melted. Turn the heat up to low-medium, stirring occasionally, until a few bubbles appear on the surface. 
  • Simmer very gently for about 5 minutes, stirring occasionally. Be very careful it doesn't spit as you as toffee leaves quite a nasty burn. :(
  • Take off the heat and leave it for about 5 mins to cool slightly. And now...now you are almost ready...
  • Take the icecreamcake out of the freezer and tip it gently out onto a large plate. carefully take off the clingfilm. And there, ta-da....you've done it. Be proud. ;)
  • You might need to leave it to soften for about 5 minutes if the ice cream has become very hard as cutting rock-hard ice cream is rather tricky as I am sure you know. Anyway, once it's soft enough, cut into triangles with a big knife and serve with generous spoonfuls of beautiful butterscotch drizzled/slathered/poured on top. Ahhhhh...bliss. ;)
Note on amounts: It's hard to say exactly how much this will serve...as often I find people do tend do go back for seconds...so do take that into account ;) but roughly, I would say aim for about 6...(if you are planning on sharing that is. ;) xxxx


Monday, 3 November 2014

Chocolate-studded cookies.:)


I know these might look suspiciously similar to my Crazily Chocolatey double choc chip cookies (if you haven't baked them yet then please please pleaseeee consider doing so...check them out HERE if you feel so inclined ;) ), but no, I can assure you that these are a totally different cookie altogther. For starters, the cookie dough itself is entirely different. It is much sweeter as yes, there is a very cheeky amount of gorgeous light brown soft sugar in this recipe. (I adore this type of sugar...it just lends such a delicate caramelly flavour to the completed product. Almost always before I mix it with the other ingredients when I bake with it, I sift through the sugar grains with my fingers, primarily to break up any hard little clumps you occasionally get in it when it's been densely packed...and also to give myself some sort of excuse to inhale that fabulous sugary aroma. :) They aren't quite as dark as the other cookies, either, as there is less melted chocolate in the cookie dough. But rest assured, all ye chocaholics (yes I am including myself in this category, rest assured...) for this is undoubtedly very much made up for in the very, very, very generous amount of chocolate chips - some of which are reserved for studding in the tops of the cookies before baking. So what we end up with is a scrumptiously sweet, chewy, chocolatey cookie with lots of delightful chunks of heavenly milk and dark chocolate within, and on top of, each one.
 Like my Crazily Chocolatey Cookies, these biccies will have a slightly crack, rugged appearance, which all adds to their charm. And as always, feel free to increase the amount of chocolate chips if you so desire. ;)

Ingredients

  • 255 g light brown soft sugar
  • 125 g butter, softened
  • 1 large egg, beaten
  • 1/2 tsp vanilla essence/extract
  • 225 g plain flour
  • 30 g cocoa powder
  • 75 g plain chocolate, broken into pieces
  • 1 tsp bicarbonate of soda
  • 1/2 tsp salt
  • 100 g milk chocolate, chopped into large chips
  • 75 g plain chocolate, chopped into large chips
Makes about 20 big cookies.:)
Method:)
  • Preheat oven to 190c/fan 170. Grease two large baking trays and line them with baking paper.
  • Cream the butter in a large bowl with a wooden spoon or electric mixer until very soft. Add the sugar and mix together well until light and fluffy.
  • Bring a small saucepan of water to the boil on the hob. Place the 75 g plain chocolate in a heatproof bowl/dish and balance it over the simmering water. Allow to melt, stirring occasionally. Once melted remove from the heat and allow it to cool for a few minutes.
  • Mix the vanilla with the egg in a jug and gradually beat into the creamed mixture.
  • Sift in the flour, cocoa, bicarbonate and salt. Mix together with a large metal spoon. Mix in the melted dark chocolate.
  • Set aside about one third of the chocolate chips for studding the tops of the cookies. Add the remainder to the cookie dough and mix together.
  • Using a dessertspoon, scoop balls of cookie dough onto the prepared trays. Press the reserved chocolate chips gently into the tops of the cookies, but don't push them in too far - just enough so that you can still see them peeking out. ;) Space the balls of cookie dough well apart from one another so that they don't join up when they bake. These cookies are quite substantial so give them plenty of room to grow to their maximum potential. ;) 
  • Bake the cookies in the preheated oven for 10-12 minutes: they should have increased in size and should have a slightly cracked appearance. They will be fragile to the touch at first: but this is normal so don't fret. Leave them on the trays for about 4 or 5 minutes.
  • Use a metal spatula (or, as we in the Snelgrove house call it...the "fish slice" :o [no I don't know why exactly...as it is not used to slice fish under any circumstances...I don't believe in mixing crockery for savoury and sweet recipes ;) ]) to carefully transfer each cookie to a wire rack. And then of course, we have the usual dilemma: of whether to let them cool completely before consumption, so one can appreciate their delightful chewiness; and to not have to worry too much about the terrible risk of the cookie disintegrating; having been unceremoniously dunked into some form of hot liquid... or the other option of eating them when they are warm and gorgeously soft...with the chocolate chips having not yet hardened...yes, they are still gooey and molten and oozing, like miniscule exploded bombs of divine chocolate stickiness. Solution? I suggest you have both one now and later, so that the qualities of both cookie states can be adequately comprehended. After all your hard work with your wooden spoon and chopping board (all that chocolate chopping does take time, I know, I appreciate that all too well ;) ), it's too tiring and stressful a decision to have to be faced with for sure. ;) 

Friday, 5 September 2014

Because one type of choc is never enough. ;) thus we have the triple choc chip cookie.

image
image
image

And now it is time to introduce my favourite EVER cookie, the triple choc chip. Of course being triple means that the three different types of chocolate, plain, white and milk, are all involved...all three are present in chip form, it's true to say, but 75 g of melted milk choc is incorporated into the cookie dough itself, too, which lends a gorgeous sweetness to the biccies themselves....probably the reason why I can never really resist them. I just adore cleaning the bowl of cookie dough while my little creations are baking happily away in the oven...and when they come out with the chocolate all melty and soft I can feel my heart melt in a similar sort of way. But don't forget to leave them to harden just a little before attempting to eat one! They will be very tender and fragile; so please please don't make the mistake of browning them to much. I have never baked mine any longer than 10 minutes; but I know all ovens are different.
I've given quantities for all the different chocolate types for the chips, but really you can fiddle about with them as you see fit...and don't worry, of course you can exceed the given amount if you so wish. I often find that along the way chocolate chips are lost, anyway...but all for a good cause, to keep the baker's energy levels up while she does all that stirring and beating and cleaning, you see. ;)
Ingredients
  • 120 g butter, softened
  • 120 g light brown soft sugar
  • 120 g caster sugar
  • 1 large egg
  • 1 tsp vanilla essence/extract
  • 200 g plain flour
  • 100 g milk chocolate
  • 75 g white chocolate
  • 75 g plain chocolate
Method
  • Preheat oven to 190c/fan 170 and grease two big baking trays. Line them with baking paper.
  • Beat the butter with a wooden spoon or an electric mixer until very soft. Add the sugars and beat well until fluffy and lighter in colour. (Ganache Elf tip. Perhaps this is just an Irish or Tesco thing, but I’ve noticed that in the packs of light brown soft sugar, especially if it comes in a tightly sealed bag, that there are often just a few small, hardish lumps of sugar amongst the finer grains. They’re easily broken up if you crush them between your fingers. So when you weigh out the borwn sugar, sift through it with your fingers to check for these lumps before adding it to the butter.
  • Beat the egg in a jug with the vanilla.
  • Place 75 g of the milk choc in a small bowl placed over a pan of simmering water. Allow to melt, stirring now and again till smooth. When melted remove from the heat and leave to cool slightly.
  • Chop the plain chocolate, the white chocolate and the remaining 25 g milk chocolate into large chips.
  • Pour about a third of the egg mixture into the bowl with the creamed butter and sugar. Mix together well, scraping down the sides of the bowl with a metal spoon or spatula every so often so that it’s all incorporated. Add another third and repeat the process until all the egg has been used up.
  • Sieve in the flour and gently fold in with a metal spoon, along with the melted milk chocolate. Then add in the chocolate chips.
  • Scoop up dessertspoonfuls of this heavenly cookie dough and place them, spaced well apart, on the prepared trays, shaping into balls with your hands or with the spoon. Aim for about 20 – 22 even-sized balls. (and leave some cookie dough for yourself of course. ;) )
  • Bake for 8 – 10 minutes until pale golden brown…make sure you check after 8 minutes to ensure they aren’t going too dark. They will be fragile and delicate at first…but don’t fret, they will harden on cooling ;) remove from the oven and leave on the trays for about 5 minutes, and then carefully transfer to wire racks using a metal spatula. Eat warm  (well eat at LEAST one anyway...don't forget the importance of sampling ;) ) and leave the rest to cool (may need to hide them) and store in an airtight tin when completely cold. They will keep for about 5 - 7 days.
  • image
    image

Monday, 1 September 2014

most suitable for...? well...dunking, nibbling, munching. :)

image

Oh, biscuits…out of all of the edible delights of the baking world, I think, if I had to choose my ultimate favourite, it would probably be biscuits. I don’t think I would be able to then choose my favourite variety of biccie…that is a question which is just much too difficult for me to answer.
I just adore biscuits…whether they be chocolate or plain, big or small, fancy or simple. I’d happily munch on them anytime of the day, morning or night…but my favourite time for biscuit-munching has got to be in the afternoon, when my afternoon hot choc generally becomes a dunking basin for whatever biccies I happen to have currently on the go. Closely followed by something I’ve been doing quite a lot recently – that eing crumbling up a biscuit and adding it to my banana pudding a lot with my usual chocolate. The combination of both chocolate and crushed biscuit on top of my favourite ever pudding can only be described as delightful. ;)
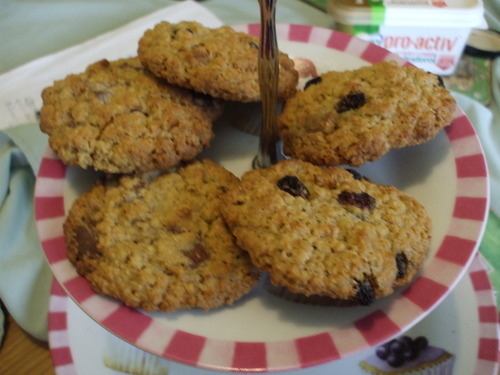
OK. if I had to simplify things down and try and list some of my most-loved biccies. well I've already blahed on a good bit about my love for Oreos (and their various imitations.) And I find not many things can rival my irresistible triple chocolate chip cookies too easily...don't worry, i will share this recipe with you the very next time I make them. :) And then we have these little fellows featured in the pic above. Now I must say, whoever thought of putting oats into a biscuit, you are a genius and I give you my eternal thanks.:) I just love the scrumptious crunchy texture oats lends to a biccie...it makes them extremely good for dunking too as the biscuit holds so well despite being saturated in hot choc/coffee etc. One of my favorite ever shop-bought biscuits has to be the good old-fashioned HobNob. (Or again, for as is often the case with a stingey shopper like myself, the Tesco/Aldi equivalent - Oaties I believe they are called. ) And when it comes to home-baking, homemade oaty-sort biscuits are always a very welcome and yummy addition to the biccie tin. I don't think, to be honest, I would feel that My Cocoa-Stained Apron would be compltete without including the recipe for these, then: the comfortingly straightforward-to-make, gorgeously crunchy, and totally yummy oat cookie. In my version, I divide the biscuit dough into three little bowls before baking, as I like to have three types of oat cookie in one batch. One I leave plain, one I add sultanas to, and the other, a few (or maybe not so few...when it comes to chocolate and me the word few doesn't really seem to exist. ) chocolate chips.So whether you're feeling fruity, or in need of a little chocolate hit, or just fancy something simply oaty, you will be catered for either way. :) 
The yummy oat cookie. :) Makes about 22.
  • 125 g butter, softened
  • 120 g caster sugar
  • 120g light brown soft sugar
  • 1 large egg, beaten
  • 1 tsp vanilla essence/extract (extract is better but more expensive of course. :(
  • 100 g self-raising flour
  • 1 tsp salt
  • 50 g plain/milk chocolate, chopped into little pieces
  • 40 g sultanas
  • 250 g rolled oats 
  • 2 tbsp water
Method
  • Grease two big baking trays and line with baking paper. (If your trays are a bit on the small side it might be a good idea to use three as a pose to two, if you are very anxious for your cookies to be perfectly round and not to join up. :)  preheat the oven to 160c.
  • Beat the butter until really soft with a wooden spoon or an electric mixer. Add the two sugars and continue to beat until light and fluffy. Scrape down the sides of the bowl every now and again with a metal spoon or a spatula.
  • Beat the egg in a jug with the vanilla and the 2 tbsp water. Add about a quarter of the egg mixture to the creamed butter and sugar. Mix well before adding another quarter or so of the egg. Beat again until well mixed, and then continue until all the egg is used up.
  • Place the oats in another bowl and sift in the flour ans the salt. 
  • Add the dry ingredients to the butter, sugar and egg mixture and mix well until a very sticky dough forms. Keep about a third of this in your original mixing bowl, but place the other two thirds of it in separate bowls (perhaps use the ones you used for sifting the flour to save on washing up. :) 
  • Add the chopped chocolate to one bowl, and the sultanas to the other, leaving the remaining one plain. 
  • Use a dessert spoon to scoop up spoonfuls of the cookie dough, and use your hands to shape into little balls. Place the balls on the trays, spacing them well apart. 
  • Bake the cookies for about 15-20 minutes, until the cookies are a lovely light golden brown colour. They should be still slightly soft though and not too dark; and they will be quite fragile at first. Check after 14 minutes to check that they are not going too brown. 
  • Remove the trays from the oven and wait for a out 5 minutes to let the biscuits harden slightly. Then use a metal spatula to transfer the cookies to wire racks to cool. They keep really well for about a week in an airtight tin. But they are lovely warm too, and, of course, are just MADE for being dunked. ;)

Tuesday, 26 August 2014

And how I became the Ganache-Elf.

Yes, because after all, I haven’t always been a baker, a ganache-maker, or a girl who is just a bit crazy for both cooking and baking and chocolate in general. Well I think I have always been a chocaholic, that’s true, but there was a time when Ganache-Elf was completely ignorant of what ganache is…or indeed, pretty much of the entire baking and cooking world itself. For that world, I’ve discovered ever since I started baking, is one of excitement and creativity and diversity…a truly amazing one which I, once I discovered how passionate I was for it, was eager to completely and utterly immerse myself in…
It’s hard to pinpoint exactly when my interest was first and fundamentally kindled…one thing I DO know for sure was that I have always had a sweet tooth, and so when my Mam ever did decide to whip up a batch of cookies, say, or a simple lemon sponge, you could guarantee I would be peering around the kitchen door with wide eyes, hoping against hope that I would be lucky enough to be offered the first - and biggest - slice. And then of course, once I was old enough, I timidly asked my mam if I could help her in her culinary endeavours. My Mam had smiled and stroked my hair fondly, and had assured me that I certainly could, and we would resume to bake up “something nice” that very day. 
My Mam says she doesn’t remember, but I am positive that the first thing we ever made together were biscuits - but by no means just ordinary ones. Well, in a way I suppose they were what some people would classify as ordinary…they weren’t in any fancy shapes or had any expensive or unusual ingredients in them. But they were just so, so good. I’m afraid I can’t tell you exactly what was in them and the way we made them, because my mam maintains she doesn’t remember making them at all; and I have come to the conclusion that it was perhaps an old family recipe which now has been unfortunately lost. :( But anyway, I think I could possibly hazard a guess at what was in them. I remember them being golden; gorgeously golden, and crunchy and deliciously sweet. They were quite butter, too - I think, if we were to try and compare them to any of the well-known varieties of biscuit, we would be somewhere halfway in between a hobnob and a shortbread. They did probably have oats in them, and lots of demerara sugar. But what I do know with certainty is that were absolutely divine. My mam had to discreetly place the wire rack upon which the golden delights were stacked out of my sight when she thought I wasn’t looking; for, having already lost about four of her produce to her little helper, she did intend on saving some for the biscuit tin for the other members of the family to savour at their leisure. 
I adored helping my Mam when she baked. My Mam was never an avid baker exactly - she claims she only really did it on special occasions or when the mood took her; but that didn’t mean that her baking was nothing special…oh no. Everything I remember having of Mam’s baking was so, so delicious…she may not have baked alot, so to speak, but the few things she did do she did so, so well. I would always beg her, in my cutest little girl voice, to bake more often than we did - firstly, because I adored eating the home-baked creations; and secondly, I just found the whole actual task of baking something enthralling, intriguing, fascinating. And so Mam would give me the little and uncompleted jobs like stirring the mixture or greasing tins; and I would be rewarded for my “efforts” by being presented with the whisks or the bowl once the cake or whatever was safely baking away in the oven; and being teasingly asked by my mother whether I would like to save her the job of cleaning these utensils? The answer, of course, would be a hastily uttered “yes please mammy”; and, while my Mam preoccupied herself tidying away the bags of flour and sugar and taking out her wire racks to rest the baked item on once it was cooked, I would plop myself down upon the kitchen floor in front of the oven, whisks or spoons at hand, and would stare, with fascinated delight, through the glass door as I licked the cake batter from my utensils; watching as the magic that is homebaking took place before my very eyes.
But as for when I actually started baking solo…again, hard to say exactly when. I think the first thing I ever baked alone, without my Mam’s supervision, was blackberry and apple crumble…this was one of the things Mam did occasionally rustle up when the baking mood took her; and I had watched her make them numerous times. I would literally jump for joy when my mam permitted me to rub the fat into the flour: this was definitely one of my favourite little “errands”. I just loved the feel of the soft, crumbly mixture between my fingertips; and the way the cubes of butter or margarine would gradually disperse themselves amongst the whiteness of the flour under my gentle touch. And then the time came when Mam was having some friends around for dinner and she wanted something scrumptious but simple to serve up for dessert. As she washed the cooking apples and the blackberries for the filling, and started clattering around in the kitchen cupboard where the mixing bowls for baking were all stored, she saw me peeping hopefully around the kitchen door, hoping against hope that I would be summoned to assist her in such an important culinary task. What I didn’t expect, though, was what she then asked me: placing the bowl for the crumble mixture on the worktop, she removed her signature Yorkshire Tea Apron and put it over my head, instead, bending to fasten the strings at the back. “Do you want to make the crumble, Emily?” she said. “By yourself?”
Breathless with excited surprise I eagerly assured her that I would. I was so, so slow and careful, it probably would have been ten times quicker had Mam done it herself, but she didn’t mind. She busied herself away with preparing the main course while I chopped, mixed, weighed out, rubbed in, and so forth. And finally, my proud squeak of “I’m done, Mammy!” rang through the kitchen. Mam fussed over me and told me that I was a little chef in the making, and then entrusted me with yet another very important task: she told me that I could be in charge of actually “baking” the crumble later on when our guests arrived. So I suppose that was the first time Ganache-Elf baked by herself, sort of. From that point onwards, I became the “crumbler” of the house - if Mam ever wanted a crumble doing, she knew very well who would be willing to save her the job of doing it herself. Years passed and, many a crumble later, I was in my third year of secondary school and about to sit my Junoir Cert exams. 
The Christmas prior to that stands out as a special memory for me, especially in regard to the development of my love of baking. You see that particular year Mam, my sis and I had been more industrious on the home-baking front then we had ever been in previous years. Mam always made trifle - it was my Dad’s favourite and Christmas wouldn’t be Christmas without it for him - but homemade Christmas biscuits, brownies, and sausage rolls all materialised themselves in gorgeous smelling batches, too. The more I baked, the more I discovered that I loved it. There was just something so, so special in the very act of weighing out ingredients, mixing them together, and then placing a tin or a tray into the oven; to inhale deeply and to take in, surely, one of the most lovely aromas you could ever smell - the smells of your very own masterpiece baking away in the oven - and then, when the cooking time was up, to open the oven door and take out your homemade creation…and to know that it was made by you, not a stranger or an inanimate machine - you and no one else, with love and care and attentiveness, and to know that whoever you are baking for will appreciate and enjoy every bite.
And so Christmas came and went, but my fascination with all things related to baking remained stronger than ever. every time I went shopping with Mam and I saw her picking up packets of cakes or biscuits and plopping them in the trolley without a thought…a little pang went through me. Why can’t I make things like that? I thought. I had a sudden vision of me whipping tray upon tray of fresh cookies out the oven; of cutting up a fragrant, warm baguette and serving it, still piping hot, alongside a traditional lasagne; of putting my homemade buns in the guy’s lunchboxes and never having to pick up a box of Tesco Value fairy cakes ever again…and the more I thought about it, the more I was determined to make this little image of mine a reality…
And so one evening I nervously took out my Mam’s ancient, relic-like, but pretty legendary all the same, Kenwood mixer. I put on my own little apron that my granny had brought me back from the Canary Islands last summer. And that is how my baking adventure began, really. And I can safely say without any doubt that it is a journey that I have enjoyed every single moment of. I know that I’m no chef and that my baking isn’t anything out of this world. I can’t honestly say I’ve ever felt exactly good at anything, and there’s been many a time when I’ve taken something out of the oven and thought, oh crap, this is shit. But I know that I am a baker and that I love baking, and that it gives me so, so much joy and happiness. And I firmly believe that my love of baking is most definitely one of the key contributors to my recovery from my eating disorder.

Monday, 25 August 2014

More cookie dough.


image
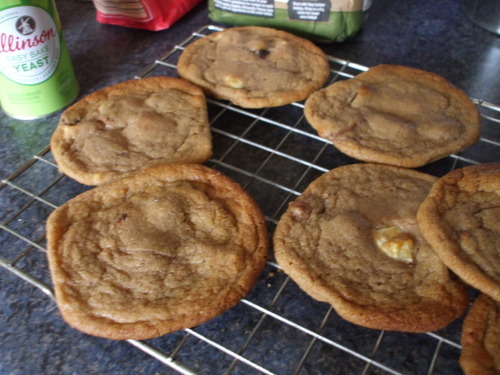
imageYesterday, I made even more cookies. Probably due to their extreme chocolatiness, the remainder of my totally chocolatey cookies which I made last weekend didn't last very long, at all. I was toying with the idea of making shortbread or flapjacks or oat cookies; but I had a new choc chip cookie recipe that I wanted to just try out first. At the moment I'm going through all of my cookbooks with little pieces of coloured paper (and probably driving everyone else in the house mad...the scissors never seem to be in their accustomed place in the kitchen drawer nowadays. And I am sure that the little cuttings of paper that I keep on accidently leaving around are quite irritating, as well.) Though of course, there is a reason behind all this paper-cutting and scissor-nicking. I'm marking all my recipes, both the ones I've done before and the ones I haven't, and rating them as I go along. And so I came across a choc chip cookie recipe (I honestly have lost count of the amount of these I have), and so i thought that i would try this one out for a change and see how it goes.
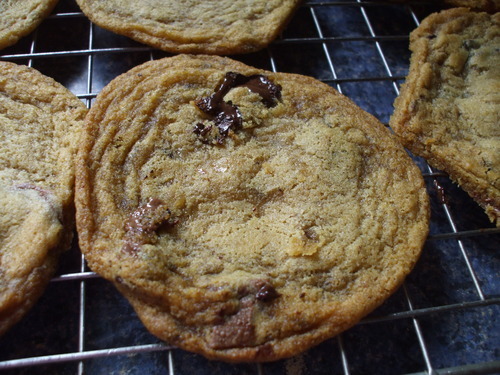
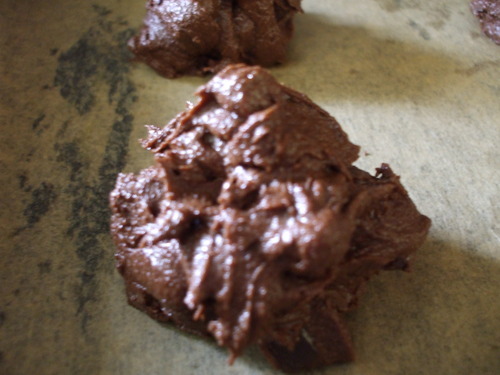
It's funny, but with certain items of baked produce I often seen to have a particular recurring "issue" which often happens again and again each time with that certain thing each time I bake it. Like remember with the scones I was relating to you how they often came out not quite as high as I would have liked. Now with cookies...and weirdly enough, this only ever seems to happen with normal chocolate chip cookie dough - not double chocolate, which is kind of funny...I frequently make the mistake of thinking I will get away with just lining two baking trays instead of three, in the certainty that they won't join up. And then of course I lift the trays from the oven and discover, to my exasperation, I have cookies that are not the classic round shape a perfect cookie should be...rather, I end up instead with a load of funny quadrangle shapes which I have to separate with a little knife before transferring to the wire rack to cool. And though I don't ever recall burning any of my baked goodies before, I can't seem to bear the thought of ruining this perfect record. But this sometimes means, in turn, I remove cookies from the oven which, if only left just a little longer in that toasty little space, would have been just perfect...not too hard, not too soft; just with that lovely chewy crispiness which is any cookie fiend's dream...image
Don't be fooled by this pic...true, these are my cookies, and they do look pretty enticing and flawless, with the chocolate chips oozing out in contrast to that lovely golden cookie dough colour. But the star of this pic was the best of the lot. Half of them did join up, and so once again the groans of Ganache-Elf could be heard resonating through the kitchen as she kicks herself for the upteenth time for being frugal with her tray-lining. And also, to add insult to injury...more than half of the cookies were wayyyyyy too floppy. The recipe stated that they should be chewy and not too crisp, but surely, some sort of sturdiness is required in a true cookie. I'm tempted to blame my recipe for being misleading...I did follow it pretty precisely and cooked the cookies for the recommended time...but a bad workman blames his own tools I guess so it could well have been a mistake on my own part. 
Well, anyway. I don't think this counts as an actual baking disaster. I haven't actually eaten one of them yet. I suppose I had the "hump" with my creations yesterday, so disconcerted I was with their shape and general floppiness. But today...well, I feel much better about it all, indeed. I had a peek in the tin I had placed my cookies...or perhaps I should really say, cookie pieces, because the majority of them did, I'm afraid, break into halves and thirds and quarters as I stashed them away in a tin once they were cooled...and well, I know they don't look exactly pretty, but they smell nice. And being all in different shapes and sizes means that one isn't restricted to have one whole cookie...as in, if you are just a wee bit peckish and fancy a nibbble, you could just dip your hand into the tin and take out a bite-sized piece. Or, likewise, perhaps you sometimes feel in the need (well maybe need isn't quite the right word, but anyway...) for more cookie dough than what is usually provided in an average sized cookie...well, you could then take two big halves, maybe. Or three. Or four. Or five. 

Friday, 22 August 2014

can cookies get any chocolatier than this.

image
image

image
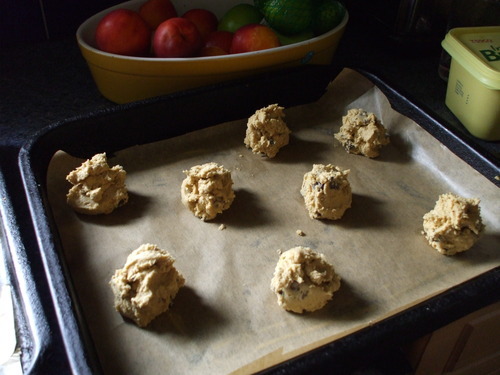
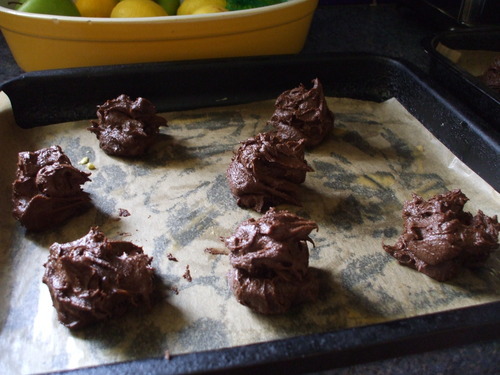
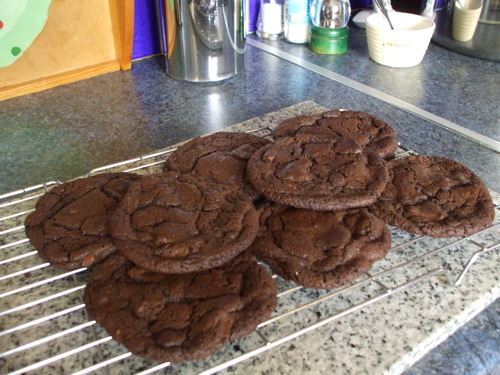
These are the cookies I made on Friday...before and after baking.
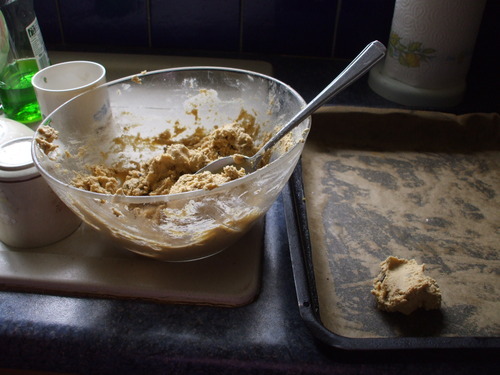
I must admit...much as I adore these chewy, chocolatey cookies when they are actually cooked - especially when they are still warm and fragrant from being just taken out from the oven; with the chocolate chips all gooey and the cookie dough still delightfully soft and not yet properly hardened - I actually would prefer to eat them...well, raw, I suppose.  Putting all 15 of those little chocolate dollops into the oven was an act in itself that almost made me quite tearful indeed. You see I was baking them as a gift for a friend, so I didn't feel quite so inclined to just help myself as I baked like I usually do. Oh never fear, I cleaned the bowl of course as always, and my mixing spoon, once the cookies were safely out of harm's way in the oven. But, could I have very easily have placed one of those heaped tablespoons of raw cookie dough onto a saucer instead of onto its designated place on the baking tray, and have eaten it just as it was, then and there? Well, I suppose you don't need me to tell you the answer to that question.
Anyway. Whichever way you choose to eat them, these certainly are awesome cookies. Rather substantial as you can see from the picture, not that that matters. To be honest, the actual cookie dough mixture quantity isn't that much. I suspect their large size probably comes about due to the generous amount of chocolate chips - I used milk and dark, but it's up to you, really, what you fancy - mixed into the dough. What with that and the fact that the actual dough is also infused with about 150 grams of melted dark chocolate, I don't think I have ever come across a cookie as chocolatey as this. 
The search continues...but for now, here's my recipe.
Ingredients
  • 125 g butter, softened
  • 75 g light brown soft sugar
  • 50 g caster sugar
  • 150 g plain chocolate
  • 1 large egg
  • 1 tsp vanilla extract/essence
  • 150 plain flour
  • 2 heaped tbsp cocoa powder
  • pinch of salt
  • 1 tsp bicarbonate of soda
  • 100g plain chocolate + 100g milk chocolate (well, that's the minimum amount I would recommend, anyway... ;) ) for the chips.
method...
  • Grease two big baking trays and line them with baking paper. Preheat the oven to 170c/fan oven 150c.
  • Chop the milk and dark chocolate INTENDED for the chips (that's one of the many reasons I recommend using more than the amount specified here...chips are often lost along the way ;) )
  • Beat the butter in a big bowl with a wooden spoon or an electric mixer until nice and soft and squishy. Put a pan of water on the hob to boil.
  • Add the sugars and beat well until lighter in colour and fluffy. In a jug, beat the egg with the vanilla. 
  • Put the 150 g dark chocolate in a small heatproof bowl and balance it over the simmering water on the hob. Allow it to melt, stirring every now and again. Once melted, remove from the heat and let it cool for a few minutes.
  • Gradually add the egg, bit by little bit, to the creamed mixture, mixing well between each addition. Replace your wooden spoon/electric mixer for a large metal spoon and then add the melted plain chocolate. Oooh this mixture is just getting harder and harder to resist...
  • Sieve in the flour, the cocoa, the bicarbonate and the salt. Fold in with all those yummy chocolate chips... (all...? ;) ) and mix well.
  • Use a tablespoon to scoop out mounds of the cookie dough and space them well apart on the baking trays. As I mentioned above, I usually make about 15. But again, it depends how big / small you like your cookies to be...
  • Bake for 12-15 minutes. You will notice that the cookies are still very soft and fragile when you take them from the oven...but don't worry they will harden :) but don't transfer them to the wire rack straight away to cool - leave them on the trays for about 5 - 10 mins before removing them with a sharp edged spatula and placing on the rack. The rest is self-explanatory: clean bowl, utensils etc until free of raw cookie dough, then proceed to eat at least one cookie while still warm...they WILL keep in a tin for up to a week though don't worry, but I don't think, realistically, there will be any still in there for that long, right. ;)

Thursday, 21 August 2014

Caramel square time...

image
image
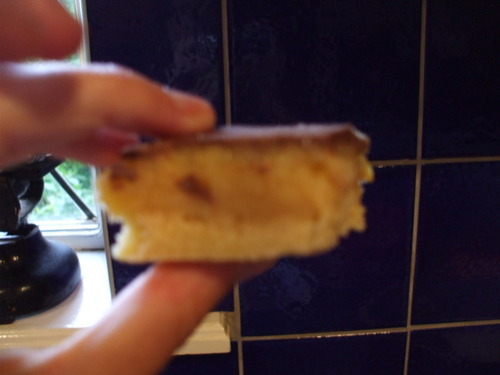
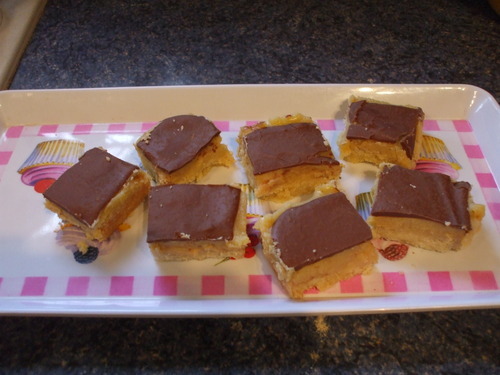
Now…WHO doesn’t like caramel squares?? Or millionaire’s shortbread, I have sometimes heard them called. Yesterday we had an egg shortage in the house, and I, in a bit of panic for we were equally as short on biscuits, peered hopefully into the baking cupboard, praying that I had in a can of condensed milk: that super sweet milky concoction which I have always used in caramel making. And yes, lurking in the very back, was the small squat can that I required. So...I couldn't make cookies or anything with eggs, but thankfully, no eggs are used in millionaire's shortbread.
 A few hours later… well no, I was not permitted to eat these warm – that’s one of the annoying things about caramel square making. Unfortunately, one must be patient and allow the caramel and the shortbread to cool before consumption. As for the melted choc, it’s advised to let that set too before cutting, but I have often broken this rule. ;)

I am sure that recipes for these are pretty easy to get hold of, but just in case you have taken a particular attachment to ones featured in the pic, here is my own recipe :) it's a good one, anyway, and I am of the belief that good recipes are MADE to be shared. 

Ingredients.
For the shortbread...

  • 175 g plain flour
  • 55 g caster sugar
  • 100 g butter, at room temperature.
For the caramel...
  • a 400 g tin of condensed milk.
  • 55 g caster sugar (golden caster sugar if you have it in is great for caramel, but normal white works fine too :) )
  • 100 g butter 
And 75 g milk chocolate (well, that's the MINIMUM amount I suggest ;) ) for the top.
You also need a 20 cm deep square cake tin, greased and lined with baking paper.

Method.
  • Make the shortbread first. Preheat the oven to 170c/fan oven 150c. Sieve the flour into a bowl. Dice the butter into little cubes and add to the flour. Rub in lightly with your fingertips until the mixture resembles fine breadcrumbs. Stir in the sugar.
  • Gently mix the mixture with your hands until it begins to clump together, but don't worry too much about bringing it completely together into a dough. Transfer it then to the prepared tin. Bake for about 15-20 mins, until pale golden: but be careful not to let it get brown. Leave it to cool in the tin while you make the caramel layer.
  • Pour the condensed milk into a small saucepan and add the sugar and the butter. Place on a very low heat on the hob and heat gently until the butter melts and the sugar begins to dissolve. Then raise the heat to low-medium, stirring continuously. It's important that you stir all the time once you raise the heat, as caramel is notorious for sticking to the bottom of saucepans and burning. Also, be very careful that it doesn't spit at you - if it touches your skin it can leave a very nasty burn. :(
  • bring the mixture slowly to the boil, still stirring all the time. Once it's bubbling happily away, lower the heat ever so slightly and simmer (keep it so it's still bubbling, just not too fiercely :) ) for 10-15 minutes, until the caramel has darkened in colour to a nice toffee-brown. Now it's time to test to see if it's set enough. :) 
  • To test, fill a little bowl with very cold water and drop just a tiny bit of caramel in it. It it's ready, it should form a tiny little ball which will flatten easily in your hand if taken out the water.
  • Remove the caramel from the heat, and then pour carefully over the shortbread in the tin - be very very careful here you don't get splashed. And I know this is really, really hard, but you MUST wait a good bit before you can get your licking spoon to clean out the saucepan!!! I made this mistake before, and I wish I never had - a burnt tongue caused by hot caramel is NOT nice. :(
  • Let the caramel set before adding your chocolate topping. (it normally doesn't take any longer than an hour.) Melt the milk chocolate very gently in a heatproof bowl set over a pan of simmering water (a bain-marie, I believe this is called.) Then spread the melted chocolate lovingly over your caramel layered masterpiece. Now let it set while you clean out the chocolate bowl and wash up. 
  • And when the chocolate is set (or sett-tish, if you really, really, really can't wait... ;) ), cut into 16 squares with a sharp knife. Now, wasn't that worth the wait? If you did manage to wait, that is.But give yourself a big clapon the back, anyway. You've just made caramel squares all by yourself, after all. :)