At first glance it might seem that I am just a happy, normal girl who loves to bake and walk her dog. However, I have suffered with an eating disorder since I was 13. It was only in May 2014 when I realised that this Voice in my head was slowly but surely trying to kill me. And so began the long, hard, and painful journey which is recovery...

I want My Cocoa Stained Apron to be a special place...a place for reflection, memories, shared stories...and of course a little bit of cocoa-staining ;) Recovery might be the hardest thing you ever choose to do in this life. But it is also the bravest and best decision you will ever make.:)

Showing posts with label cupcake. Show all posts

Saturday, 18 July 2015

Dappled cupcakes!!:)

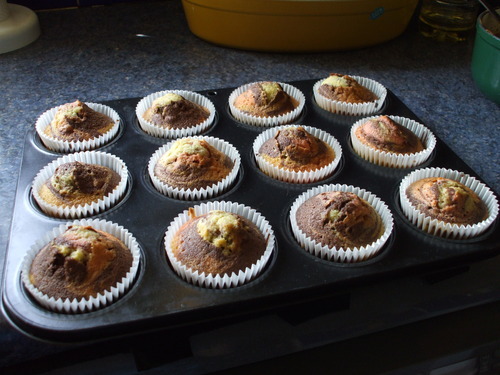
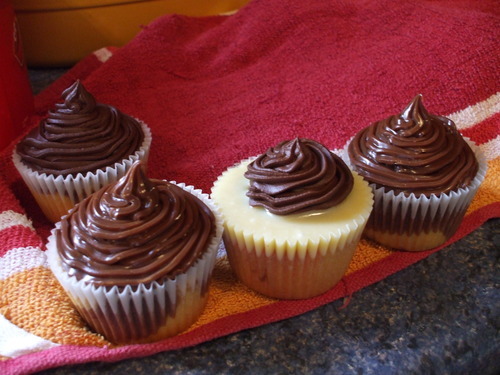
Yes!!! Yet MORE cupcakes were made in the kitchen of Ganache-Elf today!! And you know, the best thing about these is, that they look ever so exquisite, with a delightful, dainty prettiness to them which makes them all but irresistible to anyone who you might consider lucky enough to ask to sample one of your heavenly delights - well, despite all of that, they are remarkably simple to make, and don't need any pricey ingredients. Just check to see if you have some little choccies in the house for decorating!! ;) I used cadbury dairy milk buttons, but it is, of course, entirely up to you which ones you use - as is the way which you choose to apply the most heavenly concocoction ever created by humankind, surely (that being GANACHE of courese. ;) to your buns. Swirls? Smiley faces? A polka dot or chessboard patterns? The possibilities are as endless as your imagination!! Ganache in itself, once mastered, is never really any hardship to make - don't let the fancy-sounding name fool you if you are unfamiliar with the delights of ganache-making. But anyway, never fear - the recipe is included below complete with Ganache-making instructions!! ;)


  • 125 g butter/margarine, softened
  • 150 g caster sugar
  • 2 large eggs
  • 150 g self-raising flour
  • About 1 tbsp cocoa powder
  • 1/2 tsp vanilla essence/extract
  • 2 tsp milk 
For the ganaches...
  • 4 tbsp single cream
  • 100g white chocolate, chopped
  • 100 ml single cream
  • 100g plain chocolate, chopped
  • a few chocolate dairy milk buttons (or whatever small chocolates you prefer )

Method:)
  • Preheat the oven to 180c/fan 160. Line a muffin pan with 12 muffin cases.
  • Beat the butter or margarine in a bowl until really soft, then add the sugar, the eggs, and the flour. beat well for about 2 minutes until smooth and well blended.
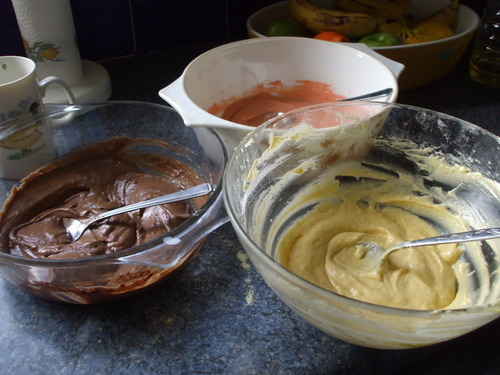
  • Transfer half the mixture to a clean bowl and add the vanilla essence to one of them.

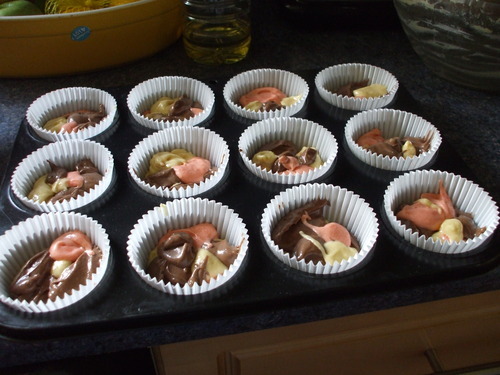
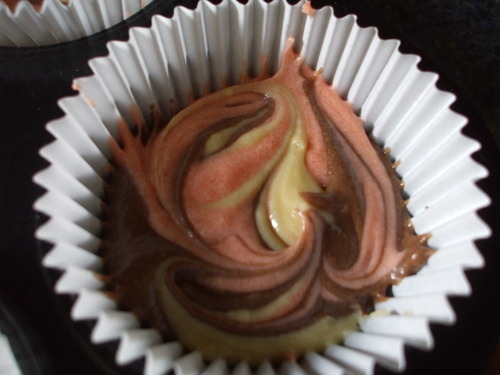
  • Distribute alternative spoonfuls of the different coloured batters amongst the 12 paper cases, filling them about three quarters full. When you're done, take a little thin skewer and swirl it round in each case to get that gorgeous, swirly marbled effect.
  • Bake the cupcakes for about 17-20 minutes, until well-risen and springy to the touch - if you press the top of one gently with a fingertip, it should spring back. If an indention is left bake for a few more minutes and then test again.
  • Leave in the muffin pan for about two or three minutes, and then move to a wire rack to cool. While they are cooling make the ganaches, starting with the dark chocolate ganache. ;)
  • Make the dark choc ganache by melting the 100g plain chocolate with 100 ml single cream, on a very low heat in a small saucepan. Stir until smooth and then refrigerate for about 1 ½ - 2 hours, checking after 1 ½ hours…you don’t want it very hard, just a nice spreadable consistency.
  • Next make the white choc ganache: in a small heatproof bowl set over a pan of simmering water, melt the white choc with the 4 tbsp single cream. Stir now and again and watch it very closely – the white choc will temper easily if it is overheated. As soon as the choc has melted remove from the heat and stir until nice and smooth. Refrigerate for about 1 hour – 1 ½ hours, checking after an hour, until the ganache is thicker and more spreadable.
  • When the cupcakes are completely cold, decorate them with the two ganaches...in whatever way you heart desires. To get swirls or rosettes of course, you will need an icing bag or small piping bag fitted with a star-shaped nozzle. I created flowerheads and circular patterns upon my own batch, and then added a few buttons to some of them. Very pretty, very cute, and very, very yummy, of course. <3 xxx

Sunday, 22 March 2015

Ever So Lemony Buns!! :)

Following my posting of one of my all-time favourite recipes, Granny's Lemon Cake, back in December, (Click HERE to see my recipe!!! ;) ) I thought today I would share with you another baked creation which inevitably combines intense lemony moistness with irresistible cuteness. This baked creation being of course, the aptly named Ever-So-Lemony Bun, a scrumptious, airy, light-as-a-fairy cupcake which provides the perfect accompaniment to a large cup of tea on a chilly spring evening, or maybe for a nice little treat after dinner with a dollop of fresh, warm custard. ;)


Ingredients (makes 9 cupcakes :) )
  • 80 g butter/margarine, softened
  • finely grated zest of 2 lemons
  • 2 medium eggs
  • 180 g self-raising flour
  • 5 tbsp full-fat milk
  • 90 g caster sugar
  • 90 g light brown soft sugar
  • apricot jam to glaze
Method :)


  • Preheat the oven to 180c/fan 160 c and line a muffin pan with 9 paper cases (cupcake or muffin, not bun or fairy cake ones - the latter are too small!! :o
  • Beat the butter or the margarine in a large bowl until very soft, and then add the eggs, the milk, the flour and the two sugars. Beat well for about 3 minutes until well incorporated.  After 2 minutes pause the mixer and scrape down the sides of the bowl before resuming mixing, so there is no mixture wasted.
  • Fold in the lemon zest with a large metal spoon, and then Divide the cake batter equally amongst the 9 cupcake cases. 
  • Bake for about 20 minutes until risen and golden. Leave the cakes in the muffin tray for about 5 minutes before transferring to a wire rack.
  • When the cakes are cool, gently heat a couple of tablespoons of apricot jam in a saucepan. Brush a little of the warmed jam over the top of each cupcake to make a sticky, shiny glaze. 


Wednesday, 14 January 2015

Apple crumble cupcakes!! ;)


Apple and cinnamon...ahh, the two of them are just made for each other, aren't they? Once autumn comes round and cooking apples start plopping down from the heavily-laden fruit trees and accumulating themselves on the soft, leaf-covered ground - seemingly begging to be utilised in some scrumptious way - the door of the little cupboard in the corner of my kitchen which houses my well-stocked stash of spices and herbs may find itself bbeing opened more frequently than usual; with several cannisters of my favourite-ever spice having been placed at the very front of this said cupboard for ease of access. ;) Apple pie, apple crumble, apple cake, apple turnovers...the list of possibilities when it comes to putting cooking apples to good use in the bakery is endless. If only the same could be said for the seemingly never-ending supply of cooking apples from the orchard. For before we know it, autumn is over, and we're back to mud-stained wellies, broken umbrellas from  gale-strong winds, and endless flickings of the kettle switch in order for yet another pot of tea to be put on to brew, for yes, it sure is bloody freezin' out there today chucks!!!. Ahh, just some of the many joys of winter at Derryguile House. ;)

But one thing about this lovely, but rather nippy time of the year  that does not fill me with enthusiasm is the fact that beneath those very trees which, only a few months ago, were literally groaning with the weight of so many gorgeous apples, now nothing at all remains, save perhaps the odd shrivelly mushroom or some sort of tough-stemmed weed which has some sort of unnatural resistance to wet and cold. No more fresh apples!! And if the case may be that I do get in a rather fruity mood and in the need of something sweet, appley and cinnamonny...well I have to somewhat reluctantly plod down to Tescos in the hope that they will have some nice cooking apples that aren't too miserable-looking. But earlier this week, I had something of a dilemma.I really, really wanted to make something of an appley-cinnamony kind...but there was not one cooking apple to be found in Tesco or Lidl. But before I could resign myself to despair and defeat...a-ha.... what was to be found at the very back of yet another one of my bottomless cupboards?? A jar of Coleman's apple sauce!!! ;)

And so I rustled up these scrummy little buns, with the limited ingredients I had...but I reaped very fruitful rewards from my experimenting indeed. I ended up with a batch of golden, lightly-spiced, seductively moist and totally irresistible little cupcakes which, when eaten warm from the oven with a splodge of custard on the side, make the perfect treat for a cold winter's evening. <3

Ingredients :)

For the crumbly topping...


  • 50 g plain flour
  • 45 g butter, diced
  • 1/2 tsp cinnamon
  • 50 g demerara sugar
For the cupcakes...

  • 150 g self-raising flour
  • 1 large egg, lightly beaten
  • 90 g demerara sugar
  • 60 g margarine, softened
  • 1 tsp cinnamon
  • A 280 g jar (or around that ;) ) of good quality, chunky apple sauce
  • 1/2 tsp bicarbonate of soda

Method :)

  1. Preheat the oven to 180 c/160 c fan. Put 14 paper bun cases in fairy cake tins.
  2. Make the crumble mix first. Dice the butter into small cubes. In a bowl, stir together the plain flour, the cinnamon and the 50 g demerara sugar. Lightly Rub the diced butter into this mix using your fingertips.
  3. next, make the cupcakes: beat the margarine in a bowl with an electric mixer until very soft, then add the demerara sugar and mix well for a couple of minutes until fluffy. 
  4. Sift the flour and cinnamon together in a separate bowl.
  5. Add about one quarter of the beaten egg, along with a small spoonful of the sifted flour mix. Beat well until incorporated.
  6. Repeat the process, adding a quarter of the egg and a spoonful of flour at a time, and beating well between each of the additions, until all of the egg has been used up.
  7. Empty the jar of apple sauce into a deep bowl. Add the bicarbonate of soda to the apple, and mixwith a spoon. Be careful as it will fizz up!
  8. Spoon half of the apple sauce into the cake batter, and then add half of the remaining sifted flour. Fold gently in with a large metal spoon. 
  9. repeat with the remainder of both the apple sauce and the flour.
  10. Distribute the cake batter equally amongst the paper cases in the fairy cake tins. Add a sprinkling of crumble mix to the top of each, pressing down very gently with your fingers.
  11. Bake in the preheated oven for about 20 minutes, until risen and golden. Leave them in the tins for abbout 5-10 minutes before very carefully transferring to a wire rack to cool. :) xxx


Sunday, 4 January 2015

The stickiest cupcakes ever!! ;) flapjack buns!!!

I often find I derive great enjoyment from combining things in baking. Of course first and foremost there is the biscuit cake sponge. And then we have the Neo cake. Both of these collaborate cake and biscuit. And then there are these exceptionally sticky, syrupy little buns, which are basically a fluffy, airy cupcake with a splodge of flapjack in each.

Flapjack? Just in case you may not be familiar with this term - for there have been a couple of occasions when I have offered people a flapjack and have received looks of both suspicion and puzzlement. Now I'm afraid I can't explain the origins of this curious name - maybe some Jack in a flap made them, sometime someplace?  - but I can of course tell you a little about what defines a good flapjack. Oats, butter/margarine, syrup and demerara sugar are the basic ingredients; and it's porbably one of the simplest of things to make - it's only a matter of melt, mix and bake. You have to be alittle careful with the baking time, of course - trying to cut, and eat, an overbaked flapjack is somewhat like trying to spread rock-hard butter from the fridge on soft fresh bread - but there can be no denying the fact that nothing quite beats a good, syrupy, crunchy flapjack for dunking in coffee or popping into a lunchbox for nibbling on when you're on the go. ;)
The next time I make flapjacks, I promise I will share my recipe on here - trust me, it's a great little recipe to have in your repertoire. They are ever so quick and cheap to make, they keep quite happily in an airtight tin for over a week, and of course they are just so, so yummy. ;) But today we are talking about flapjack cupcakes, as I just happened to make these yesterday. I was in the mood for a cupcake, you see: but when I opened my baking cupboard and saw the dark green can of Lyle's golden syrup sitting temptingly at the very front, the newly opened bag of demerara propped right next to it, my heart melted with nostalgia as my mind wandered back to the days of my early baking, when I would spend hours upon end in the kitchen, uncovering the secrets of the arts of baking for myself; whipping batch upon batch of those bakes most suitable for the novice baker - currant-studded queen cakes; soft white scones;  and, of course, the inevitable flapjack in all it's gorgeous golden-syrupy glory. And so, what to do - how could I compromise and satisfy both my cupcake craving and flapjack fancy? The result of my deliberations was, of course, the flapjack bun: quite likely the most sticky cupcake I have ever made for quite some time - and, even more likely, the most scrumptious. :)
Ingredients (makes 8 cupcakes :) )


  • 50 g porridge oats
  • 95 g margarine
  • 1 large tbsp golden syrup
  • 45 g demerara sugar
  • 1 large egg
  • 50 g light brown soft sugar
  • 50 g self-raising flour
Method :)
  1. Preheat oven to 190c/170c fan and put 8 cupcake cases in a bun tin.
  2. Put 45 g of the margarine in a small saucepan and add the syrup and the demerara sugar. Use a heated tbsp to meansure the syrup as this makes it alot easier to handle. Put the saucepan over a very low heat until the margarine has melted. Pour in the oats and mix together well.
  3. Put the remaining margarine in a bowl and bbeat with an electric mixer or wooden spoon until very soft.
  4. Add the light brown soft sugar and beat well for about 3 minutes until soft and fluffy.
  5. beat the egg in a jug lightly. Pour about a quarter into the bowl with a small spoonful of flour. Beat together well until incorporated, and then add another quarter of the beaten egg with another spoonful of flour. beat again and repeat the process until all the egg has been used up.
  6. Sieve in the remaining flour and fold in with a metal spoon. Add a few drops of water, if necessary, if the batter is not quite of a nice soft dropping consistency. 
  7. Divide the cake batter amongst the 8 cupcake cases. Then, divide the flapjack mixture in the saucepan amongst the cupcakes, spooning it over the top of each one.
  8. bake for about 20 minutes, until golden, but not too dark.
  9. leave to cool for abbout 5 mins, and then transfer to a wire rack to cool.
WARNING: you might require a wee spoon when you go to eat your cupcake(s ;)), if you don't like having sticky fingers!!! ;)

Monday, 29 December 2014

Marshy the Snowman Cupcakes!! :)

Meet Marshy the Snowman everyone!! Haha, or should that be Snowmen, for as usual this recipe yields 12 identical cupcakes. ;) And yes instead of Frosty the Snowman like they have in the song, it's Marshy the Snowman because that white stuff they snowmen are made of isn't, after all, any kind of icing or frosting or whatever - the head and the body consist of nothing but squishy white marhsmallows, another one of Ganache-Elf's big weaknesses. usually, as you might have guessed, I like to enjoy these delightful, soft members of the confectionary family on top of a hot choc in semi-molten form, but on this occasion, I thought they contributed very well to the aesthetic appeal of these Christmassy Cupcakes, as well as their scrumptiousness, of course. ;)
Ingredients :)


  • 125 g margarine/butter, softened
  • 125 g light muscovado sugar
  • 2 large eggs
  • 125 g self-raising flour
  • 2 tbsp cocoa powder
  • 2 - 3 tbsp full-fat milk
  • 100 g white chocolate
For the dark chocolate ganache and decorations ;)

  • 150 g plain chocolate, roughly chopped
  • 150 ml single cream
  • 1 - 2 Cadbury Flake bars (or any other kind of flaky milk chocolate like Galaxy Ripple or cadbury Twirl :) )
  • About 10 white marshmallows (or you might need more depending on their size :) 
Method :)
  1. preheat oven to 180c/160 c fan. Line a muffin pan with 12 paper cases. 
  2. Place the margarine in a big bowl and beat with an electric mixer until very soft. 
  3. Chope the white chocolate with a sharp knife into small chunks or big chips. 
  4. Add the sugar, the eggs, the flour and the sifted cocoa powder.Mix well with an electric mixer for about 2 minutes; before pausing the mixer and scaping down the sides of the bowl with a large metal spoon. Resume mixing for another minute until smooth and well-blended.  
  5. Spoon up some of the batter and let it fall back into the bowl to check it is of a nice, soft, dropping consistency. Add 2- 3 tbsp of milk, a tbsp at a time, if it seems a little on the thick side. 
  6. Fold in the white chocolate chips gently with a metal spoon. Then equally divide the batter amongst the paper cases.
  7. Bake for about 15 - 20 minutes, until the cupcakes are well-risen and spring back when lightly pressed with a fingertip. If an indent is left when you do this, bake for a few minutes more before testing again.
  8. Leave in the tin for about 5 minutes, then carefully transfer to a wire rack to cool. 
  9. Make the dark choc ganache by melting the 150g plain chocolate with 150 ml single cream, on a very low heat in a small saucepan. Stir until smooth and then refrigerate for about 1 ½ - 2 hours, checking after 1 ½ hours…you don’t want it very hard, just a nice spreadable consistency.
  10. Splodge a generous dollop of ganache on top of each cooled cupcake, reserving a small amount for piping the eyes and buttons of the snowmen.
  11. For the snowmen, cut 6 of the white marshmallows into half. Place each half on top of each cupcake, leaving a little space at the top for the head.
  12. Cut another marshmallow across its width into about 4 or 5 small pieces. Place the "heads" on top of the halved marshmallow on each cupcake.
  13. Now fill an icing bag fitted with a plain nozzle with the reserve ganache. 
  14. use this ganache to dot a pair of eyes, a little nose and a smile on each snowman. Then dot three buttons on each plump middle. :)
  15. Carefully break the flake/ripple into long thin shards and use these to make the arms of each snowman. :)


Sunday, 7 December 2014

Roll and Munch Buns. :)

So I had my triumph with NEO cake. (as in, actually inserting Neos into one form of baked produce. HERE is the recipe... ;) ) And it's funny, but around the same time as I wrote that old post about my fake(ish) Neo cake - the one that I entitled as such, but which didn't actually contain Neos inside the actual sponge or icing - I also told you about my NIBBLE buns. Which were normal chocolate buns with a little Cadbury Nibble gently inserted onto the top of each when they were still warm from the oven. (HERE is the recipes for both!! ;) )

But what if I went one step further in this process, so that we would have a nice chunky caramel deep inside a chocolate bun...? But this time there weren't any Nibbles in the cupboard...someone must have nibbled them all before I got to them. ;) But I had Rolos and Munchies, which I like just as well, needless to say. ;)
 A word of warning, though. I thought about a tube each of rolos and munchies would be enough. How wrong was I...in a tube these days you only get a meagre ten rolos. :( So in the end I ended up using about four tubes - two of rolo, two of munchie. Buy plenty of them, anyway. It's always nice to have a few spare to munch on. ;)

Roll and Munch Buns. :)


  • 2 tubes of Rolos
  • 2 tubes of Munchies
  • 125 g softened butter/margarine
  • 150 g light muscovado sugar
  • 125 g self-raising flour
  • 2 tbsp cocoa powder
  • 2-3 tbsp full-fat milk / single cream
  • 2 large eggs
  • 200 ml single cream
  • 200 g plain chocolate


  • Preheat oven to 180c/fan 160c; line a muffin pan with 12 paper muffin cases.

  • Sift the cocoa powder into a bowl. Add the butter, eggs, sugar, and flour, and beat well with an electric mixer for about three minutes until smooth and well-mixed.  After two minutes, stop the mixer and scrape down the sides of the bowl with a metal spoon or spatula before mixing for the remaining minute.
  • Add enough milk to achieve a nice soft dropping consistency.Scoop some of it onto a spoon and then let it drop back into the bowl to check this: it should slide or drop down easily enough and not be too thick. 
  • Spoon the mixture into the paper cases until they are all equally filled. 
  • Place a Munchie/Rolo on the top of each and gently press it in, right to the bottom. Smooth over the top with a teaspoon. 
  • Bake the buns for about 20 minutes until well-risen. The sponge should spring back when lightly pressed with a fingertip, with no indentation left. if there is bake for another couple of minutes before testing again.
  • Remove from oven once they are cooked and leave in the muffin pan for about 3 – 5 mins, then transfer to a wire rack to cool.
  • Now push another Rolo/Munchie gently into the very top of each soft, still warm cake. Don't push down too firmly this time. Leave the buns to cool completely while you make the ganache.
  • Make the dark choc ganache by melting the 200g plain chocolate with 200 ml single cream, on a very low heat in a small saucepan. Stir until smooth and then refrigerate for about 1 ½ - 2 hours, checking after 1 ½ hours…you don’t want it very hard, just a nice spreadable consistency which is suitable for piping. 
  • Pipe generous swirls of ganache on the tops of the cooled cakes. And then of course add the crowning glory...add yet ANOTHER rolo/munchie on each glorious ganache mountain (or maybe even volcano? ;) It's  an explosion of sticky caramelly deliciousness I like to think. ;) )
  • And if you really want to get the ball rolo-ling and have just that bit extra caramel munchie-ness, chop up any leftover rolos/munchies with a sharp knife into small pieces and scatter over your buns for a glitzy pretty look (and additional yumminess!! ;) ) 

Friday, 31 October 2014

Happy Halloween Cupcakes.:)

I know, I know...I only posted some cupcakes a few days ago; why on earth am I making even MORE cupcakes I hear you cry? Well...it is Halloween. So something Halloweeny had to be made, of course. And so yet even more frightfully cute cupcakes were whipped up today, with a spooky little Halloween touch to them.


Errrrr.... ok, before we proceed any further. You do know what these little shapes are meant to be, don't you? The reason I ask being, that my Daddy didn't. My Mam did though, thankfully, so I haven't lost hope in my piping skills completely. Well yes, maybe Daddy is right in saying the next time, I should make the pumpkins orange, and make the spiders more fearsome looking...he claims they resembled less like scary Halloween spiders and more like jolly, twinkley-eyed little octopuses. 


Ingredients...
  • 125 g butter/margarine, softened
  • 150 g caster sugar
  • 2 large eggs
  • 175 g self-raising flour
  • 5 tbsp full-fat milk + 3 tsp extra
  • 1 1/2 tbsp cocoa powder
  • few drops of red food colouring
For the ganache and icings:
  • 100 ml single cream
  • 100 g plain chocolate
  • 75 g icing sugar
  • 30 g butter, softened
  • few drops vanilla essence/extract
  • a little cream/milk as required

Method:)
  • Preheat the oven to 180c/fan 160. Line a muffin pan with 12 muffin cases.
  • Beat the butter or margarine in a bowl until really soft, then add the sugar, the eggs and the vanilla. Beat well for about 2 minutes, scraping down the sides of the bowl after a minute so that it is all nicely incorporated.
  • Sieve in the flour and pour in the 5 tbsp of milk. Gently fold in with a big metal spoon.
  • Transfer half of the cake batter into another big bowl and sieve in the cocoa. Add the 3 tsp of extra milk and mix gently together. The batter should be of a nice, soft, dropping consistency: add a little extra milk if it's a little thick.
  • To the other half, add a few drops of food colouring. (I used red but of course...it's up to you. :) ) 
  • Drop alternative spoonfuls of the two batters into the muffin cases, filling each three-quarters full. Once you've done this, swirl a thin skewer in each one to get the lovely marbled effect. 
  • Bake the cupcakes for about 17-20 minutes, until well-risen and springy to the touch - if you press the top of one gently with a fingertip, it should spring back. If an indention is left bake for a few more minutes and then test again.
  • Leave in the muffin pan for about two or three minutes, and then move to a wire rack to cool.
  • Make the dark choc ganache by melting the 100g plain chocolate with 100 ml single cream, on a very low heat in a small saucepan. Stir until smooth and then refrigerate for about 1 ½ - 2 hours, checking after 1 ½ hours…you don’t want it very hard, just a nice spreadable consistency.
  • When the cupcakes are completely cold, spread them with a generous layer of ganache.
  • Make the vanilla buttercream by beating the 30g butter/margarine until very soft, then sieve in the icing sugar. Beat together to get a nice soft creamy icing, adding a little cream/milk if necessary. 
  • Spoon into an icing bag fitted with a plain nozzle and then pipe shapes on top of the dark chocolate ganache. Pumpkins, ghosts, spiders, and a witch's hat (which looked anything but that in my case, but anyway...) were what I came up with...though of course there are many more possibilities. Just don't make them too ghoulish or you might put people off eating them. Oh, well, I suppose you are right...whether cuteness or scariness is involved or not, noone is ever really going to refuse a cupcake. ;)

Tuesday, 28 October 2014

colourful cute cupcakes... :)

There's something just so, irresistibly adorable about the cupcake. Surely, they have to be the daintiest, prettiest, and undeniably cutest members of the baking world? Of course, as with many things, appealing and aesthetic qualities can be greatly enhanced with a little bit extra of tender loving care. And so is the case with these little beauties.
I mean, just look at them. ;)
image
image
image
image
image
image
image

So even before the divine white and dark chocolate ganaches are applied, the extraordinary beauity and enticing qualities of these miniature gateaux has already been well established. All thanks to a little colour coordination on the part of the baker. Mine were pink, yellow and brown, but of course it's entirely up to you and what kind of mood you are in. On Paddy's Day this year I had green and yellow ones in keeping with the Irish theme. And then, of course, when they are topped with the two different kinds of ganache, the delightful attractiveness of your colourful creations is made wonderfully complete. As you can see from the pic above, varying the way in which you actually apply the ganache...a little dark rosette on smooth white coating in one, one big dark swirl on another, or vice versa...augments their charm ever further. Though once more I must stress that my way is NOT the only way. feel free to experiment with different types of ganache and the ways in which you choose to decorate your cupcakes. I think a glace cherry or a malteser, for example, might look very sweet stuck on top of a dark chocolate ganache swirl, surrounded by very fune shards of grated milk chocolate or sprinklings of icing sugar for a snowy effect.   
Anyway, on to how to make your very own marble-lous cupcakes. ;)
Ingredients:)
  • 125 g butter/margarine, softened
  • 150 g caster sugar
  • 2 large eggs
  • 180 g self-raising flour
  • few drops of red food colouring (or whichever colour you like ;) )
  • About 1 tbsp cocoa powder
  • 1/2 tsp vanilla essence/extract
  • 5 tbsp full-fat milk + extra for the cocoa batter
For the ganaches...
  • 4 tbsp single cream
  • 100g white chocolate, chopped
  • 100 ml single cream
  • 100g plain chocolate, chopped

Method:)
  • Preheat the oven to 180c/fan 160. Line a muffin pan with 12 muffin cases.
  • Beat the butter or margarine in a bowl until really soft, then add the sugar, the eggs and the vainlla. Beat well for about 2 minutes, scraping down the sides of the bowl after a minute so that it is all nicely incorporated.
  • Sieve in the flour and pour in the 5 tbsp of milk. Gently fold in with a big metal spoon.
  • Now it's time to make your cupcakes all pretty and colourful. ;) Depending on how many colours you want, distribute the mixture evenly between two, three or four bowls. (or five, or 6...rainbow cupcakes?! well there's an awesome idea. ;)
  • For the cocoa-flavoured batter: If you are doing just three or two colours, sieve the 1 tbsp of cocoa powder into one of the batters and add about 2 tsp (or more if necessary) milk to get a nice soft dropping consistency. (if you have just two batters perhaps add a heaped tbsp of cocoa and 3 tsp of milk so its chocolatey enough. ;) ) for more than three colours, add a little less cocoa and milk - if you have six colours, say, you'll only need about 1/2 tsp. (It's not an exact science, so don't worry too much about it. My advice would be to aim for about 1 tbsp for 2-3 olours, 3/4 tbsp for 4-5, 1/2 for 6...etc. ;)
  • For the other coloured batters, simply add a few drops of your chosen food colouring to a batter. Leave one batter plain if you want a yellow colour.
  • Distribute alternative spoonfuls of the different coloured batters amongst the 12 paper cases, filling them about three quarters full. When you're done, take a little thin skewer and swirl it round in each case to get that gorgeous, swirly marbled effect.
  • Bake the cupcakes for about 17-20 minutes, until well-risen and springy to the touch - if you press the top of one gently with a fingertip, it should spring back. If an indention is left bake for a few more minutes and then test again.
  • Leave in the muffin pan for about two or three minutes, and then move to a wire rack to cool. While they are cooling make the ganaches, starting with the dark chocolate ganache. ;)
  • Make the dark choc ganache by melting the 100g plain chocolate with 100 ml single cream, on a very low heat in a small saucepan. Stir until smooth and then refrigerate for about 1 ½ - 2 hours, checking after 1 ½ hours…you don’t want it very hard, just a nice spreadable consistency.
  • Next make the white choc ganache: in a small heatproof bowl set over a pan of simmering water, melt the white choc with the 4 tbsp single cream. Stir now and again and watch it very closely – the white choc will temper easily if it is overheated. As soon as the choc has melted remove from the heat and stir until nice and smooth. Refrigerate for about 1 hour – 1 ½ hours, checking after an hour, until the ganache is thicker and more spreadable.
  • When the cupcakes are completely cold, decorate them with the two ganaches...in whatever way you heart desires. To get swirls or rosettes of course, you will need an icing bag or small piping bag fitted with a star-shaped nozzle. The cupcake in the front right of the pic above was first covered by a smooth layer of white ganache, before a small rosette of dark ganache was added on top. But don't worry if you don't have one. Undisputed prettiness is guaranteed whichever way you choose to finish off your cute cupcakes. ( As is, I am sure, the likelihood that all your friends and family will be won over entirely by the charming appeal of these edible, colourful little delights. ;)


Wednesday, 10 September 2014

Carrot, coconut, cinnamon...and a wee bit of ginger too. :)

imageimage


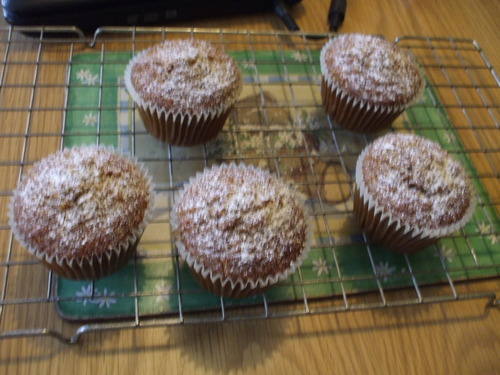
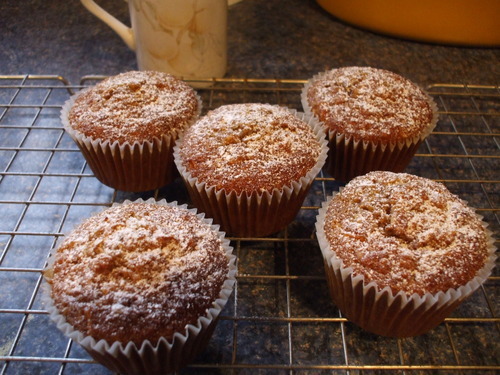
These little guys were rustled up today in my spare time…well we have just had our first (hoorah!) long-awaited glut of carrots from the garden…but I’m afraid I wasn’t permitted to use THEM in the featured cupcakes above, oh no. You see carrots were on offer this week in Aldi, so in the fridge we already had tonnes of these wonderful orange vegetables, and then just today daddy comes in through the back door of the house with his arms full of homegrown ones. Which we are having later on for dinner, btw – so it was up to me to use up those ones in the fridge, some way. Well, what better way than carrot cake? But hang on – these are even better than carrot cake…light scrumptious little cupcakes packed full of grated carrot, ginger, cinnamon..and one of my alltime favourite ingredients…dessicated coconut.
Ingredients
About 2 - 3 carrots, depending on size: you need approx 150 g worth of grated carrot. 
110 g soft light brown sugar
6 tbsp sunflower oil
30 g dessicated coconut 
1 large egg
1/4 tsp bicarbonate of soda
1 tsp ground ginger
1 tsp ground cinnamon
75 g self-raising flour
Pinch of salt
A little icing sugar for dusting
Method
 Line a muffin pan with 6 paper muffin cases. Preheat oven to 170/150c fan.
Sift the flour, bicarbonate, salt and spices into a small bowl.
Beat the egg in a separate bowl with a wooden spoon or electric mixer and add the oil and the sugar. Mix well once more until well blended.
Top and tail the carrots, peel and then coarsely grate them (ganache elf tip: prepare them just before you need them so you don’t need to worry about them going brown or storing in water to prevent that. ;)
Add the carrot, coconut, flour, bicarbonate, spices and salt to the egg mixture and fold in with a large metal spoon.
Carefully fill the muffin cases with the mixture (I usually pour straight from the bowl – but you can use a spoon if you would prefer…but the mixture is quite sloppy so be warned ;) ). Place the tray in the preheated oven and bake for about 20-25minutes, until well risen, light golden brown and springy to the touch.  
Leave in the tin for about 5 mins before removing carefully and placing on a wire rack to cool. dust with icing sugar before serving. They don't keep very long because they are so moist and are low in fat, so try to eat as fresh as possible - bit they should be fine kept in an airtight tin for up to four/five days. :)


Saturday, 6 September 2014

Anyone would think you bought these in the shops. ;)

Muffin cases are often to be found amongst the various other items in the shopping trolley on Friday, when Mam and I make our weekly trip to Tescos. I'm always making cupcakes, it is true to say. Firstly, because they are just so popular with everyone...everybody loves being given a little box of adorable homemade cupcakes, smothered in lots of pretty iceing. And they are (well, sort of, depending on what you put on them I guess. ;) ) so portable too, so handy for being popped in packed lunches or for grabbing out the tin for a quick bite when you're on the go. And of course...cupcake making is just so fun, so rewarding, so enjoyable. I just love the creative side of cupcake-making...there are just so many different varieties, flavours, icings to choose from; and the way in which they are utilised or applied is all in the hands of the baker.  There's a cupcake for every mood and every occasion, I believe. If it's Halloween or Bonfire night...well I most certainly have an excuse to make my little spider cupcakes. Christmas time curtails the making of holly-leaf cupcakes, and in summertime only fresh strawberry-topped cupcakes will do. If I'm feeling a little sluggish, a coffee cupcake ticks all the right boxes; if I can't make up my mind as to whether I want a cupcake or a biccie, flapjack cupcakes help to solve my dilemma somewhat. And of course, if I am feeling in the need of both chocolate and cupcake in one...simarly, these cupcakes are very useful indeed in putting all my problems to bed. ;)image
image
image
image
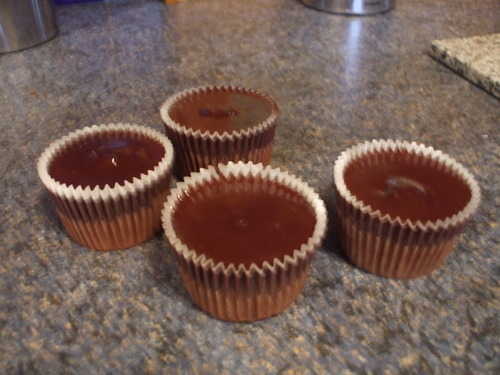
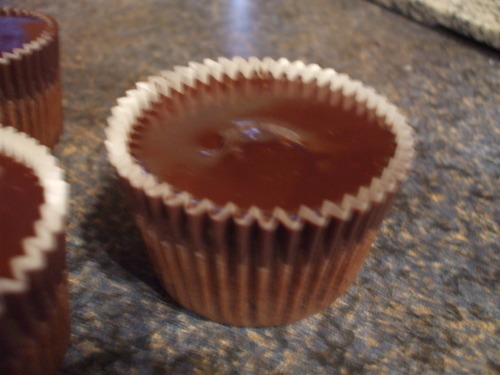
I must admit, I do have qualms about giving these as gifts to people...not because I'm worried that they won't be appreciated, oh no. These cupcakes are everything which a chocolate cupcake-lover could ask for...a light chocolatey sponge WITH lots of chunky chocolate chips; topped with a beautiful smooth silky chocolatey icing. (that being ganache, of course.) Oh no, it's not that. It's just I worry that people might indeed assume I went to the shop to buy a few packs of these, and that I did not make them especially with them in mind. Applying the ganache when it is still runny, you see, means that you have a cupcake with a smooth covering of ganache that looks very pretty, but also meaning that they are often mistaken for shop-bought; when they are anything but. Perhpas the taste would give them away, though. I like to think that my homemade cakes taste much nicer than the shop-bought variety, after all, so one hopes that a difference can be distinguished. ;) Do try to use light muscovado sugar for these, by the way...it lends a lovely caramelly flavour to the finished product.:)
Ingredients
  • 125 g butter/margarine, softened
  • 125 g light muscovado sugar
  • 2 large eggs, beaten
  • 25 g cocoa powder
  • 100 g self-raising flour
  • 250 g plain chocolate
  • 150 ml single cream

  • Preheat oven to 180c/fan 160. Place 14 paper muffin cases in muffin trays.

  • Chop 125g of the plain chocolate into large-sized chips.

  • Beat the butter/margarine in a large bowl until really soft with a wooden spoon or an electric mixer. Add the sugar (see my tip from my triple choc chip cookie recipe about brown sugar and its occasional lumps! :) ) and continue to beat until lighter in colour and fluffy.

  • Beat the eggs lightly in a jug, then add about a quarter to the creamed bbbutter and sugar. Mix well, scraping down the sides of the bowl with a metal spoon or spatula every now and again to ensure it’s all mixed in with not bits sticking to the sides. Continue this process, adding the egg a quarter at a time until it’s all used up.

  • Sift in the cocoa powder and the flour. Replace your mixer/wooden spoon for a large metal spoon and fold the flour and cocoa gently into the mixture. Fold in the chocolate chips next.

  • Spoon the mixture into the paper cases, making sure it is equally distributed amongst them all.

  • Bake for 15-20 minutes, until risen and springy to the touch. Check after 15 minutes, testing by gently pressing the top of one cupcake with your fingertip – it should spring back when you remove your fingertip.
    • Leave the cupcakes in the muffin tray for about 5 minutes before transferring to a wire rack to cool. Leave to cool completely before you make the ganache. (this ganache is made a teency bit differently to the normal method…you just don’t chill it at all before adding to the cupcakes ;)

    • For the ganache: put the cream and the chocolate in a bowl over a pan of simmering water. Allow the chocolate to melt, stirring occasionally. Once the chocolate has melted remove from the heat and stir until smooth and satiny.

    • Pour a little ganache on each cupcake so that each one has a smooth, shiny covering. Refrigerate for a couple of hours until set.

Friday, 29 August 2014

NEO cake. (Neo-rlly as nice as the original...) and Nibble Buns.

I'm a bit of a wanderer when it comes to food shopping - like clothes shopping, I love a good bargain, and I probably waste a good deal of time studying the price labels in the various supermarkets in our local area, trying to work out what's the cheapest per litre/gram, etc; even if the differences are miniscule and choosing the less expensive one only saves me a couple of cents. A bit mad, I know, but having been blogging My Cocoa Stained Apron for a good while, now, I think I am sort of a bit on the crazy side - not in a harmful way as I was when i had the ED, no: more on the benevolent side of things. Not crazy, just crazy for baking, and food, and sweet things: that's me, the Ganache-Elf. Anyway, to get back to what I was saying, I do like to shop around and make the most of the special offers and different bargains which vary from shop to shop. One week I might pop into our nearest supermarket, the little SuperValu down in Mountmellick, intending to only get a bottle of milk and a couple of bananas: and I come out with my arms full of goodies which I may not necessarily need, but just couldn't resist picking up, telling myself Ahh, well, they're unlikely to EVER come down to such an agreeable price EVER again, right? Another week, I might decide to go into Aldi before going into Tesco for our weekly "big shop" (tesco being, in general, where we would do this. The routine is normally to go into Tescos first swiftly followed by Aldi, where we buy alot of our fresh fruit and veg and other stuff which Tesco just don't do quite as well or as cheap as Aldi's.). And end up getting on so well in there we don't actually need to go into Tesco afterwards. And so this week I went to Lidl for a change and saw, in the biscuit section, some biscuits that looked suspiciously like my latest sweet addition: the wonderful, totally scrumptious, and irresistibly cute Oreo...
But they WEREN'T Oreos, of course. They were the Lidl version, entitled, rather unimaginatively on Lidl's part, "Neos". (I find it quite intiruging, to note the to note the general lack of inventiveness by the discount brands when they imitate something. Mysticals instead of Minstrels, for example. And Okey Dokeys for Hunky Dorys.) Now there IS of course a difference in taste and appearance. It would be extremely difficult, after all, to reproduce such a classical biscuit as the Oreo to perfection. Lidl haven't done a bad job, though. And of course there is the added attraction of they're being alot less expensive. Meaning I felt perfectly justified in using plenty of them in the making of my appropriately named Neo Cake. image 
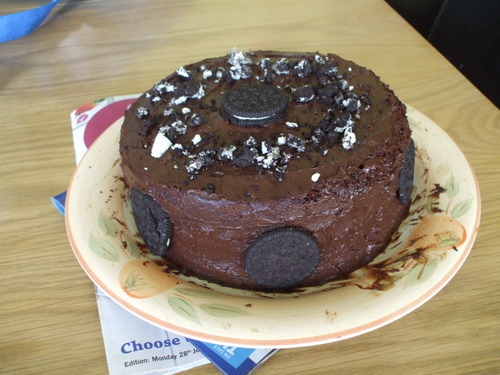
Well to be honest I can't really crow on too much about this cake and its Neo content because apart from sticking the Neos onto the iced (or should that be, ganache-d) cake, and crumbling some on top, there isn't really anything that Neo-ish about the cake itself. though I hope in time to somehow get the actual biscuits into my cakes, and baking...or who knows, even make my own Oreos. This cake, though, probably shouldn't really be called Neo Cake. The chocolate sponge was from my trusty chocolate fudge cake recipe which has never once let me down though I've lost count of the amount of times I've done it. And the icing...I don't think I need to tell you what I used for that. So no, I don't really think my creation could be called a proper Neo Cake...that might be a project for next time I guess, now that I know for certain Neos are completely harmless(as in, a very yummy alternative for the more expensive Oreo.) and that I can use them to my heart's content without feeling guilty in doing so, for after all no one had accused me of cheating in substituting the beloved classical Oreo with a cheaper brand of biscuit.
On making the ganache for the cake, I went a little overboard with the quantities of chocolate and cream, needless to say. Which meant that the remainder of the lovely concoction left in the saucepan had to be utilised in some way or other. Conveniently, a couple of packets of Cadbury Caramel Nibbles (in case you are unfamiliar with them…they are sort of like Giant Buttons with caramel inside them…ahhhhhhhhhh) had materialised in the candy cupboard during the week: buy-one-get-one-free-across-the-whole-cadbury-range offer in Tesco, you are a godsend. And so along with Neo cake, we had…Nibble buns. 
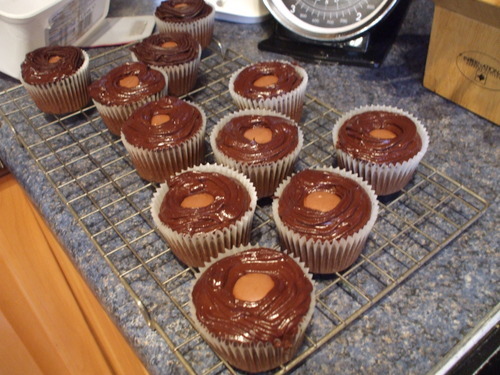
image
As you can see, nothing really too complex about these...a lovely little chocolate cupcake topped with swirls of ganache, with a little caramelly disc at their heart. I applied the caramels when the buns were still warm - I didn't push them completely into the sponge; I sort of only tilted the little chocolate circle at an angle and then inserted it in so that a good bit was still left sticking out. So that the chocolate remained whole, but became seductively soft. But yet, as in the case of Neo cake, there was no actual Nibbles in the actual buns, or icing. Sometimes though it's nice to keep things simple, as there is most certainly beauty in simplicity, I believe. But yes, for next time...I may have to buy a few extra Neos. And Nibbles. In order, of course, to be able to make both sponge and icing Neo-y / Nibbley. And who knows there might even be some left over for Ganache-Elf to nibble on, too.
So here is my recipes for both NEO cake and Nibble Buns. :)
NEO cake. :)
For the cake...
  • 125 g butter/margarine, softened
  • 285 g caster sugar
  • 3 large eggs, beaten
  • 1 tsp baking powder
  • 3 tbsp cocoa powder
  • 170 g self-raising flour
  • 2 tbsp full-fat milk
  • 1 tbsp + 1 tsp cream

For the ganache (yes, you guessed correctly. ;) : 225 g plain chocolate and 250 ml single/double cream.
And also, of course...a box of Neos to decorate. :)
  • First make the cake. Grease a couple of 20 cm sandwich tins and line their bases with baking paper. Preheat the oven to 180c/fan 160c.
  • Mix the sifted cocoa powder with 4-5 tbsp hot water in a big bowl until you have a nice chocolatey paste. Add all the other cake ingredients and beat well with an electric mixer for about three minutes until smooth and well-mixed.  After two minutes, stop the mixer and scrape down the sides of the bowl with a metal spoon or spatula before mixing for the remaining minute.
  • divide the batter between the two cake tins and smooth the surfaces of the cakes with the back of a metal spoon. Bake for 20-25 minutes until well-risen and springy to the touch. Gently press the top of a sponge to see if its cooked or not - if it is, the sponge should spring back; there shouldn't be an indentation when you take away your fingertip. If there is bake for another 2 minutes and try again. 
  • Once they are cooked, leave them sitting in the tins for 2-3 minutes before turning onto a wire rack to cool. Wait another minute and then remove the paper carefully from each cake. Allow the cakes to cool completely before you ice and decorate them. 
  • Next make the ganache by melting the 225g plain chocolate with 250 ml single cream, on a very low heat in a small saucepan. Stir until smooth and then refrigerate for about 1 ½ - 2 hours, checking after 1 ½ hours…you don’t want it very hard, just a nice spreadable consistency.
  • Spread a generous layer of ganache on top of one of the cakes and then sandwich the two of them together. Spread the reaming ganache on the top and around the sides of the cake, swirling with a palette knife to get a pretty decorative effect.
  • Now for a bit of Neo-ing. Apply whole ones, crush some of them and sprinkle on top, break them in half and stick them in the top of the cake pointing upwards... again it is really up to you. :)
Now for the buns, the ganache quantity is basically the same as the cake. Of course add a bag of Nibbles to your shopping list though. I'm sure everyone has their own chocolate cupcake recipe and that they don't need me to blah on about my own one. But anyway...this cupcake recipe is the one I use all the time and it is a very nice basic one and so straightforward and yummy :) So to make 12 cupcakes, you need:
125g butter/margarine, softened
150 g caster sugar
2 tbsp cocoa powder
2 large eggs
110 g self-raising flour
1 tbsp full-fat milk/cream
The way you make these is very similar to the chocolate cake method really. Preheat oven to 180c/fan 160c; line a muffin pan with 12 paper muffin cases. As with the cake, blend the sifted cocoa powder with 3 tbsp hot water in a bowl to get a thick chocolatey paste. Then add the rest of the bun ingredients and give it one nice big beat with an electric mixer until smooth and well-blended; scraping down the sides of the bowl with a spatula after two minutes as before. the batter should be of a nice dropping consistency: scoop some of it onto a spoon and then let it drop back into the bowl to check this: it should slide or drop down easily enough and not be too thick. Add a little more milk/cream if it isn't dropping off your spoon.
Divide the mixture equally amongst the 12 paper cases. Bake for 15-20 minutes until well-risen and springy to the touch: like the cake, if you press the top of a bun lightly with a fingertip, it should spring back and there should be no indentation left. Remove from oven once they are cooked and leave in the muffin pan for about 3 – 5 mins, then transfer to a wire rack to cool.
If you would like your caramels sort of semi-melted like mine were, then push a Nibble gently into the top of each bun – don’t push it right in; leave a good half still sticking out and tilted at an angle so that when you pipe the ganache around it the Nibble will still be visible.
Make the ganache while the cupcakes are cooling and ensure it is chilled enough for piping.
Pipe generous  swirls of ganache on top of the cupcakes once they are completely cold; leaving a nice little hollow in the very centre so you can just see the Nibble peeping out. You can put them in the fridge to firm up the ganache a bit, or if you prefer you can eat them with the ganache still soft and tender...personally, this is the way I like them the best. Though microwaving a chilled Nibble bun for about 20 seconds in the microwave so that the ganache melts and the Nibble becomes all molten too...that makes a very naughty but nice little nibble indeed. :)