At first glance it might seem that I am just a happy, normal girl who loves to bake and walk her dog. However, I have suffered with an eating disorder since I was 13. It was only in May 2014 when I realised that this Voice in my head was slowly but surely trying to kill me. And so began the long, hard, and painful journey which is recovery...

I want My Cocoa Stained Apron to be a special place...a place for reflection, memories, shared stories...and of course a little bit of cocoa-staining ;) Recovery might be the hardest thing you ever choose to do in this life. But it is also the bravest and best decision you will ever make.:)

Showing posts with label jam. Show all posts

Wednesday, 27 May 2015

Sultana sponge!! :)

APOLOGIES everyody I haven't done a recipe post for ages..... :o we're going all classic and nostalgic today...remember that fluffy, delicately sweet sponge dripping with some sort of sticky jam that your granny used to make? Last weekend I rustled up my own little version of one, adding some plump sultanas after the mixing stage. this cake is so comfortingly simple to make, and you can whip it up in no time at all, and it's highly likely you will have most of the ingredients in already. Great if you have had a jam-packed day as the Ganache-Elf often does! ;)

Ingredients
  • 225 g margarine/butter, softened
  • 225 g caster sugar
  • 4 large eggs
  • 225 g self-raising flour
  • A few drops of milk if needed
  • 2 tsp baking powder
  • 100g sultanas
  • About 6-8 tbsp jam (I used raspberry)
  • Granulated or icing sugar for dusting 
Method
  • Preheat oven to 180c/fan 160c. Grease 2 sandwich tins that are 20 cm in diameter. Line the bases with baking paper.
  • Put the margarine, sugar, eggs, flour and baking powder and beat well with an electric mixer for about 3 minutes until smooth and well-blended. After two minutes pause the mixer and scrape down the sides of the bowl with a metal spoon or a spatula so it’s all nicely incorporated.
  • Spoon up a little of the mixture and let it fall back into the bowl to check that it is of a nice dropping consistency – it should slide easily back into the bowl. Add a few drops of milk if required. Foldin the sultanas with a large metal spoon.
  • Divide the mixture equally amongst the two tins and smooth the surfaces with the back of a spoon or a palette knife.
  • Bake for about 25 minutes until the sponges are well-risen and springy to the touch when pressed gently with a fingertip: if a slight indentation is left when you remove your fingertip, then bake for another few minutes or so before testing again.
  • Remove from the oven and leave in the tins for about three minutes before turning out onto a wire rack. Wait another minute, then gently peel off the baking paper. Leave to cool completely.
  • When the sponges are completely cold, spread a generous layer of jam across the top of one of the sponges before placing the other one on top. Sprinkle with a little icing sugar or granulated sugar.

Monday, 27 April 2015

Jammy Dodgers!! :)

A childhood favourite of mine!!! I LOVE jammy dodgers and they always remind me of picnics when Iwas little <3 I dedicate this recipe to a special friend of mine who also shares my love for these delightful little biccies...she showed me a pic of her own and OMG they were exquisite!! Needless to say, mine didn't look quite so professional ;) but there was no compromise on taste though..they were as yummy as I had intended ;)


Ingredients

  • 125 g butter, diced
  • 160 g plain flour
  • Good pinch of salt
  • 100g caster sugar
  • 1 tsp vanilla extract
  • 1large egg yolk
  • About half a pot of any jam of your choice – raspberry is the traditional filling and is quite possibly my ultimate favourite ;) but you could try using strawberry, apricot, blackcurrant, blackberry…whichever takes your fancy ;) and for extra prettiness why not use a number of different coloured jams? One point of note, though: smoother jams so generally work better than chunky ones in these biccies!! ;)

Method 
  • Sieve the flour and salt into a big bbowl and stir in the sugar.
  • Add the diced butter and rub lightly in, using your fingertips, until the mixture ressembbles fine breadcrumbs.
  • Make a little well in the centre of the mixture, and then add the egg yolk, pouring the teaspoon of vanilla extract on tip of the egg yolk.
  • Gently Draw the flour around the edges of your "well" into the centre where the yolk is. Mix very gently with your hands, until a soft, moist dough is formed. 
  • Wrap the ball of dough tightly in clingfilm and then pop it in the fridge for a minimum of half and hour.
  • Preheat the oven to 170c/fan 150c. Line three trays (or two large) with bbaking paper.
  • Take the dough out the fridge and remove the clingfilm. Cut into two equal sized pieces. Roll out one of the halves, using a rolling pin, between two pieces greaseproof paper, which should both be dusted very lightly with a sprinkling of flour. You should roll it into a neat little oval or rectangle, and the dough should be a thickness of about 5mm.
  • Use a 7 cm round cutter, lightly dusted with flour, to stamp out little circles of dough. Gather up the scraps of leftover dough and then roll them out again with the other unrolled half ball of dough. Cut out more circles using the same cutter. In total, I got about 20 little circles. 
  • Place 10 of the circles of dough on the baking trays.
  • Now you need to cut smaller holes in the centre of the other 10 circles!! Of course if you have a very small cutter (about 2cm  or there abouts in diameter), this is definitely the best thing sto use. I on the other hand am not so fortunate to own such a marvellous baking utensil;) ...so what did I use instead..? The plastic top of a 1 l milk cardboard carton , dipped in flour!! ;)
  • Place the "holy" :p cirles on the baking trays too, allowing room between all circles to allow for spreading. ake for 10-15 minutes. When cooked, they should be a very pale golden. The shortbready biscuits will still be slightly soft at first - not too hard or dark in colour - but they will harden as they cool. 
  • After about 15 minutes transfer the biccies until a wire rack to cool.
  • When the biscuits are cool, (or this can still be done when they are slightly warm, just not too near their removal from the oven as at that point the biscuits will be still quite delicate ) spread a generous dessert spoonful of jam over the top of each on of the shortbread rounds(the ones WITHOUT the little holes at their centre). 
  • Sandwich each one of the jam-covered rounds with the remaining shortbread circles (the ones with the little hole at their centre). Sprinkle with a little icing sugar if you like. :) xxx


Sunday, 14 September 2014

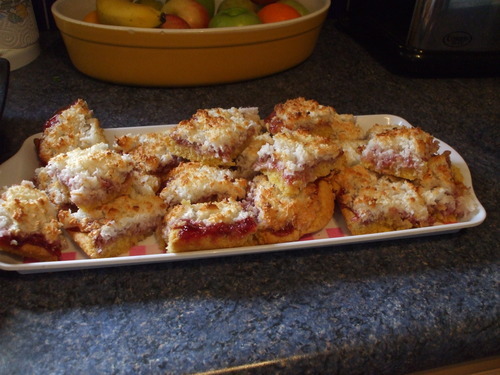
very sticky coconut slices...

image
imageimage

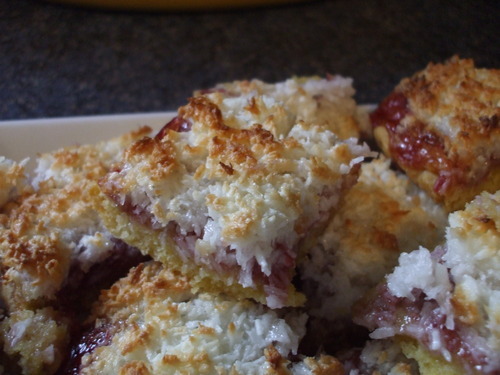
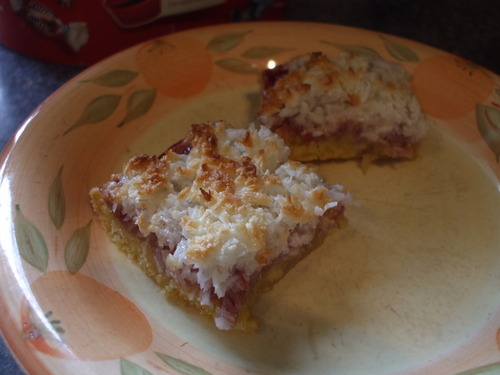
These are surely, one of those bakes that really, really have stood the test of time...they are so classic but oh so scrumptious, and have lost absolutely NONE of the appeal that they had years ago I say. There is most certainly a good degree of stickiness involved, eating these. What with that soft buttery pastry, the gorgeously sweet raspberry jam, and that divine layer of dessicated coconut to top it all, you might well need a napkin - or two if you're like me and are inclined to dive back in that tin for more. ;)
I usually cut mine into roughly about 20 slices - 5 cuts across the cooked cake lengthways, and then 4 widthways - or 16 squares if I feel there is a need for them to be larger than usual. Though of course you can cut them as little or as large as you like. :)
Ingredients
  • 2 large eggs and 1 large egg white. (But don't discard the yolk...they are useful for so many things. Put the spare one in a small bowl and add a tablespoon of water. It will keep in the fridge for a few days. See my list of egg yolk recipes (forthcoming ;) ) for ways in which egg yolks can be used. It might be of use to you if you make meringues etc and have a load of egg yolks leftover.
  • 150 caster sugar
  • 100 g butter, diced
  • 150 g dessicated coconut
  • About 8-9 generous tbsp raspberry jam (or blackcurrant and strawberry might be nice...but raspberry is definitely my favourite for these. :) 
  • 200 g self-raising flour
  • 2 tbsp very cold water
Method
  • Grease a baking tin/roasting tray (a rectangular one is best: mine is about 28 cm x 18 cm.) and line with baking paper as the slices are VERY sticky as already mentioned. ;) Preheat oven to 180c/160 c fan.
  • For the pastry base: Sift the flour into a bowl and add the diced butter. Rub in very lightly using your fingertips until the mixture resembles fine breadcrumbs, with no lumps of fat.
  • Lightly stir in 50 g of caster sugar and make a well in the centre of this dry mixture.
  • Separate the 2 whole eggs, adding the whites to the 1 extra one. Be very careful when you are separating that no trace of egg yolk leaks into the whites.:) (Ganache-Elf tip. I have never been able to separate eggs the way you see the pros do it on the telly. And I am sure most of you have your own way of separating eggs which is far better and more effective than mine. But anyway JUST in case you don't...I like to crack one egg into a small bowl (cracking its shell by tapping it hard on the edge of the bowl). Next, I place an egg cup over the egg yolk and then tip the bowl at an angle over another larger bowl, so that the egg white separates easily from the yolk and slides into the bigger bowl. Then the egg yolk is put into another separate bowl (I know...this way probably does create alot of washing up, but anyway... ;) ) before I move on to separate the next one.
  • Slide two of the egg yolks into the well in the centre of the flour, and then add 2 tbsp very cold water. Mix with a flat bladed knife at first until the mixture starts to come together, then use your hands to gather it together into a soft ball. If it feels a little dry, add a few teaspoons of water. The dough should feel soft and slightly moist, though not overly sticky. 
  • Press the dough out evenly into the baking tin with your hands. Pop it in the fridge to rest for a little bit while you make the coconut topping.
  • For the coconut topping, whip the 3 egg whites in a clean bowl to stiff peaks. If you tip the bowl slightly, the whipped whites should reamin in the bowl, not moving - nothing should run out! Fold in the dessicated coconut and the remaining 100 g sugar. 
  • Take the pastry out of the fridge and generously spread over the jam. Then spread over the coconut topping to evenly cover the jam layer.
  • Bake for 15 - 20 minutes. The coconut should be beginning to turn golden, but should not be too dark. Remove from the oven and leave to cool in the tin.
  • Cut into squares/rectangles using a very sharp knife when cold. They are gorg with a cup of tea, or deliciously decadent splodged with custard for a cheeky pud. ;)


Tuesday, 2 September 2014

My apron is purple-stained. :)

image
image
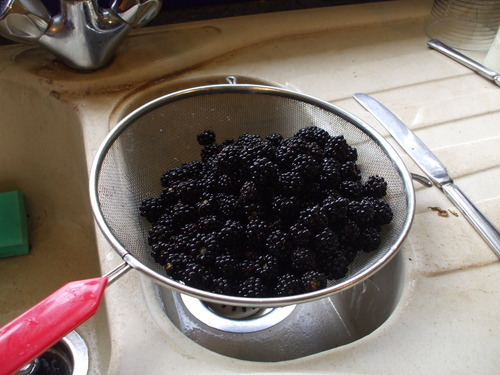
Apparently it's a bad year for fruit over here in Ireland. I am in two minds about this. For sure, it is a bad year for blackcurrants; as testified by my last hopeful visit to my neighbour's garden last week. Oh what a sorry, sorry sight greeted my eyes! Those lovely little bushes which, this time last year, had been absolutely laden with the little purpley fruits were scarggley and bare! Such a catastrophe! So yes, as I was saying, perhaps not such a good year for blackcurrants. But there's another black-coloured berry that is now literally taking over the hedgegrows along my lane. Yes, it's the ever-reliable, seemingly indestructible, but undeniably awesome blackberry. Has there ever been a summer in Ireland which can't categoricaly be classified as a "good" year for the blackberry? Well...not for the fifteen years I've been here, anyway. It may rain, it may hail, it might feel as if an Arctic air mass has shrouded the entire country and that buying that new pair of shades and a bikini was possibly the most impulsive and stupid decision you have ever ever made...but never mind all that; the blackberry seems to survive it all. Which is great news for cooks and jam-makers like me, of course, who, having become increasingly exasperated by the poor yield of other fruits, find much comfort, solace and yummy reassurance in the blackberry's wonderful ability to survive any kind of weather...
Now the thing is I do get rather carried away while I am picking blackberries and I end up with tubs and tubs of tubs of these gorgeous little fruits. And there's only so many apple and blackberry crumbles you can make before complaints arise about the lack of variety being offered for pudding all of a sudden...don't get me wrong, my family adore it, but variety is important in the kitchen of Ganache-Elf, and I don't approve too highly of the idea of there being nothing else being produced in the dessert line except this beloved classic. Blackberry and apple loaf cake, and apple and blackberry pie, have been made too on various occasions...but no matter how many blackberry infused cakes I make, I just always seem to be left with gram upon gram of juicy berriness which I know must be utilised for SOMETHING at all costs...
Well of course the obvious solution is to make jam...but I have had a few problems with blackberry jam in the past so I did hesitate before finally deciding to give it another try. Unlike my famous blackcurrant jam, the blackberry jam I have ever endeavoured to make has always either been too runny, too set, or just tasted...well, odd. But I made two pots of blackberry jam as an experiment the other day; and it does actually look quite promising. It's set anyway, and it's not rockhard either. I wasn't intending on opening it to see what it tasted like until I had finished off my opened jar of blackcurrant. But my curiousity as to whether it was actually edible, whether it actually tasted, well, palatable...it got the better of me. And.....(drum roll.....)....
Yes, I think it is actually berry good.  ;)
Ok no more silly jokes and more about what we did to make a successful pot of blackberry jam.
image

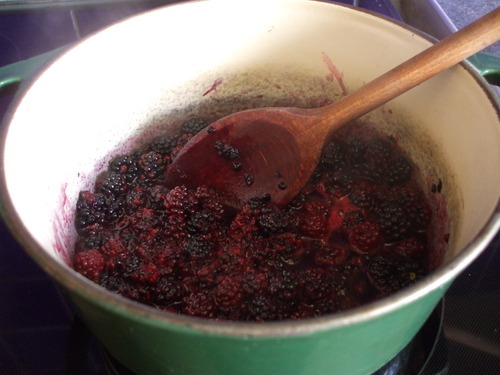
Well, I was being cautious so I went for small amounts here. I had about 450 g of fresh plumpuous blackberries, which I bunged in my big green saucepan with two tablespoons of water and a tablespoon of lemon juice. The lemon I used was going mouldy at one end, and since sugar not exactly an expensive ingredient, I felt secure in the knowledge that if my jam did turn out to be a jamn-bloody mess (sorry! sorry! couldn't resist ;) ), well at least it wasn't going to be costing my pocket too much.:)
I then brought my berries to the boil on a medium heat, stirring...well, not all of the time, but a good percentage of the time, anyway - just in case. I know jam isn't as notorious for sticking to the pan as caramel and such like, but stirring is recommended and it allows you of course to keep a good eye on it as it comes to the boil. Once boiling, I lowered the heat to low-medium and simmered for about 15 minutes, no more. The memory of my rock-hard blackberry jam that I made last year still haunts me to this very day....
Now for the sugar. In the past I always kept the ratio of sugar to blackberries equal, but on this occasion I added just a wee bit more sugar than 450 g. A little bit of extra sweetness wouldn't do any harm, I was sure. ;)
Before adding the sugar to the pan, I took the pan off the heat and then tipped it in - again, being cautious I suppose, as sugar does sometimes stick and burn, and I'm quite attached to this particular saucepan - it's another one of my Mam's; and quite a relic in itself. I quickly stirred it all in and then placed over the heat once more, brought back to the boil, and simmered for 10 minutes. And now for the moment of truth...was my jam set? 
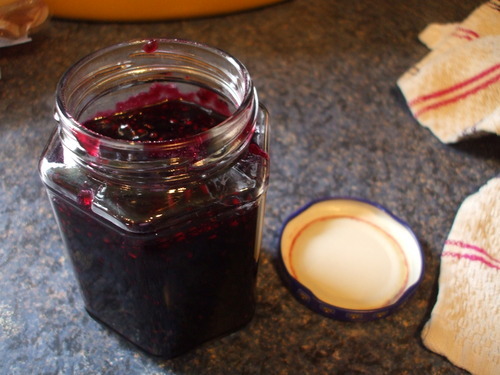
Well, a little wrinkle appeared on my saucer, just as I had prayed for...so yes, I suppose you could say my day was jam-packed with success after all. ;) So perhaps tomorrow...I might treat myself to one of my scones out the freezer, spread thickly with plenty of my homemade blackberry jam. I might as well indulge myself after all. The hedges are yet still laden with bunch upon bunch of black glossy berries; so I suspect that this batch of blackberry jam might be the first of many. :)

Wednesday, 27 August 2014

summer's first batch of jam...

It's that time of year again my friends...
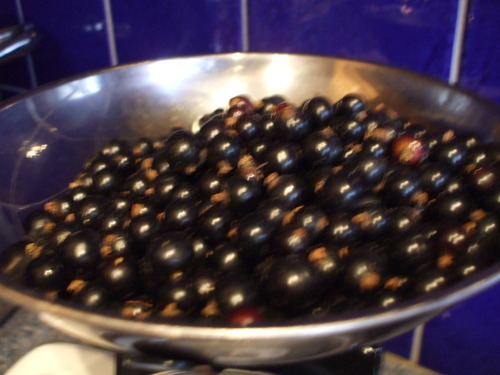
The sun is shining, the birds are singing...but lo and behold, there is another noise that one only really hears at this time of the year. It's the sound of Ganache-Elf picking blackcurrants. Yep, I freely admit I am no singer - but when it comes to berry-picking I just can't help myself. There is just something so, so rewarding about picking berries. Even if after a few minutes your back starts to ache and your head itches because of those pesky midges. And so while I am happily plucking and picking away and getting my hands all purple with berry juice, I often just can't resist bursting into song. You see not only is berry-picking a joy in itself...it becomes even more of a joy when you have a very special purpose in mind for those berries.
image
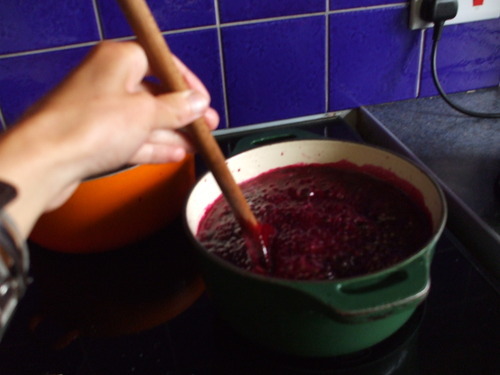
I remember it as if it were yesterday...the day I made my first batch of jam. It wasn't blackcurrant though believe it or not. My next door neighbour brought me round a huge glut of homegrown raspberries which he had been given as a gift, but didn't really want. Now I can easily eat raspberries, and strawberries for that matter, raw. I love them and could easily eat them like sweets, handful by greedy handful. I sampled a few of the plumpous fruits once my neighbour had assured me for the hundredth time he did not want them. Immediately, a burst of fruity sweet deliciousness burst forth upon my tongue. They were amazing. But...there were so many of them. And some were already going mommy and overripe. How on earth was I going eat all of these? And then...I had a brainwave. I hastily reached for my apron and wooden spoon...
image
And so that's how I entered into the wonderful world of jam-making. Once you've tasted homemade jam, you will want to taste it again, believe me: shopbought just can't match that fruity, sweet, irresistible flavour. I got about four pots of jam from that luscious crop of juicy raspberries. But I didn't maintain that number for long, of course. 
Unfortunately, I haven't been able to make raspberry jam since then. If raspberries were cheap and easy to get hold of, of course, then I would be making it by the bucketful: but in Ireland, unfortunately, this is not the case, and if one were to go out and buy the required quantity of raspberries for a few batches of jam, well, let's just say the shopping bill wouldn't come out exactly cheap, anyway. But...don't worry, all was not lost. Unbeknownst to me, my neighbour has had, for a few years, a load of berry bushes growing rather haphazardly in his back garden...not raspberries or strawberries, no, but blueberries, gooseberries, and, best of all...blackcurrants.
Now raw blackcurrants are nothing special, it is true...but, when made correctly with the correct quantity of sugar they make the most beautiful, beautiful jam. On lamenting the fact that I was unable to commence with any more jam production due to lack of suitable fruit, my wonderful neighbour thoughtfully enlightened me on his own berry bushes, telling me he was uncertain as to whether I could utilise any of those for further jam making. My heart skipped a beat. Blackcurrant jam...now that would be something. Next to raspberry, it is most definitely my favourite flavour of jam...and absolutely nothing could possibly rival it for spreading on toast, dolloping on rice pudding, or smothering lavishly over scones, teacakes, buns, and such like.
And so what started off as an experimental endeavour in order to try and use up a glut of extra fruit developed into a yearly ritual for Ganache-Elf. Yes, I did indeed hurry out to pick those blackcurrants - a process which in itself cannot be completed in a hurry, but, as I've outlined above, is for me a pleasure rather than a chore, despite the scratchiness and the acheing and the risk of embarassing oneself due to the poor quality of one's own singing. Anyway, to return to the point, I picked the berries at my lesiure, returned to the kitchen, and set about making my first batch of blackcurrant jam...and yes, since that summer - I'd say it was abbout three years ago, at a guess - I have been making blackcurrant jam every year. And have been blissfully happy in doing so; as I have been equally as satisfied with the results.
image
Ok ok ok.....if you are like, really really houseproud (or sorry, perhaps kitchen proud would be a more suitable term here.) perhaps jam-making is not for you. It's soooo messy, well blackcurrant jam is anyway. As you can see from the pic above. It spits when it's cooking for one thing, splattering the walls (and you, quite possibly, so please, do wear an apron as the stains are annoyingly difficult to get rid off once they're there) and the hob and anything else that happens to be in firing range as it does so. And when it comes to pouring into the jars...well, I find it easier to transfer the mixture into a jug first, then into the sterilised jars...but still, all in all it still is pretty messy and by the time you're done chances are your kitchen surfaces will look as if a three-year-old was attempting to paint them purple or something. 
But please, please, please, if you can, don't let thoughts of sticky treacley messiness put you off making your own blackcurrant jam. Honestly, it really is worth all that scrubbing and cleaning and fairy washing-up liquid that will be required afterwards...and not only that, jam-making is so fun. There's something wonderfully theraputic about it all - apart from actually picking the berries themselves, the stirring and the labelling of the jars and so forth. jam makes great gifts, too - along with cakes, a little pot of my homemade jam always makes a very welcome gift amongst my friends and family. It's funny, but even though of course I can only make it during the summer when the berries make themselves available, I've become almost as "famous" for my jam as I am for my baking. And, just like baking...jam-making need not remain an unfathomable mystery to you. And as the jam-maker, you and only you can reserve the right to clean the saucepan and measuring jug once your jam is jarred and safely sealed...oh yes, there is something extremely theraputic about jam-making, indeed. ;)
Anyway, I think it is only right I share with you my recipe for my favourite ever jam :) it makes about 4 small pots, but can be easilt doubled or tripled if you are lucky enough to have that many berries at your disposal. 
  • 450 g blackcurrants
  • 1 kg granulated sugar
  • 1 pint/300 ml (or a teency bit less...,it's no exact science ;)water.
First wash your berries and remove any stalks. Do try when you are picking the berries to pluck them off the bushes without taking the stalks off too, because then it makes it very tedious and irritating to have to pick them off at a later stage. Pop them into a big saucepan with the pint of water and then bring to the boil over a medium heat, stirring well every now and again - you don't have to do it continuously, but don't leave it unattended, that said. I usually multi-task when I'm jam-making - I might be icing buns or something, say, while at the same time I can still stop to tend to the jam. Put a little saucer in the freezer.
When the berries are boiling, turn down the heat to low-medium and simmer for half an hour, stirring every now and again as before. Once the 30 mins are up add the sugar, bring to the boil once more, and simmer for another 10 minutes. 
Now for the setting test. I am sure jam-makers are well familiar with this, but just in case you aren't let me just briefly explain. That little saucer you put in the freezer is not only a useful way of cooling down a jam sample so you can taste it for yourself you see. ;p) no, this is what is going to help you to determine whether your jam is set or not. Put a small blob of jam on this saucer and then wait a minute before pushing it gently with your finger. Can you see a little "wrinkle" on the surface of the jam blob as you push it? If you can, this means your jam is ready! :)But if not...simmer it again for a few minutes and then try again.
And then once you're happy enough...pour the jam into a big measuring jug (the messy part ;) ), and then pour into the sterilised jars (I sterilise my jars by washing them in really hot soapy water, drying them and then heating them for about 20 minutes in the oven at 120c.) They don't need to go into the fridge until they're opened. One they're opened, the jam does keep in the fridge in its jar for a good few weeks, so don't worry too much about that. But once opened it never lasts that long anyway. ;)