At first glance it might seem that I am just a happy, normal girl who loves to bake and walk her dog. However, I have suffered with an eating disorder since I was 13. It was only in May 2014 when I realised that this Voice in my head was slowly but surely trying to kill me. And so began the long, hard, and painful journey which is recovery...

I want My Cocoa Stained Apron to be a special place...a place for reflection, memories, shared stories...and of course a little bit of cocoa-staining ;) Recovery might be the hardest thing you ever choose to do in this life. But it is also the bravest and best decision you will ever make.:)

Showing posts with label cookie. Show all posts

Monday, 30 March 2015

Chocolate oat cookies!! :)

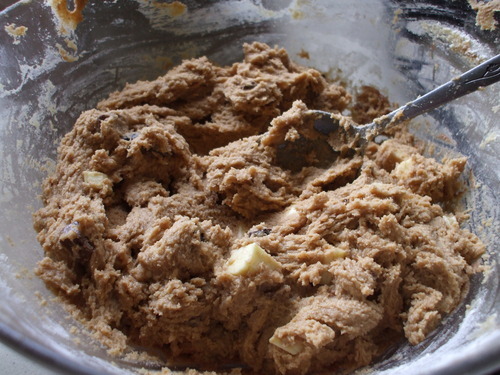
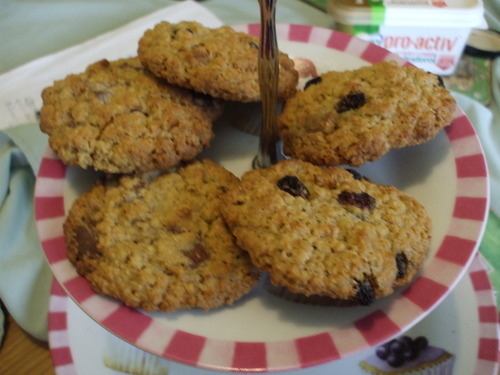
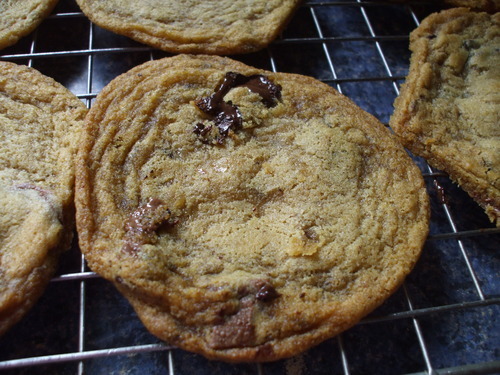
As you all know I am somewhat partial to the odd oaty cookie with my hot choc...but of course I am equally a fan of the classic chocolate chip cookie with its thick studs of plain, milk or white chocolate, and the chewy, scrumptiously sweet cookie dough. And so, on this wet, windy March day here in Ireland, I had plenty of time to bbe as experimental with my baking as I liked, and so my mission hereby was, of course, to see if i could unite both oaty and chocolate chip cookie in one delightful little biccie. The resulting cookies still had the pleasing crunchiness of my favourite oaty treats, but were made ever the more irresistible by the addition of an assortment of chocolate chips., and the flavouring of the cookie dough itself with just a wee bit of melted dark choc... ;)


And need I mention these little bites accompany tea/coffee/hot choc ;) all too well??? <3 xxxx

Ingredients (for about 20 yummy cookies! :) <3


  • 75 g plain chocolate
  • 1 large egg, beaten
  • 125 g butter, softened
  • 125 g light muscovado sugar
  • 100 g porridge oats
  • 1 tsp vanilla extract
  • 125 g plain flour
  • 1/2 tsp baking powder
  • 1 tbsp cocoa powder
  • 250 g plain chocolate, chopped into small chunks or chips.


Method :)
  • Preheat the oven to 180c/160c fan. Line two or three baking trays with baking paper. 
  • Soften the butter in a bowl with an electric mixer or a wooden spoon until very soft. Tip in the sugar and beat until light and fluffy.
  • In a jug, beat the egg lightly with a fork. Add  the vanilla to the egg and mix well.
  • Gradually, bit by little bit, add the beaten egg into the creamed mixture, scraping down the sides of the bowl every now and again, until it is all nicely incorporated.
  • Place the 75 g plain chocolate in a heatproof bowl set over a pan of simmering water. Allow to melt, stirring occasionally. Remove from the heat once melted and let it cool for a few minutes. 
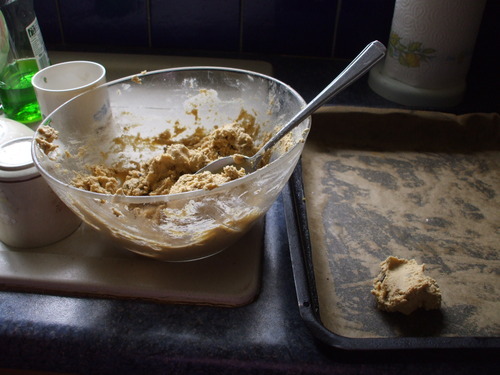
  • Sift together the flour, baking powder and cocoa. Gently fold this into the creamed mixture along with the oats and melted chocolate. Use a large metal spoon to do this, twirling it up, across and down through the cookie dough in a figure-or-eight pattern. Finally, mix in the chocolate chunks or chips.
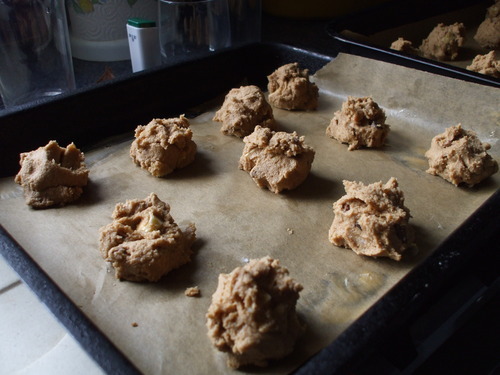
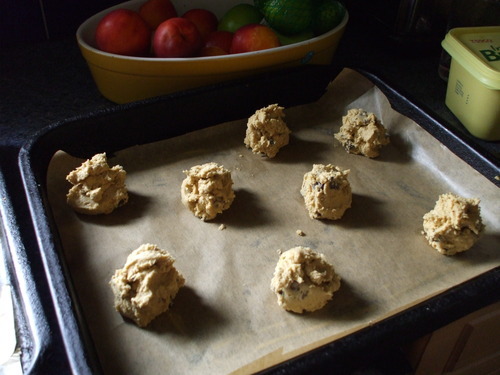
  • Now you need to transfer balls of the cookie dough to the prepared trays. Scoop up a dessertspoonful of cookie dough and place on a tray, shaping it into a rough ball shape using your fingers or the spoon. Repeat with the rest of the cookie dough until it is all used up. Make sure the balls are spaced well apart to allow room for spreading.
  • Bake the cookies for 12-15 minutes.  They should still be slightly soft, not hard. 
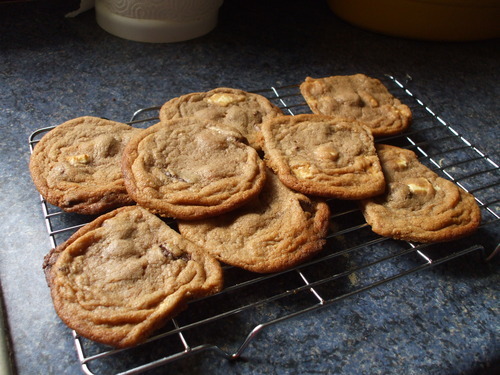
  • Leave them on the trays for about 5 minutes once you've removed them from the oven, and then carefully transfer them to a wire rack with a metal spatula. And of course, any remaining cookies (if any!!! ;) can be stored in an airtight tin for up to a week. :) xxxx

Tuesday, 11 November 2014

Healthy sunflower oat cookies. :)

ATTENTION ATTENTION ATTENTION. Major changes have occurred in the bakery of ganache-Elf this week. The reason for this being...?
My Daddy (being one of the main consumers of my baked goodies. ;) ) has just got his blood test results from a month ago. And unfrotunately, his cholesterol was a little too high for our liking...which means, yes, it brings a hard lump to my throat to say it...sniff, sniff...there are to be no more cakes. No more buns or cupcakes. for Daddy, that is. All together: awwwwww.
 BUT. All is not lost!!!
 I CAN still make Daddy nie things for his lunchbox etc. They just have to be...well, healthy. And kind to the heart <3
 So yes, this is my new mission (amongst other things, of course. ;) ) I am going to put all my heart into making heart-healthy things for Daddy dearest.

And so I started off with these delightful little biccies yesterday. ;) I've called them sunflower oat cookies though please don't be disappointed that they don't, appearance wise, look anything like those gorgeous golden blooms of high summer. ut they are golden in colour, though!! Haha. No, the reason why I christened them thus is that I made them with Tesco Healthy Living Sunflower Spread instead of butter.
 And they have raisins in them of course, and oats. Two things which I feel safe enough in classifying as healthy. But the best thing abbout these is that even though they are that wee bit better for you, they are, trust me, still undeniably scrumptious. I had one with my hot choc yesterday and I couldn't resist going back for seconds. The recipe yields roughly about 25 cookies, you see, so I wasn't too worried about there not being enough left for Daddy's coffee breaks during the week.:)


Ingredients:)

  • 140 g sunflower spread (I use Tesco, but I am sure that other shops do their own version, too, and then of course there is Flora spread too, an excellent equivelent. Just make sure it says "suitable for baking" on the tub as some of these healthy-living spreads have a high percentage of water, which will yield disappointing results.)
  • 50 g demerara sugar (the bigger granules of this brown sugar give a lovely crunch to the cookies. :)
  • 100 g light brown soft sugar.
  • 75 g caster sugar 
  • 1 tsp vanilla essence/extract
  • 1 large egg
  • 2 tbsp water
  • 100 g self-raising flour
  • 75 g raisins/sultanas
  • 250 g rolled oats
Method :)
  • Preheat the oven to 180c/160c fan. Line two big baking trays with baking paper. 
  • Soften the sunflower spread in a bowl with an electric mixer or a wooden spoon until very soft. Tip in the sugars and beat until light and fluffy.
  • In a jug, beat the egg lightly with a fork. Add the water and the vanilla to the egg and mix well.
  • Gradually, bit by little bit, add the beaten egg into the creamed mixture, scraping down the sides of the bowl every now and again, until it is all nicely incorporated.
  • Sift in the flour and the salt. Add the oats and the sultanas/raisins, and then mix all of it together with a large metal spoon until you have a sticky, oaty cookie dough. :)
  • Now you need to transfer balls of the cookie dough to the prepared trays. Scoop up a dessertspoonful of cookie dough and then roll it into a ball in the palm of your hand. Place them on the trays, spacing them well apart to allow for spreading. 
  • Bake the cookies for 12-15 minutes. They should be pale golden and still slightly soft in the centre...don't let them get too brown. ;) burnt oats don't taste too good. :( And the gorgeous chewiness of the little biccies augments their charm ever further. :)
  • Leave them on the trays for about 5 minutes once you've removed them from the oven, and then carefully transfer them to a wire rack with a metal spatula.
  • Leave them to cool completely or eat warm..just be careful if you go for the latter option as they will be a little fragile at first. ;) Now who said healthy biscuits taste like cardboard which has been baked? (to quote my brother. ;) ) Just give these a try and see for yourself. ;)


Monday, 3 November 2014

Chocolate-studded cookies.:)


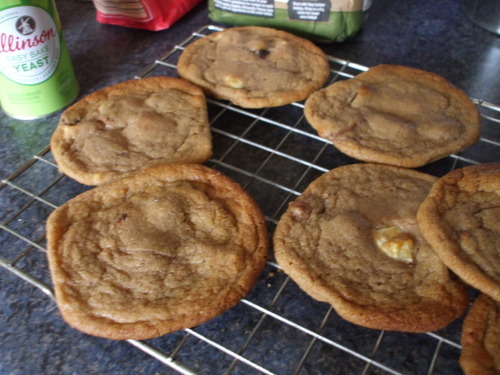
I know these might look suspiciously similar to my Crazily Chocolatey double choc chip cookies (if you haven't baked them yet then please please pleaseeee consider doing so...check them out HERE if you feel so inclined ;) ), but no, I can assure you that these are a totally different cookie altogther. For starters, the cookie dough itself is entirely different. It is much sweeter as yes, there is a very cheeky amount of gorgeous light brown soft sugar in this recipe. (I adore this type of sugar...it just lends such a delicate caramelly flavour to the completed product. Almost always before I mix it with the other ingredients when I bake with it, I sift through the sugar grains with my fingers, primarily to break up any hard little clumps you occasionally get in it when it's been densely packed...and also to give myself some sort of excuse to inhale that fabulous sugary aroma. :) They aren't quite as dark as the other cookies, either, as there is less melted chocolate in the cookie dough. But rest assured, all ye chocaholics (yes I am including myself in this category, rest assured...) for this is undoubtedly very much made up for in the very, very, very generous amount of chocolate chips - some of which are reserved for studding in the tops of the cookies before baking. So what we end up with is a scrumptiously sweet, chewy, chocolatey cookie with lots of delightful chunks of heavenly milk and dark chocolate within, and on top of, each one.
 Like my Crazily Chocolatey Cookies, these biccies will have a slightly crack, rugged appearance, which all adds to their charm. And as always, feel free to increase the amount of chocolate chips if you so desire. ;)

Ingredients

  • 255 g light brown soft sugar
  • 125 g butter, softened
  • 1 large egg, beaten
  • 1/2 tsp vanilla essence/extract
  • 225 g plain flour
  • 30 g cocoa powder
  • 75 g plain chocolate, broken into pieces
  • 1 tsp bicarbonate of soda
  • 1/2 tsp salt
  • 100 g milk chocolate, chopped into large chips
  • 75 g plain chocolate, chopped into large chips
Makes about 20 big cookies.:)
Method:)
  • Preheat oven to 190c/fan 170. Grease two large baking trays and line them with baking paper.
  • Cream the butter in a large bowl with a wooden spoon or electric mixer until very soft. Add the sugar and mix together well until light and fluffy.
  • Bring a small saucepan of water to the boil on the hob. Place the 75 g plain chocolate in a heatproof bowl/dish and balance it over the simmering water. Allow to melt, stirring occasionally. Once melted remove from the heat and allow it to cool for a few minutes.
  • Mix the vanilla with the egg in a jug and gradually beat into the creamed mixture.
  • Sift in the flour, cocoa, bicarbonate and salt. Mix together with a large metal spoon. Mix in the melted dark chocolate.
  • Set aside about one third of the chocolate chips for studding the tops of the cookies. Add the remainder to the cookie dough and mix together.
  • Using a dessertspoon, scoop balls of cookie dough onto the prepared trays. Press the reserved chocolate chips gently into the tops of the cookies, but don't push them in too far - just enough so that you can still see them peeking out. ;) Space the balls of cookie dough well apart from one another so that they don't join up when they bake. These cookies are quite substantial so give them plenty of room to grow to their maximum potential. ;) 
  • Bake the cookies in the preheated oven for 10-12 minutes: they should have increased in size and should have a slightly cracked appearance. They will be fragile to the touch at first: but this is normal so don't fret. Leave them on the trays for about 4 or 5 minutes.
  • Use a metal spatula (or, as we in the Snelgrove house call it...the "fish slice" :o [no I don't know why exactly...as it is not used to slice fish under any circumstances...I don't believe in mixing crockery for savoury and sweet recipes ;) ]) to carefully transfer each cookie to a wire rack. And then of course, we have the usual dilemma: of whether to let them cool completely before consumption, so one can appreciate their delightful chewiness; and to not have to worry too much about the terrible risk of the cookie disintegrating; having been unceremoniously dunked into some form of hot liquid... or the other option of eating them when they are warm and gorgeously soft...with the chocolate chips having not yet hardened...yes, they are still gooey and molten and oozing, like miniscule exploded bombs of divine chocolate stickiness. Solution? I suggest you have both one now and later, so that the qualities of both cookie states can be adequately comprehended. After all your hard work with your wooden spoon and chopping board (all that chocolate chopping does take time, I know, I appreciate that all too well ;) ), it's too tiring and stressful a decision to have to be faced with for sure. ;) 

Friday, 5 September 2014

Because one type of choc is never enough. ;) thus we have the triple choc chip cookie.

image
image
image

And now it is time to introduce my favourite EVER cookie, the triple choc chip. Of course being triple means that the three different types of chocolate, plain, white and milk, are all involved...all three are present in chip form, it's true to say, but 75 g of melted milk choc is incorporated into the cookie dough itself, too, which lends a gorgeous sweetness to the biccies themselves....probably the reason why I can never really resist them. I just adore cleaning the bowl of cookie dough while my little creations are baking happily away in the oven...and when they come out with the chocolate all melty and soft I can feel my heart melt in a similar sort of way. But don't forget to leave them to harden just a little before attempting to eat one! They will be very tender and fragile; so please please don't make the mistake of browning them to much. I have never baked mine any longer than 10 minutes; but I know all ovens are different.
I've given quantities for all the different chocolate types for the chips, but really you can fiddle about with them as you see fit...and don't worry, of course you can exceed the given amount if you so wish. I often find that along the way chocolate chips are lost, anyway...but all for a good cause, to keep the baker's energy levels up while she does all that stirring and beating and cleaning, you see. ;)
Ingredients
  • 120 g butter, softened
  • 120 g light brown soft sugar
  • 120 g caster sugar
  • 1 large egg
  • 1 tsp vanilla essence/extract
  • 200 g plain flour
  • 100 g milk chocolate
  • 75 g white chocolate
  • 75 g plain chocolate
Method
  • Preheat oven to 190c/fan 170 and grease two big baking trays. Line them with baking paper.
  • Beat the butter with a wooden spoon or an electric mixer until very soft. Add the sugars and beat well until fluffy and lighter in colour. (Ganache Elf tip. Perhaps this is just an Irish or Tesco thing, but I’ve noticed that in the packs of light brown soft sugar, especially if it comes in a tightly sealed bag, that there are often just a few small, hardish lumps of sugar amongst the finer grains. They’re easily broken up if you crush them between your fingers. So when you weigh out the borwn sugar, sift through it with your fingers to check for these lumps before adding it to the butter.
  • Beat the egg in a jug with the vanilla.
  • Place 75 g of the milk choc in a small bowl placed over a pan of simmering water. Allow to melt, stirring now and again till smooth. When melted remove from the heat and leave to cool slightly.
  • Chop the plain chocolate, the white chocolate and the remaining 25 g milk chocolate into large chips.
  • Pour about a third of the egg mixture into the bowl with the creamed butter and sugar. Mix together well, scraping down the sides of the bowl with a metal spoon or spatula every so often so that it’s all incorporated. Add another third and repeat the process until all the egg has been used up.
  • Sieve in the flour and gently fold in with a metal spoon, along with the melted milk chocolate. Then add in the chocolate chips.
  • Scoop up dessertspoonfuls of this heavenly cookie dough and place them, spaced well apart, on the prepared trays, shaping into balls with your hands or with the spoon. Aim for about 20 – 22 even-sized balls. (and leave some cookie dough for yourself of course. ;) )
  • Bake for 8 – 10 minutes until pale golden brown…make sure you check after 8 minutes to ensure they aren’t going too dark. They will be fragile and delicate at first…but don’t fret, they will harden on cooling ;) remove from the oven and leave on the trays for about 5 minutes, and then carefully transfer to wire racks using a metal spatula. Eat warm  (well eat at LEAST one anyway...don't forget the importance of sampling ;) ) and leave the rest to cool (may need to hide them) and store in an airtight tin when completely cold. They will keep for about 5 - 7 days.
  • image
    image

Monday, 1 September 2014

most suitable for...? well...dunking, nibbling, munching. :)

image

Oh, biscuits…out of all of the edible delights of the baking world, I think, if I had to choose my ultimate favourite, it would probably be biscuits. I don’t think I would be able to then choose my favourite variety of biccie…that is a question which is just much too difficult for me to answer.
I just adore biscuits…whether they be chocolate or plain, big or small, fancy or simple. I’d happily munch on them anytime of the day, morning or night…but my favourite time for biscuit-munching has got to be in the afternoon, when my afternoon hot choc generally becomes a dunking basin for whatever biccies I happen to have currently on the go. Closely followed by something I’ve been doing quite a lot recently – that eing crumbling up a biscuit and adding it to my banana pudding a lot with my usual chocolate. The combination of both chocolate and crushed biscuit on top of my favourite ever pudding can only be described as delightful. ;)
OK. if I had to simplify things down and try and list some of my most-loved biccies. well I've already blahed on a good bit about my love for Oreos (and their various imitations.) And I find not many things can rival my irresistible triple chocolate chip cookies too easily...don't worry, i will share this recipe with you the very next time I make them. :) And then we have these little fellows featured in the pic above. Now I must say, whoever thought of putting oats into a biscuit, you are a genius and I give you my eternal thanks.:) I just love the scrumptious crunchy texture oats lends to a biccie...it makes them extremely good for dunking too as the biscuit holds so well despite being saturated in hot choc/coffee etc. One of my favorite ever shop-bought biscuits has to be the good old-fashioned HobNob. (Or again, for as is often the case with a stingey shopper like myself, the Tesco/Aldi equivalent - Oaties I believe they are called. ) And when it comes to home-baking, homemade oaty-sort biscuits are always a very welcome and yummy addition to the biccie tin. I don't think, to be honest, I would feel that My Cocoa-Stained Apron would be compltete without including the recipe for these, then: the comfortingly straightforward-to-make, gorgeously crunchy, and totally yummy oat cookie. In my version, I divide the biscuit dough into three little bowls before baking, as I like to have three types of oat cookie in one batch. One I leave plain, one I add sultanas to, and the other, a few (or maybe not so few...when it comes to chocolate and me the word few doesn't really seem to exist. ) chocolate chips.So whether you're feeling fruity, or in need of a little chocolate hit, or just fancy something simply oaty, you will be catered for either way. :) 
The yummy oat cookie. :) Makes about 22.
  • 125 g butter, softened
  • 120 g caster sugar
  • 120g light brown soft sugar
  • 1 large egg, beaten
  • 1 tsp vanilla essence/extract (extract is better but more expensive of course. :(
  • 100 g self-raising flour
  • 1 tsp salt
  • 50 g plain/milk chocolate, chopped into little pieces
  • 40 g sultanas
  • 250 g rolled oats 
  • 2 tbsp water
Method
  • Grease two big baking trays and line with baking paper. (If your trays are a bit on the small side it might be a good idea to use three as a pose to two, if you are very anxious for your cookies to be perfectly round and not to join up. :)  preheat the oven to 160c.
  • Beat the butter until really soft with a wooden spoon or an electric mixer. Add the two sugars and continue to beat until light and fluffy. Scrape down the sides of the bowl every now and again with a metal spoon or a spatula.
  • Beat the egg in a jug with the vanilla and the 2 tbsp water. Add about a quarter of the egg mixture to the creamed butter and sugar. Mix well before adding another quarter or so of the egg. Beat again until well mixed, and then continue until all the egg is used up.
  • Place the oats in another bowl and sift in the flour ans the salt. 
  • Add the dry ingredients to the butter, sugar and egg mixture and mix well until a very sticky dough forms. Keep about a third of this in your original mixing bowl, but place the other two thirds of it in separate bowls (perhaps use the ones you used for sifting the flour to save on washing up. :) 
  • Add the chopped chocolate to one bowl, and the sultanas to the other, leaving the remaining one plain. 
  • Use a dessert spoon to scoop up spoonfuls of the cookie dough, and use your hands to shape into little balls. Place the balls on the trays, spacing them well apart. 
  • Bake the cookies for about 15-20 minutes, until the cookies are a lovely light golden brown colour. They should be still slightly soft though and not too dark; and they will be quite fragile at first. Check after 14 minutes to check that they are not going too brown. 
  • Remove the trays from the oven and wait for a out 5 minutes to let the biscuits harden slightly. Then use a metal spatula to transfer the cookies to wire racks to cool. They keep really well for about a week in an airtight tin. But they are lovely warm too, and, of course, are just MADE for being dunked. ;)

Friday, 29 August 2014

More cookie dough.


image
imageYesterday, I made even more cookies. Probably due to their extreme chocolatiness, the remainder of my totally chocolatey cookies which I made last weekend didn't last very long, at all. I was toying with the idea of making shortbread or flapjacks or oat cookies; but I had a new choc chip cookie recipe that I wanted to just try out first. At the moment I'm going through all of my cookbooks with little pieces of coloured paper (and probably driving everyone else in the house mad...the scissors never seem to be in their accustomed place in the kitchen drawer nowadays. And I am sure that the little cuttings of paper that I keep on accidently leaving around are quite irritating, as well.) Though of course, there is a reason behind all this paper-cutting and scissor-nicking. I'm marking all my recipes, both the ones I've done before and the ones I haven't, and rating them as I go along. And so I came across a choc chip cookie recipe (I honestly have lost count of the amount of these I have), and so i thought that i would try this one out for a change and see how it goes.
It's funny, but with certain items of baked produce I often seen to have a particular recurring "issue" which often happens again and again each time with that certain thing each time I bake it. Like remember with the scones I was relating to you how they often came out not quite as high as I would have liked. Now with cookies...and weirdly enough, this only ever seems to happen with normal chocolate chip cookie dough - not double chocolate, which is kind of funny...I frequently make the mistake of thinking I will get away with just lining two baking trays instead of three, in the certainty that they won't join up. And then of course I lift the trays from the oven and discover, to my exasperation, I have cookies that are not the classic round shape a perfect cookie should be...rather, I end up instead with a load of funny quadrangle shapes which I have to separate with a little knife before transferring to the wire rack to cool. And though I don't ever recall burning any of my baked goodies before, I can't seem to bear the thought of ruining this perfect record. But this sometimes means, in turn, I remove cookies from the oven which, if only left just a little longer in that toasty little space, would have been just perfect...not too hard, not too soft; just with that lovely chewy crispiness which is any cookie fiend's dream...image
Don't be fooled by this pic...true, these are my cookies, and they do look pretty enticing and flawless, with the chocolate chips oozing out in contrast to that lovely golden cookie dough colour. But the star of this pic was the best of the lot. Half of them did join up, and so once again the groans of Ganache-Elf could be heard resonating through the kitchen as she kicks herself for the upteenth time for being frugal with her tray-lining. And also, to add insult to injury...more than half of the cookies were wayyyyyy too floppy. The recipe stated that they should be chewy and not too crisp, but surely, some sort of sturdiness is required in a true cookie. I'm tempted to blame my recipe for being misleading...I did follow it pretty precisely and cooked the cookies for the recommended time...but a bad workman blames his own tools I guess so it could well have been a mistake on my own part. 
Well, anyway. I don't think this counts as an actual baking disaster. I haven't actually eaten one of them yet. I suppose I had the "hump" with my creations yesterday, so disconcerted I was with their shape and general floppiness. But today...well, I feel much better about it all, indeed. I had a peek in the tin I had placed my cookies...or perhaps I should really say, cookie pieces, because the majority of them did, I'm afraid, break into halves and thirds and quarters as I stashed them away in a tin once they were cooled...and well, I know they don't look exactly pretty, but they smell nice. And being all in different shapes and sizes means that one isn't restricted to have one whole cookie...as in, if you are just a wee bit peckish and fancy a nibbble, you could just dip your hand into the tin and take out a bite-sized piece. Or, likewise, perhaps you sometimes feel in the need (well maybe need isn't quite the right word, but anyway...) for more cookie dough than what is usually provided in an average sized cookie...well, you could then take two big halves, maybe. Or three. Or four. Or five. 

Monday, 25 August 2014

More cookie dough.


image
imageYesterday, I made even more cookies. Probably due to their extreme chocolatiness, the remainder of my totally chocolatey cookies which I made last weekend didn't last very long, at all. I was toying with the idea of making shortbread or flapjacks or oat cookies; but I had a new choc chip cookie recipe that I wanted to just try out first. At the moment I'm going through all of my cookbooks with little pieces of coloured paper (and probably driving everyone else in the house mad...the scissors never seem to be in their accustomed place in the kitchen drawer nowadays. And I am sure that the little cuttings of paper that I keep on accidently leaving around are quite irritating, as well.) Though of course, there is a reason behind all this paper-cutting and scissor-nicking. I'm marking all my recipes, both the ones I've done before and the ones I haven't, and rating them as I go along. And so I came across a choc chip cookie recipe (I honestly have lost count of the amount of these I have), and so i thought that i would try this one out for a change and see how it goes.
It's funny, but with certain items of baked produce I often seen to have a particular recurring "issue" which often happens again and again each time with that certain thing each time I bake it. Like remember with the scones I was relating to you how they often came out not quite as high as I would have liked. Now with cookies...and weirdly enough, this only ever seems to happen with normal chocolate chip cookie dough - not double chocolate, which is kind of funny...I frequently make the mistake of thinking I will get away with just lining two baking trays instead of three, in the certainty that they won't join up. And then of course I lift the trays from the oven and discover, to my exasperation, I have cookies that are not the classic round shape a perfect cookie should be...rather, I end up instead with a load of funny quadrangle shapes which I have to separate with a little knife before transferring to the wire rack to cool. And though I don't ever recall burning any of my baked goodies before, I can't seem to bear the thought of ruining this perfect record. But this sometimes means, in turn, I remove cookies from the oven which, if only left just a little longer in that toasty little space, would have been just perfect...not too hard, not too soft; just with that lovely chewy crispiness which is any cookie fiend's dream...image
Don't be fooled by this pic...true, these are my cookies, and they do look pretty enticing and flawless, with the chocolate chips oozing out in contrast to that lovely golden cookie dough colour. But the star of this pic was the best of the lot. Half of them did join up, and so once again the groans of Ganache-Elf could be heard resonating through the kitchen as she kicks herself for the upteenth time for being frugal with her tray-lining. And also, to add insult to injury...more than half of the cookies were wayyyyyy too floppy. The recipe stated that they should be chewy and not too crisp, but surely, some sort of sturdiness is required in a true cookie. I'm tempted to blame my recipe for being misleading...I did follow it pretty precisely and cooked the cookies for the recommended time...but a bad workman blames his own tools I guess so it could well have been a mistake on my own part. 
Well, anyway. I don't think this counts as an actual baking disaster. I haven't actually eaten one of them yet. I suppose I had the "hump" with my creations yesterday, so disconcerted I was with their shape and general floppiness. But today...well, I feel much better about it all, indeed. I had a peek in the tin I had placed my cookies...or perhaps I should really say, cookie pieces, because the majority of them did, I'm afraid, break into halves and thirds and quarters as I stashed them away in a tin once they were cooled...and well, I know they don't look exactly pretty, but they smell nice. And being all in different shapes and sizes means that one isn't restricted to have one whole cookie...as in, if you are just a wee bit peckish and fancy a nibbble, you could just dip your hand into the tin and take out a bite-sized piece. Or, likewise, perhaps you sometimes feel in the need (well maybe need isn't quite the right word, but anyway...) for more cookie dough than what is usually provided in an average sized cookie...well, you could then take two big halves, maybe. Or three. Or four. Or five. 

Friday, 22 August 2014

can cookies get any chocolatier than this.

image
image

image
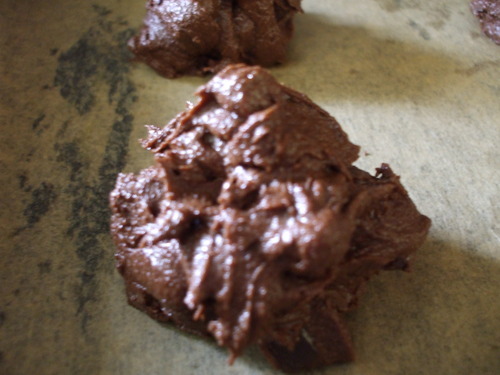
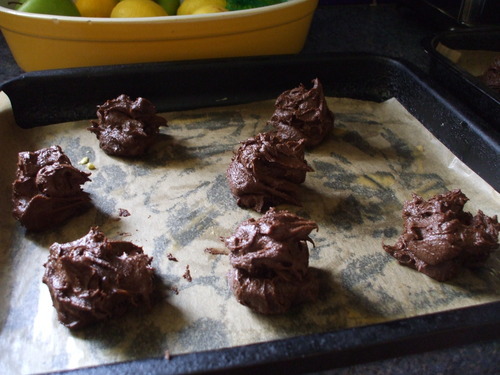
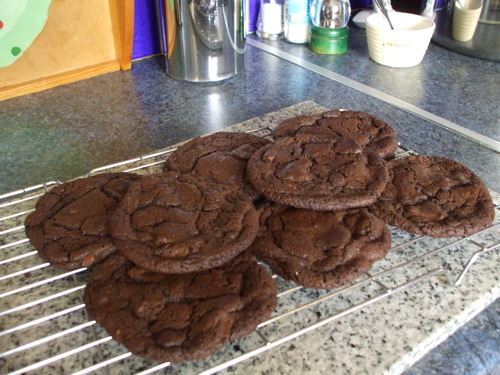
These are the cookies I made on Friday...before and after baking.
I must admit...much as I adore these chewy, chocolatey cookies when they are actually cooked - especially when they are still warm and fragrant from being just taken out from the oven; with the chocolate chips all gooey and the cookie dough still delightfully soft and not yet properly hardened - I actually would prefer to eat them...well, raw, I suppose.  Putting all 15 of those little chocolate dollops into the oven was an act in itself that almost made me quite tearful indeed. You see I was baking them as a gift for a friend, so I didn't feel quite so inclined to just help myself as I baked like I usually do. Oh never fear, I cleaned the bowl of course as always, and my mixing spoon, once the cookies were safely out of harm's way in the oven. But, could I have very easily have placed one of those heaped tablespoons of raw cookie dough onto a saucer instead of onto its designated place on the baking tray, and have eaten it just as it was, then and there? Well, I suppose you don't need me to tell you the answer to that question.
Anyway. Whichever way you choose to eat them, these certainly are awesome cookies. Rather substantial as you can see from the picture, not that that matters. To be honest, the actual cookie dough mixture quantity isn't that much. I suspect their large size probably comes about due to the generous amount of chocolate chips - I used milk and dark, but it's up to you, really, what you fancy - mixed into the dough. What with that and the fact that the actual dough is also infused with about 150 grams of melted dark chocolate, I don't think I have ever come across a cookie as chocolatey as this. 
The search continues...but for now, here's my recipe.
Ingredients
  • 125 g butter, softened
  • 75 g light brown soft sugar
  • 50 g caster sugar
  • 150 g plain chocolate
  • 1 large egg
  • 1 tsp vanilla extract/essence
  • 150 plain flour
  • 2 heaped tbsp cocoa powder
  • pinch of salt
  • 1 tsp bicarbonate of soda
  • 100g plain chocolate + 100g milk chocolate (well, that's the minimum amount I would recommend, anyway... ;) ) for the chips.
method...
  • Grease two big baking trays and line them with baking paper. Preheat the oven to 170c/fan oven 150c.
  • Chop the milk and dark chocolate INTENDED for the chips (that's one of the many reasons I recommend using more than the amount specified here...chips are often lost along the way ;) )
  • Beat the butter in a big bowl with a wooden spoon or an electric mixer until nice and soft and squishy. Put a pan of water on the hob to boil.
  • Add the sugars and beat well until lighter in colour and fluffy. In a jug, beat the egg with the vanilla. 
  • Put the 150 g dark chocolate in a small heatproof bowl and balance it over the simmering water on the hob. Allow it to melt, stirring every now and again. Once melted, remove from the heat and let it cool for a few minutes.
  • Gradually add the egg, bit by little bit, to the creamed mixture, mixing well between each addition. Replace your wooden spoon/electric mixer for a large metal spoon and then add the melted plain chocolate. Oooh this mixture is just getting harder and harder to resist...
  • Sieve in the flour, the cocoa, the bicarbonate and the salt. Fold in with all those yummy chocolate chips... (all...? ;) ) and mix well.
  • Use a tablespoon to scoop out mounds of the cookie dough and space them well apart on the baking trays. As I mentioned above, I usually make about 15. But again, it depends how big / small you like your cookies to be...
  • Bake for 12-15 minutes. You will notice that the cookies are still very soft and fragile when you take them from the oven...but don't worry they will harden :) but don't transfer them to the wire rack straight away to cool - leave them on the trays for about 5 - 10 mins before removing them with a sharp edged spatula and placing on the rack. The rest is self-explanatory: clean bowl, utensils etc until free of raw cookie dough, then proceed to eat at least one cookie while still warm...they WILL keep in a tin for up to a week though don't worry, but I don't think, realistically, there will be any still in there for that long, right. ;)

Sunday, 17 August 2014

A very, very quick update on recent baking activity.

Ganache-Elf wishes to apologise to her readers now: I did after all claim, in my first entry, that I was going to explain a bit more in my next post what exactly motivated me into creating this blog and what I hope to achieve in doing so. And of course I am going to, in the post which will follow this one. But after all, this is a baking blog and so I thought, since I have been particularly industrious in the kitchen of late, I had better give you a little taste of what I’ve been up to recently in the baking and cooking line. Through my baking and cooking movements, perhaps, you will begin to get a sense of what sort of cook the Ganache-Elf actually is.
Well…ok this isn’t quite as easy as I thought. Where do I begin? You see my problem here is that ever since we finished for summer on the 22nd of May I’ve been baking away in the kitchen as if the currently uninspiring Irish summer weather (uninspiring being a bit of an understatement right now, espiecally on this particular night. As we speak I can hear the rain drumming down upon the conservatory roof and the wind howling with such unnerving ferocity through the eucalyptus tree beside the kitchen window, anyone would think we’re in the middle of November or something. But that’s summer in Ireland for you.) is going to result in flour and butter shortages. (Which better not EVER happen, actually. A truly frightening consdieration for a baker like me.) So it’s difficult for me to even begin to tell you about what I’ve been baking recently, for what, after all, is recently? Does the term refer to the past few hours, days, weeks, or months??
 Here I go again, making a supposedly “quick” blog entry anything but that. Ok, perhaps it would be best if I just told you, for now, about what I baked and cooked yesterday (it’s now Saturday…the paragraph above was written last night. I did intend on finishing this then but all the blogging and baking had worn me out and so I went to bed early instead. Sorrrryyyyy!) and the day before that. Starting with Thursday. I did bake Wednesday but if I go into detail about what I made that day then my promise of being short and sweet with this second blog will look even more farcical than ever. So on Thursday I made something which I have wanted to make, by myself, for ages: ever since I tasted these gorgeous savoury treats in September of last year, when I moved into my new house in Dublin for the second year of college. My wonderful roommate - who is one of the most awesome bakers I know - had whipped up a batch of fragrant, soft, golden goat’s cheese buns a few hours before my arrival; and immediately offered me one as soon as I had dumped my bags of junk upon my new bed. I was hesitant at first- well, for one thing, you have to bear in mind that this was while all the eating disorder stuff was going on; and my first immediate thought on seeing the bun was “oh god I bet that’s fattening”. (I will go into more detail later on about these abnormal thoughts that I had, as I believe it’s important for me to clarify them to you if you want to understand exactly how a person with an eating disorder thinks and behaves.) And also, I had - well, not until recently, anyway - never been a fan of cheese and I had never ever had goat’s cheese before.
But I tried one anyway - and oh I’m so glad I did. They were absolutely delicious and unlike anything else I had really had before. To this day, goat’s cheese buns always remind me of my roommate, and those lovely evenings we spent together at our rented house. We were both bakers and chocolate-lovers so making something we both liked was never difficult. The contents of the little rubbish bags that served as waste-paper baskets in our room usually consisted mainly, alongside the usual piles of discarded scribbly notes which studying English inevitably brings, of Cadbury chocolate bar wrappers, Chocolate Finger packets, bun cases, and such like. We both loved to bake, though each of us had our own unique, individual style of baking and we often, during our special “baking nights” which I will forever look back upon with fondness, were to be found making entirely different things. And so, producing my own goat’s cheese buns in my own kitchen at home brought the memory of the time I spent with her and the fun we had. And, of course, from a more greedier point of view, I really wanted to make these for myself because I absolutely adore them. I love the soft sponginess of these buns; and the delicious studs of goat’s cheese which are distributed throughout each one. The cheese has a distinctive and delightful flavour and texture of its own which I love; and the way in which the top of each bun becomes wonderfully molten during baking - extra goat’s cheese is pressed gently into the uncooked balls of dough before they are placed in the oven - makes them oh-so-hard to resist. While they cooked, the tantalising smells that filled my kitchen could only be described as magical.
But! I have to be honest with you now and tell you that I wasn’t COMPLETLEY satisfied with my batch of buns. I’m not going to be too hard on myself, for it was, after all, my first time ever to make them; and I fear that I was so excited about getting them actually made I may have rushed a bit along the way and, consequently, wasn’t quite as attentive as I usually am when in “baking mode”. So why was I a little disappointed? Well, for one thing they didn’t taste quite as nice as my roommate’s did - they were still delicious, for sure, but I felt that my roommate’s were by far superior - and also, mine were HUGE. About the size of a hamburger!!  I wanted them a good size, but these ones were much, much too big. Eating one of these for a snack would be like having a small meal!! I’m not sure quite why they turned out like this. My recipe was supposed to yield nine buns, and I thought I’d make ten. And then I ended up with buns the size of cobs! Did I put too much yeast in? Or did the dough just rise more efficiently than usual as it was such a warm day? Well, hopefully I will be able to find out what went wrong on my second attempt at making them. Baking is after all like many things - practice really does make perfect and we have to learn from each and every little mistake made along the way.
Oh, dear, so much for “very very quick”, again. Well, I’ll try not to go into too much detail about what I made the following day so. The cookies whose aroma I was describing in the conclusion to my first post - they were the fruits of my labours on the Friday. I say cookies but I usually refer to this particular cookie recipe as Chocolate Drops. Why? Well, as you can see from the picture these scrummy little treats have a “drop” of chocolate ganache in their centre. I use the dampened handle of a wooden spoon to make an indentation in each cookie before baking, and, when they are cold, I fill each little groove with that wonderful, amazing, heavenly conconction known as GANACHE.
I sometimes am never really sure whether to assume or not whether people know what ganache is. Some don’t you see, whereas others are as crazy about it as I am. But let’s not get me started on the matter of Ganache now; as I believe that Ganache is such a fundamental aspect of my baking that it deserves a post entirely to itself. Let’s just say for now that if you have never eaten, made, or heard of ganache - well, I am determined to change all that on your behalf, if I achieve nothing else with this blog.
I cooked those days, too, of course - I will be quick, I will be quick, honest - : Thursday, chicken and coconut curry, and Friday, ham and chicken lasagne. Whenever I cook a chicken curry for my family, there’s always this little challenge for me to get the hotness of the curry just right. My Mam loves a bit of spice, but my poor Dad struggles a bit when it is too hot. With this particular curry, the hotness really depends on what chilli I choose to use. We buy the variety packs from Aldi so we get a mixture of chillis in each packet with varying levels of hotness. This particular time I used a very small yellow Scotch bonnet (on a scale of 1 to 10, with 10 being the hottest, the Scotch bonnet ranks nine. Please don’t make the incorrect assumption that I’m an expert on chillis, as
image
I’m not. I’m only reading the little slip of paper stuck in with the chillis in their little box.). The chilli itself is tiny, but if your curry or spicy dish has one of these little beauties in it, you will know, trust me. Ham and chicken lasagne is one of my Mam’s favourites. Instead of the traditional lasagne made with ragu bolognaise, this one has layers of cooked chicken and ham in a creamy sauce instead. The lasagne sheets and the gorgeous covering of bubbly melted cheese on the top are still there too, of course. Surely a lasagne wouldn’t be a lasagne without those, now.
Ok, I think I’m done. Maybe I should just stop claiming my posts are going to be short - they never seem to turn out that way, after all. Perhaps for me, this blogging thing is going to be like baking. Once I get started, I just can’t stop.