At first glance it might seem that I am just a happy, normal girl who loves to bake and walk her dog. However, I have suffered with an eating disorder since I was 13. It was only in May 2014 when I realised that this Voice in my head was slowly but surely trying to kill me. And so began the long, hard, and painful journey which is recovery...

I want My Cocoa Stained Apron to be a special place...a place for reflection, memories, shared stories...and of course a little bit of cocoa-staining ;) Recovery might be the hardest thing you ever choose to do in this life. But it is also the bravest and best decision you will ever make.:)

Showing posts with label olive oil. Show all posts

Friday, 5 September 2014

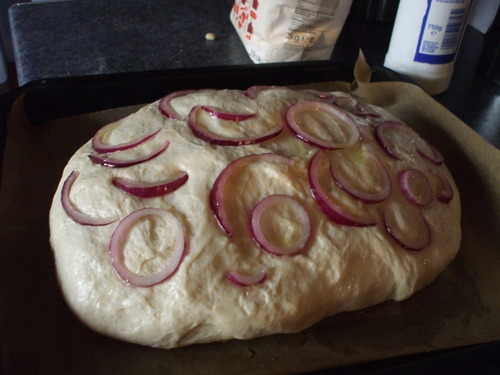
onion bread. :)

image
image
image
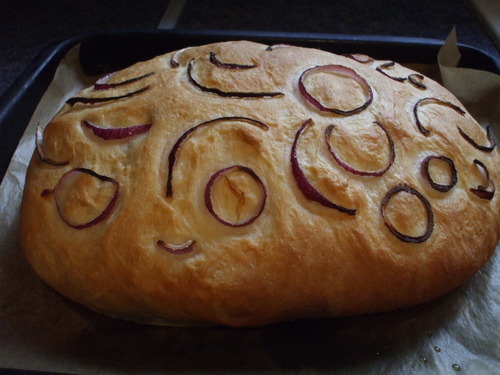
Yes, it is HUGE, though funnily enough I do use the same quantity of flour as I do with the other breads I regularly make. But I love the prettiness of this bread - I think the onions on top look so unusual and attractive. And of course they make it extra yummy, too, of course, lending a slight sweetness to the bread itself, which is equally balanced by the saltiness brought on if you sprinkle on just a little salt on the crust before baking. You don't have to add the salt though if you are health conscious. Though I usually do without guilt - I know I can't boast about my diet being low in sugar or anything (oh, well... ) but I CAN say that my diet IS low in salt and so I'm standing by that. :)
Anyway, this is a lovely bread, and well worth making, and just looks so impressive and smells absolutely divine...I like to serve it warm, cutting it in half lengthways before then cutting it into little slices and chucking the whole lot in a serving bowl, so people can just dive in. IF there is any leftover...any remaining pieces can be frozen...to be enjoyed at a later date ;)
Ingredients
  • 400 g strong white bread flour
  • 1 tsp salt, plus extra for top of loaf
  • 1 tsp caster sugar
  • 1 ½ tsp easy-blend yeast / 7 g sachet instant yeast
  • About 300 ml tepid water
  • 5 tbsp olive oil
  • ½ red onion
Method
  1. Sift the flour and salt into a big mixing bowl and stir in the sugar and the yeast.
  2. Make a little well in the centre and add 3 tbsp of the olive oil. Pour in most of the warm water. Using your hands, bring the mixture together to form a smooth, soft dough. It should be slightly moist but not too sticky. Add a little more water if it feels too dry, or, if it is too sticky, add just a very small amount of flour. Sprinkle your work surface very lightly with flour.
  3. Turn the dough out onto the work surface and knead for about 10 minutes until smooth-skinned, supple and elastic. Lightly grease a bowl with a little olive oil. Roll the dough into a ball and place in the bowl, turning once to grease the top. cover with greased clingfilm.
  4. Leave the dough to rise in a warm, draught free place for about 2 hours until it has doubled in size and feels springy to the touch if you very lightly press it with a finger.
  5. Grease a big baking tray and line with baking paper if it is not non-stick.
  6. Remove the clingfilm and give the inflated dough a big punch with your fist to knock out all the air. Turn out onto a very lightly floured work surface and knead very briefly for about a minute.
  7. shape the dough into a smooth-sided rugby ball by first rolling it out with a rolling pin to form an oval. Then fold the two long sides of the oval underneath, plumping the dough with very lightly floured hands. Place on a baking tray with the crack underneath. Press down with your hands to flatten the rugby ball slightly. Cover with the greased clingfilm once more and then put back in your nice warm spot to rise again. This should take about 1 ½ - 2 hours. (Ganache-Elf tip…be very careful when moving or carrying around the inflated dough. It is very delicate and, after having finished its second rising, you don’t want the air to be deflated again or your bread will be flat and dense. :( so transport with care…and don’t leave it in a place where it is at risk at being trodden on by inquisitive doggies or poked at by little brother, etc.)
  8. When the dough is well-risen and has doubled in bulk again (look at my pic for reference :) ) preheat the oven to 210c/190c fan. Thinly slice the red onion.
  9. Take the cling film off the dough. Very gently press the thin slices/rings of onion onto the top of the dough. Drizzle over about 2 generous tbsp of olive oil and sprinkle with a little salt if desired.
  10. Bake in the preheated oven for 20-30 minutes, until golden brown and well risen - to test for doneness, tap on the base of the loaf; it should sound hollow if fully cooked. Remove from the oven and place on a wire rack to cool. If you like your crust nice and soft, wrap in a clean tea towel before leaving to cool. It's gorgeous eaten warm, with perhaps a little olive oil alongside for slathering on each slice. NOM. 

Saturday, 30 August 2014

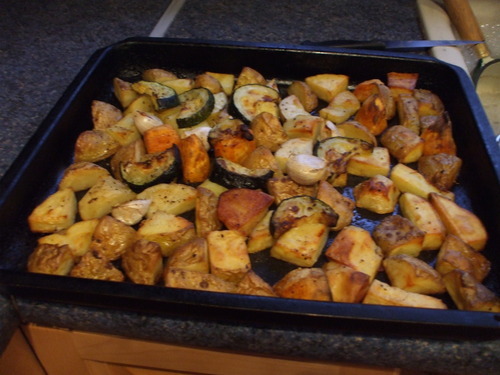
Sweeeeeet...potatoes and courgettes. ;)

image
image

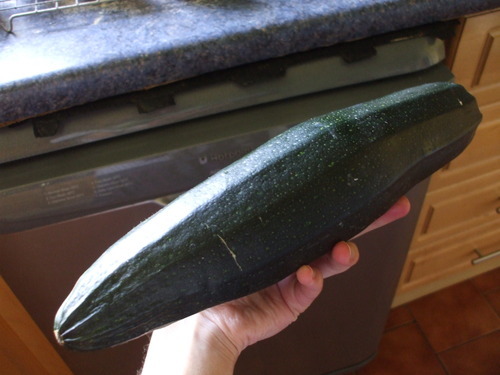
imageYes, the potatoes aren't from our garden I'm afraid...but that big courgette I'm holding there in my hand most certainly is. We've been growing courgettes for a few years now, and they always seem to do extraordinarily well...perhaps too much so, for last year they sort of overtook the whole vegetable plot and cost us our carrots and onions. :(
But hey, courgettes are a great vegetable...I know many might accuse them of being bland-tasting and boring, but I beg to differ! It all depends on what way you cook them and what you cook them with. And I find roasting them in lots of lovely olive oil - nestled alongside potatoes, sweet potatoes, and clove upon clove of fragrant garlic - a very tasty way to consume courgettes, indeed. Quite the opposite of bland in my view. :)
So if you, like me, have grown courgettes and are looking for an ideal and yummy way to utilise them which will not result in lots of disappointed and uninspired faces at the table - horribly reminiscent of those we are faced with on serving up other unpopular vegetables such as boiled cabbage or Brussel Sprouts - but instead will evoke lots of happy and appreciative "ummm!"s...it might be worth giving this one a try. And of course please don't feel that just because you are not growing your own that you can't sample this one too...they're readily available in the shops as you probably already know. And anyway, this can be easily done without the addition of the courgettes of course; but I do love having them along with the potatoes...it makes such an interesting and delicious combination of tastes and textures. Whereas the potatoes are all lovely and crispy, the courgettes, and the garlic too actually, become delightfully squishy. ;)
You will need...(to serve about 4.)
about 4-5 good-sized potatoes
1 large sweet potato, or two small ones (small ones are easier to cut! )
about 6 cloves (at least ;) ) garlic (don't worry about peeling them :)
1 small courgette (or 1/2 of a big one :) )
lots of olive oil
salt and pepper
Preheat oven to 190c/170 c fan.Wash the potatoes and cut them into wedges and sprinkle on a big baking tray. Peel the sweet potatoes and cut them into big, chunky wedges. slightly larger than the potato ones, as these take less time to cook. Add these to the tray. Thickly slice the courgette and add to the tray with the cloves of garlic. Drizzle olive oil generously over the vegetables and then toss them in the oil with a spoon. 
Position the potatoes so that their cut sides are resting on the tray. I usually rest the courgette slices on top of the potatoes in the tray; as I prefer the courgettes to be soft and squishy rather than crispy. The garlic cloves should be distributed evenly around the tray, but try not to place them too near the very edges, for they become quite hard and brown if overcooked. Season the whole lot generously with salt and pepper.
Roast in the oven for about 45 mins - 1 hour. Take the tray out of the oven halfway through the cooking time - you will notice that the potatoes on the edges of the tray might have become crisp and golden quicker than those in the middle. With a spoon, turn over the ones which have developed their crispy sides; but try not to move the ones which haven't. Drizzle over a little more olive oil and return to the oven. Check again when it comes to 45 minutes - if they are done, turn them all over again and toss the tray so they absorb the remaining olive oil, and then place at the bottom of the oven for about 10 minutes.
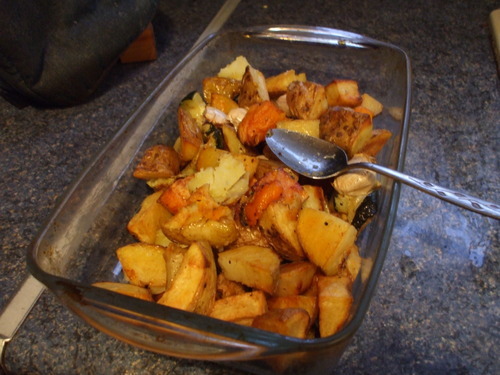
When you are ready to serve take the potatoes out of the oven and transfer them carefully to a big serving dish - move them with a spoon first before using a metal spatula to place them in the dish, so you don't lose any of those lovely crispy skins. ;)

Wednesday, 20 August 2014

golden garlicy gorgousness...

Now THIS is summer food. The barbecue may be sizzling, but hey, the barbacue can't do everything to make that perfect summery meal truly special!! Yes, the meat or the fish or whatver may be cooked al fresco, but surely that's not the only thing that's required? What about the salad, the potatoes, or whatever you fancy to accompany your grilled delicacies?
I love the fact that potatoes can be utilised in so many different equally delicious ways. If it’s a barbecue, of course, my heart usually inclines towards the more summery sort of options of cooking them. Potato wedges with rosemary roasted in olive oil. Boiled new potatoes tossed in melted butter and sprinkled with fresh new chives. And then, of course, these little fellows in the pics below.
Like the wedges these are cooked in extra virgin olive oil…but something happens to the olive oil before it is poured over the potatoes. Several cloves of garlic – well, nearly a whole bulb, to be precise – are crushed into the oil in a jug before; and then tenderly applied to the cut-up potatoes with a loving hand. Another thing I love about these potatoes, is that alongside their garlicy scrumptiousness, they develop an irresistible crispiness while they are roasting: meaning they they remain soft and floury on the inside, but with a beautiful crunchiness to the exterior. I always make sure that a sliced side of each potato shape is resting on the baking tray to ensure that this process occurs. 
image

image
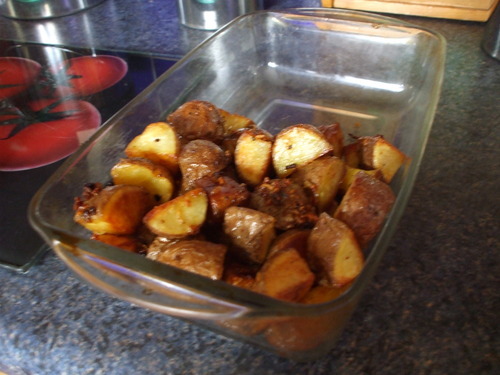
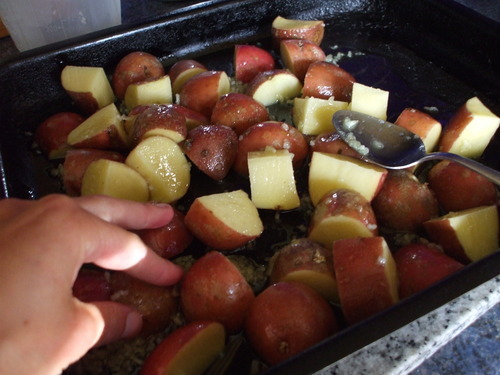
Here they are, before and after roasting. (no, they're the wrong way round, just noticed now - sorry guys.) Just olive oil, a bit of salt and pepper, and garlic. that's all you need. So never mind the fact that it's raining - get out the rusty old barbecue guys. You need an excuse to try these out for yourself. That said, you don't have to do these with barbecues... I do them all year round. Honestly, doing these will certainly save you alot of freezer space too...you won't ever feel the need to buy shop-bought wedges or potato shapes ever again. ;)  

Sorry, what's that? What's that I hear you say? You DO want to do them for yourself?
Well, here is a quick little guide to making YOUR OWN gorgeous garlicy potatoes then :) but don't worry too much about the amounts I've given - these are just a guide only.
To make Ganache-Elf's gorgeous garlicy potatoes to serve 4 you only need...

  • about 6-8 big potatoes, or the equivalent of.
  • LOTS of garlic...well I use about a whole bulb, but it really depends on how garlicy you like your potatoes to be. :)
  • about 125 ml extra virgin olive oil (but normal olive oil will be fine if you don't have any. Just make sure it's olive oil :)
  • salt and pepper.
Method.

  • Preheat oven to 190c/fan oven 170c. Wash the potatoes and then cut them into wedges, or, if they are small, perhaps quarter them. Place on a baking tray.
  •   Mix together the crushed garlic and the olive oil, then pour over the potatoes. Try to make sure the garlic bits are distributed evenly amongst the potato pieces.
  •  With a spoon toss the potatoes in the garlicy oil. Add a bit more oil if necessary – you want them to be well coated and oily, with no dry parts. Once you have done this, position the potato pieces on the tray cut side down. Season well with plenty of salt and pepper.
  •  Roast in the oven for about 45 – 50 minutes. After about half an hour take them out of the oven and turn any pieces that have developed a nice crispy bottom with a spoon – position them again so that another cut side is facing down for extra crispiness. ;) (Usually, these will be the ones that are on the edges of the baking tray…the ones in the entre might not yet have formed a crispy skin and so it’s better to NOT turn these ones as if you do you might risk damaging the crispy bit that is beginning to form. ;) If the potatoes seem a little dry, or if they are sticking too much to the tray, drizzle over a bit more oil before returning to the oven.
  •  Keep a good eye on the potatoes towards the end of the cooking time - if they are browning too much you might need to place them at the bottom of the oven.
  •  Dish up the potatoes into a serving dish: it’s best to perhaps use a spoon or sharp-edged metal spatula to remove them from the tray so that you don’t lose any of those lovely crispy skins! Scrape or pour any oil left in the tray over the potatoes in the dish, and serve immediately while they are nice and warm. :) And before the temptation to break off a few of those crispy bits and eat them there and then becomes too overwhelming. ;)