At first glance it might seem that I am just a happy, normal girl who loves to bake and walk her dog. However, I have suffered with an eating disorder since I was 13. It was only in May 2014 when I realised that this Voice in my head was slowly but surely trying to kill me. And so began the long, hard, and painful journey which is recovery...

I want My Cocoa Stained Apron to be a special place...a place for reflection, memories, shared stories...and of course a little bit of cocoa-staining ;) Recovery might be the hardest thing you ever choose to do in this life. But it is also the bravest and best decision you will ever make.:)

Showing posts with label dinner. Show all posts

Tuesday, 15 December 2015

The Branches of Recovery...Overcoming Meal Time Anxiety

Mealtime anxiety...Another thing which represents an enormous obstacle for me to overcome. In terms of sticking to my meal plan, I suppose the ones which I have actually neglected so to speak the past few months, were the snacks and lunch and breakfast, because often I would be eating these on my own or without support. But in terms of actually eating the aforesaid meals/snacks...dinnertimes have always proved much, much more trickier for me.

One of the nights last week was just a prime example of this. Before I sat down I tried to soothe my anxious mindset, telling myself that it will be grand, I can do this, I have nothing to fear, I can do this. Ed is not going to win this battle. Sadly, in this case, Ed did. I was not strong enough.

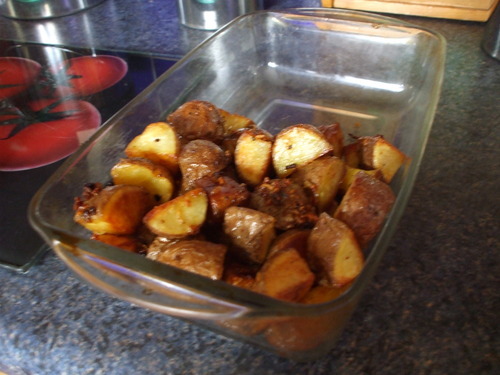
I had done some of my lovely roast garlicy potatoes, and had heaped them in a large serving dish for everyone to help themselves. I waited nervously for everyone to finish doing their own, before tentatively picking up the spoon. I could feel the colour rising in my face, a prickly, unpleasant sensation creeping along the bumps of my spine. And then...the Voice. You can't - have - more than -

That doesn't look enough, I should have more...

No, you can't, Em. The all too familiar voice of Ed.

I can... Weakly, I try to resist.

You cannot. You CANNOT. You - will - not...

"Emmy, have some more, for God's sake." Mam's voice, sharp and as tight as her face, cut across the dialogue in my head like a fist smashing through thin glass.

"No, no I don't want anymore, that's what I normally have". The words were stuttered and slurred because I knew, deep down, that it was a lie. I felt like my head was spinning at about a hundred miles per hour; as if I were plummeting through some infinite, gaping, dizzying space.

And the evening was ruined, again...because of Ed.
                                         Like the beautiful trees of my garden...we all have the strength deep inside us, to grow, and reach                                                                                                                      for the sky...<3 xxx

I don't ever want that to happen again. Because, after all...coming together as a family to sit down for a meal together...should be a pleasurable and enjoyable occasion, a special time of the day for conversation and laughter and shared stories. Not anxiety, panic, fear. Because that's what Ed does to me, at mealtimes. And I can honestly say, I am sick of it...I don't want to feel like that anymore, ever again. So I am determined to overcome this obstacle, the same way as I am determined to conquer my meal plan mission. And I do feel stronger, now. I know that I am stronger. I realise now that there is nothing that I cannot overcome.


So, here are my current strategies on how to deal with my mealtime anxiety. perhaps you will be able to use them too, if you can relate to my difficulties in any way.

  • Allowing Mam to serve up my dinner portions until I get stronger.
  • When possible have meals with others always.
  • The "fake it until you make it" method. When I was in hospital, the meals were served up for us and we had to eat them: it wasn't something we had a say in, or any agency in whatsoever. So, I am going to put myself in that situation again, when I am sitting having dinner at home and Mam serves up for me. I am just going to say to myself: I have no control or choice in regards to the meals. I have to eat it; I have to stick to my meal plan, I have to eat what is put in front of me...there is no other option.
  • Always remind myself of the bigger picture. Why should I have fear of the food? It is going to make me stronger, healthier, and ED weaker. And when Ed gets weaker...I know that I will get healthier, happier, and strongr. Stronger than ED.
  • Talking back to the Voice...I now have a load of different defence stances at my disposal. My favourite one, as given to me by my dear friend who has helped me so much in regards to recovery. "Ed? you know what? You're just a conniving piece of shit who is trying to bring me down and take away everything that I have. You're trying to convince me that I will be huge, if I eat my dinner and don't restrict like you used to make me do. Well, it's over, Ed. I am not going to listen to you any more...because my eyes have been opened and I can clearly see you for the lying, manipulative, evil little thing that you really are...
  • Ask for support when I need it. I am feeling anxious or panicky, tell my Mam how I am feeling. Distract myself from the food by listening to the others talking and joining in the conversation too.  
I also think I might set aside a bit of time over the next few days to make myself a new recovery folder/journal. And as luck might have ita dear friend of mine got me a gorgeous new notebook for Christmas (oh she knows me too well....my love affair with stationery continues!! ;) ) and I think this will be perfect for such a purpose. More details coming soon <3 Have a lovely Tuesday everyone :) <3 xxx

Thursday, 2 April 2015

Spelt bread!! :)

This is a really scrummy, crumbly bread made with wholemeal spelt flour - a flour now widely known for its health benefits, apparently. (as you can tell I am no expert on this! :p). But not only that, it makes a delicious loaf with a distinctive, charecteristic flavour of its very own. Its really nice toasted, or served with some nice smoked fish, or  simply spread with marmalde or jam or peanut butter. 

ingredients :)

  • 450 g wholegrain spelt flour
  • 2 tsp dried yeast
  • 2 tsp salt
  • 1 tsp caster sugar
  • 30 g softened butter, cubed
  • 300 ml tepid water
  • a little olive oil
Method :)

  • Place the flour in the bowl and add the salt, the sugar and the yeast. Stir together until combined.
  • Add the butter and lightly rub in with your fingertips.
  • Make a well in the centre of the flour and Pour in most of the water.
  • Mix together with your hands to form a soft ball of dough. It shouldn't be too moist, but it shouldn't be too dry either: just soft and slightly smooth to the touch. Anyway, if it feels too dry add a little more water, and if it's a little too much on the sticky side add a little more flour.
  • Pour a little oil on your worktop. Spread it out with your hand, and then turn the dough out onto the greased surface. 
  • Knead for about 8-10 minutes. Don't worry if it doesn't feel quite so elasticy as normal bread dough. Grease a clean bowl and place the dough in it, and cover with greased clingfilm.
  • Place the bowl in a warm, draught-free place to rise. This usually take about 2 to 3 hours depending on how cold the day is. When it is ready it should have doubled in bulk and visibly risen up from the bottom of the bowl.
  • Give the dough a punch to knock out the air, and then turn onto the work surface again. Knead briefly for a few minutes.
  • Grease a 900g loaf tin.
  • Shape the dough into a smooth-sided, oval-shaped round. Do this by rolling it gently back and forth on the worktop into a rugby ball shape before gently pressing it down with the palms of your hands.
  • Transfer the dough to the loaf tin , gently pressing it down so it fits snugly in,
  • Cover with greased cling film once more and leave to prove for about 1 to 1 and a half hours until risen and doubled in size once more. As before, leave it in a warm, draught free place to do this. 
  • Preheat the oven to 210c/190 c fan. Gently remove the clingfilm from the bread and place in the oven. bake for 25 - 30 minutes, until risen and cooked. To test for doneness, tap the loaf on the base with your knuckles - it should sound hollow inside. 
  • Remove from the oven and turn out on a wire rack to cool. Wrap in a clean, dry tablecloth if you like your crust nice and soft. 
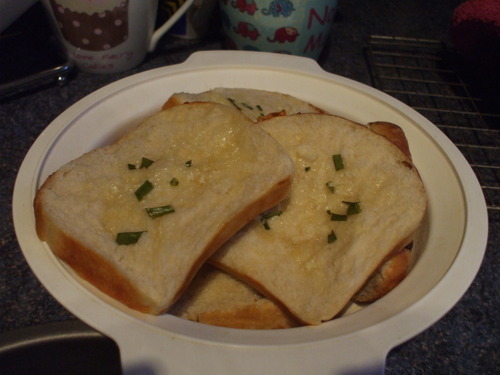
  • The bread is absolutely gorgeous eaten warm, but is is equally scrumptious toasted...slice your loaf into chunky, thick slices with a bread knife once it's cold if you want to use it for toast. It's best eaten on the day it was made, though if you are toasting it it should be fine for one or two days afterwards. Freeze any remaining slices and reheat in the microwave as required! :) 


Monday, 1 December 2014

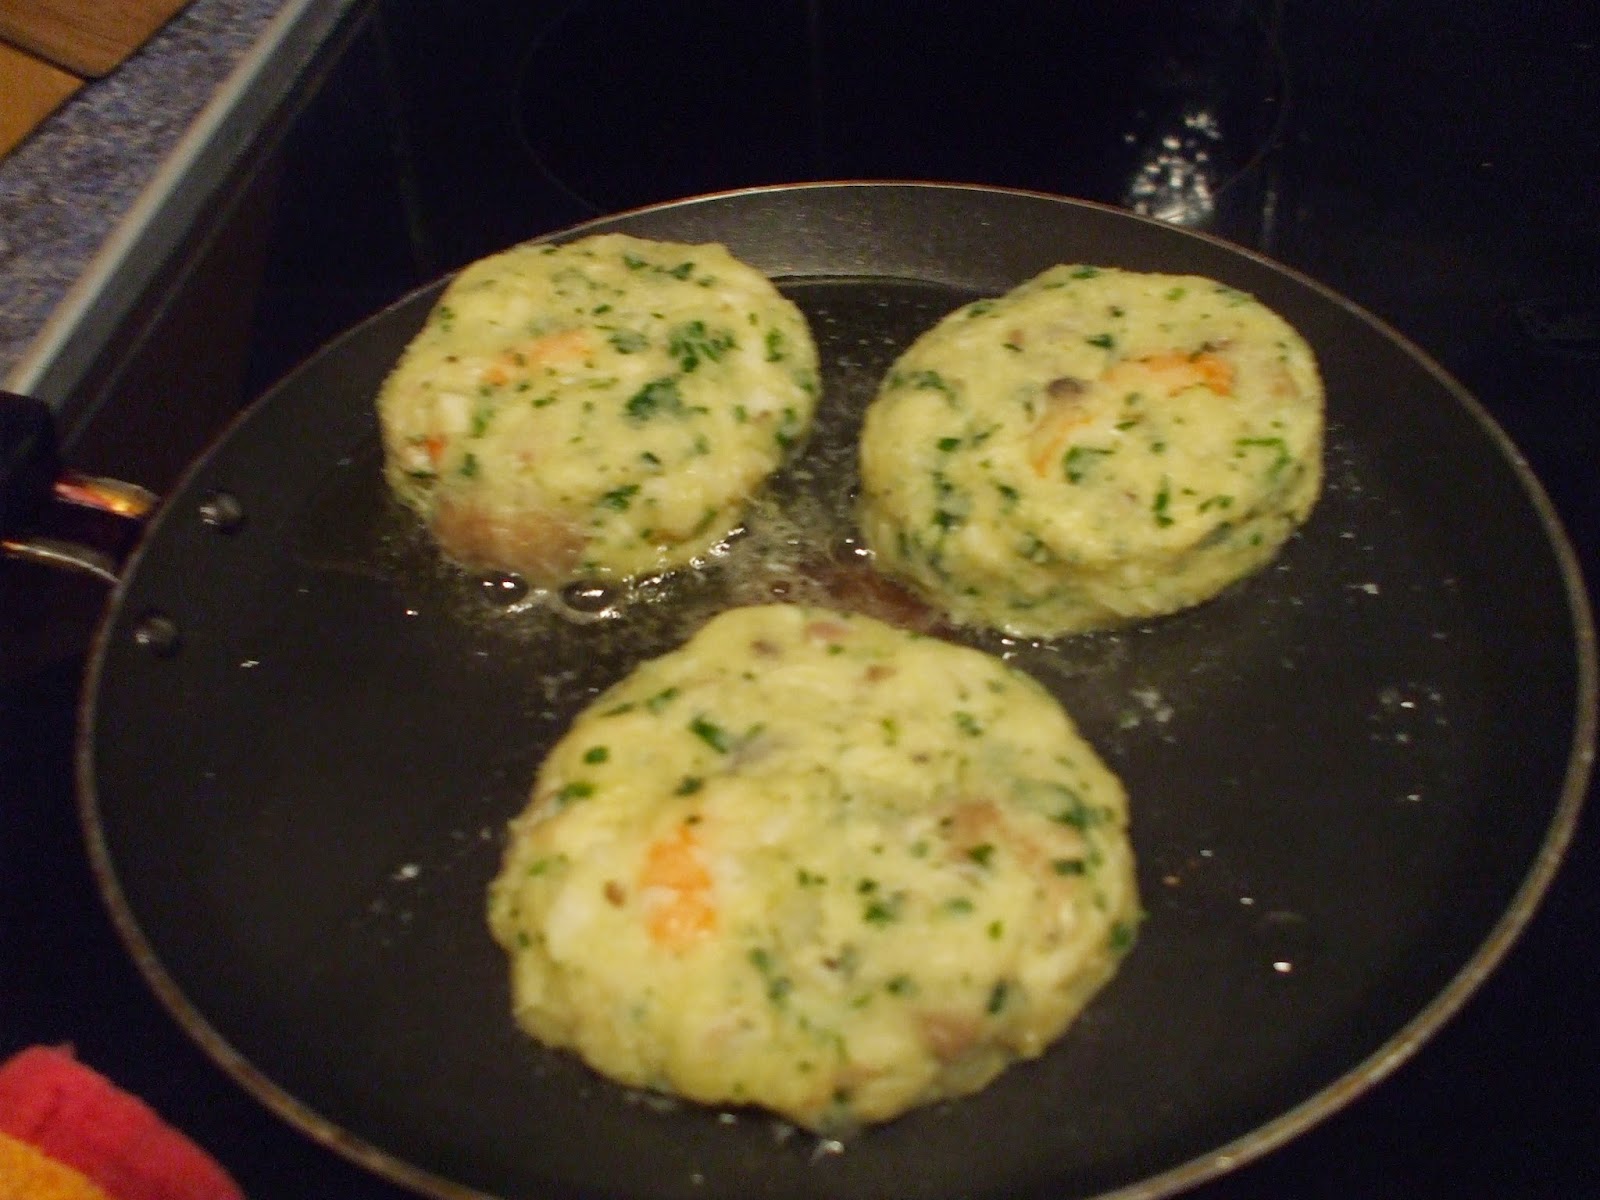
And not all the cakes I make are sweet after all... ;) Emmy's fish cakes.:)


Yes, believe it or not, Ganache-Elf's cake-making skills are not only confined to those of the sweet variety. ;)
These little fish cakes make a very yummy dinner or lunch and are far, far superior to anything you would buy in the shops (and much healthier too I bet. ;) They mark an important milestone for me in facing my fear foods...because they contain prawns and I can definitely say, hand on heart, up till this year I would never once have let a prawn enter my cooking or my mouth!! They are very nice served with maybe a few boiled or roasted baby spuds and some nice green veggies like peas, fine beans etc. But DO boil the potatoes with the skins on as I outline below. The first time I made these I made the mistake of peeling them automatically before sticking 'em on to boil...it's just what comes naturally to me I suppose...you never boil potatoes with the skins on!! But trust me it is the way to go..as doing it the "ordinary" way may make you fish cakes too crumbly. I get 8 fish cakes out of this; so generally, depending on how hungry you and your fellow diners are and what you are serving them with, the recipe would serve around 3 or 4. But don't forget you don't have to use them all up on the day you make them...you can freeze some (see step 9 below) and take them out the night before, so that all you have to do at dinner time is whip out a frying pan and grab the olive oil bottle...handy for those busy (or lazy ;) ) days. :)
  • 300g floury potatoes (about 3 mediumish ones :) )
  • 250 g cod fillets, skinned and boned
  • 60 g cooked prawns, cut in half if they're big :(
  • 1 egg yolk
  • 3 tsp Dijon mustard
  • juice of 1 small lemon
  • A good sprinkling of herbs ( chopped fresh chives and parsley would be good. But dried mixed herbs are grand too. :) )
  • 3 tbsp white wine
  • 75 g button/small mushrooms, chopped
  • A few tbsp olive oil
  • 75 g butter, diced
  • salt and pepper

Method :)

  1. Wash the potatoes, and put them in a saucepan covered in water. Bring to the boil. 
  2. Boil them rapidly for about 10 minutes, and then pour out about half of the water into the sink. There should still be some water in the pan, though - just enough so that the potatoes are half-covered. Return the pan to the hob and simmer gently on a medium heat for about 20-25 minutes. 
  3. Drain the remaining water from the potatoes. let them cool for a few minutes, and then, holding them in a teatowel as they will be still quite hot, peel off the skins and discard. As soon as you've done that pop them in a bowl and mash them with a potato masher - but don't add anything to them for the nonce.
  4. Pour the wine and the lemon juice into a heavy based saucepan or large frying pan. Dice 50 g of the butter. Place the fish in the saucepan and season with salt and pepper. Scatter the diced butter all around. 
  5. Put the pan on the hob and cover with a lid. Heat gently, over a low heat until the butter melts. Cook the fish for 10 - 15 minutes, until the flesh flakes easily. Transfer the fish to a plate. Simmer the poaching liquid in the pan for another few minutes, then pour it carefully into the bowl containing the potatoes.
  6. While you are cooking the fish, you can fry the mushrooms too: gently melt the remaining 25 g butter in a small saucepan, and then add the mushrooms and cook gently for about 5 minutes on a low-medium heat until softened and golden brown.
  7. Add the fish fillets and flake with a fork - but don't break them up too much. Season with salt and pepper and then add the egg yolk (perhaps save that egg white for making my very sticky coconut slices ?? ;) ) , the mustard, the chopped herbs, the mushrooms and the prawns.
  8. Mix it all up together - try not to break up the fish pieces too much as you go. Shape the mixture then into eight little patties - they should be about 8cm in diameter, and about 2 cm thick.
  9. Put the patties on a plate, cover with cling film and refrigerate for at least 2 hours. You can leave them in the fridge for up to 24 hours. If you only want to cook a few of the patties and want to save some for another day, you can freeze some of them at this point. Wrap the spare ones tightly in clingfilm and place them in a little tub or on a tray so that they don't get misshapen as they harden, and then place in the freezer. Defrost them overnight in the freezer and eat the following day.
  10. Pour about 3 tbsp olive oil into a large frying pan (or, if you prefer, a tbsp olive oil and 25 g diced butter) over a low-medium heat. After a few minutes add the fish cakes.
  11. gently fry the fish cakes for 5-10 minutes on one side, then carefully flip over and cook for another 5 - 10 minutes. They should be firmer and brown on each side when they are done, and nice and hot throughout. Add a little more oil if they are sticking to the pan.
  12. Divide amongst warm plates and eat immediately, with your choice of vegetables and/or potatoes, and maybe some tomato ketchup (or as my Irish friends say....RED SAUCE!!! :p ) or tartare sauce alongside. :)

Monday, 1 September 2014

Cheeeseyyyyyyyy cheese and chive bread. ;)


This has to be one of my favourite breads, both to make and eat…the shaping of the dough is so fun, and you don’t even have to go to the trouble of cutting your bread up…the different segments can be just torn off your loaf very easily; and as you do so you are given full opportunity to savour the yummy cheesey gooiness encased within the loaf… ;)
Ingredients
  • 450 g strong white bread flour
  • 7 g sachet dried yeast; or 1 ½ tsp instant yeast
  • 1 tsp sugar
  • 1 ½ tsp salt
  • 300 ml tepid water
  • 60 g mature cheddar, grated
  • Bunch of fresh chives, chopped
  • A little milk to glaze
Method
  • Sift the flour and salt into a large bowl and stir in the yeast and sugar.
  • Make a well in the centre of the dry ingredients and pour in most of the warm water. With your hands, bring the mixture together until it forms a soft dough – soft, not dry or sticky. Add more water if it feels too dry or a little more flour if it is sticking to your hands too much.
  • Sprinkle a little flour over a clean work surface. Transfer the dough from the bowl onot the work surface and knead for about 10 minutes until smooth to the touch and it becomes elastic and malleable.
  • Oil a clean bowl. Shape the dough into a bowl and plae in the bowl, turning once so the top is coated in oil. Cover with greased cling film and place in a warm, draught-free place until it has doubled in size and feels springy if lightly pressed with a fingertip. Depending on how warm the day is and the temperature of your house, the length of time required for this rising varies – I usually give mine a good two hours at the least.
  • Take off the cling film and give your dough a good punch with your fist to deflate the air. Turn it out onto a very lightly floured work surface. Grease a 900 g loaf tin well.
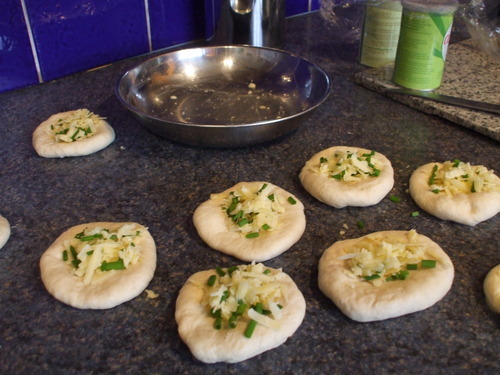
  • Knead the dough for a minute or so and then divide into about fourteen equal-sized pieces. Roll them with a cupped hand on the work surface to form smooth balls. Flatten each ball with your hand or a rolling pin to form fourteen discs.
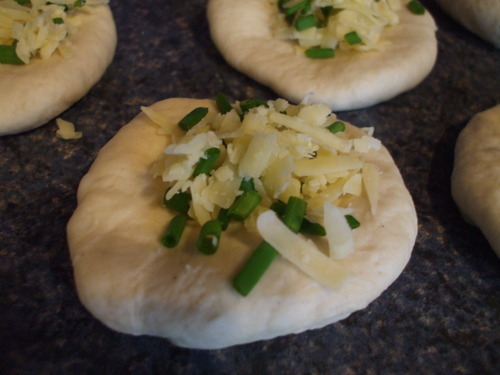
  • Mix together the chives and the grated cheese. Sprinkle a little of the mixture onto each disc.
  • Stack the discs on top of one another and then quickly transfer to the prepared loaf tin. Cover with greased cling film once more and leave to rise in a warm place again, until well-risen: about 1 hour to 2 hours. Preheat the oven to 210c/fan oven 190c.
  • Very gently brush a little milk over the top of the risen loaf. Place in the oven and bake for about 25 – 30 minutes until golden, cooked and well-risen. Test to see if the loaf is cooked by tapping it on the base – it should sound hollow. Remove from the tin and place on a wire rack to cool slightly. If you like a nice soft crust, wrap in a clean tea towel after removing from the oven.
  • Serve warm so that the cheese is still deliciously molten. It’s gorgeous as an accompaniment to pasta dishes such as lasagne…but equally delicious eaten on its own ;) When you serve the bread tear the different segments apart and stack in a bowl.
image
Here are the little cheesey discs, all ready to be stacked into a loaf...imageHmm. this little disc could do with a bit more cheese i suppose... ;)
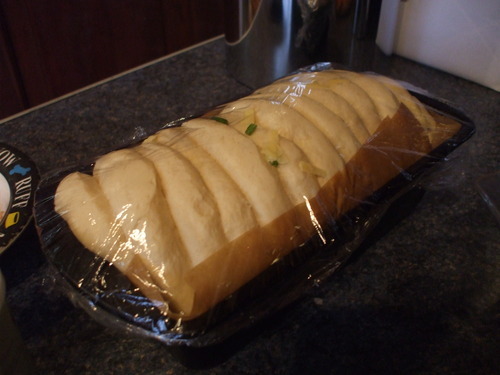
imageNow it's risen and ready to be baked...
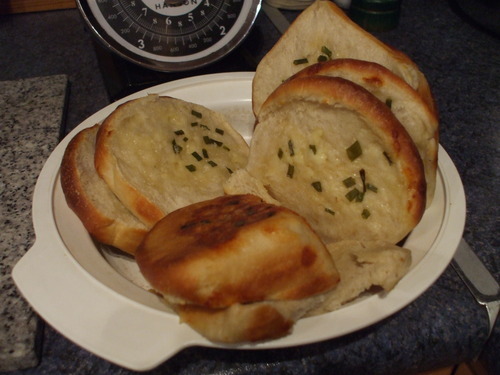
image
imageI wonder how many pieces will be left by the time dinner's over. ;)image
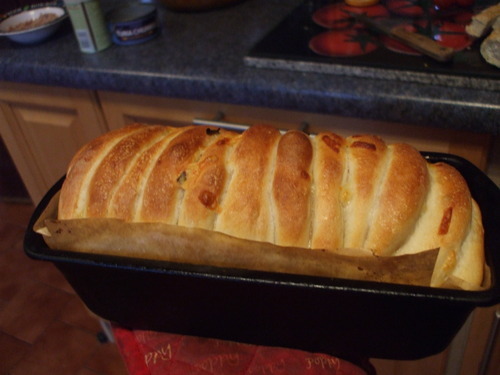
Cheese and bread...its most definitely one of those matches made in foodie heaven. <3 

Wednesday, 20 August 2014

golden garlicy gorgousness...

Now THIS is summer food. The barbecue may be sizzling, but hey, the barbacue can't do everything to make that perfect summery meal truly special!! Yes, the meat or the fish or whatver may be cooked al fresco, but surely that's not the only thing that's required? What about the salad, the potatoes, or whatever you fancy to accompany your grilled delicacies?
I love the fact that potatoes can be utilised in so many different equally delicious ways. If it’s a barbecue, of course, my heart usually inclines towards the more summery sort of options of cooking them. Potato wedges with rosemary roasted in olive oil. Boiled new potatoes tossed in melted butter and sprinkled with fresh new chives. And then, of course, these little fellows in the pics below.
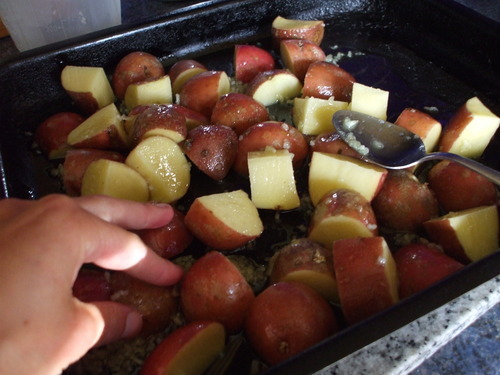
Like the wedges these are cooked in extra virgin olive oil…but something happens to the olive oil before it is poured over the potatoes. Several cloves of garlic – well, nearly a whole bulb, to be precise – are crushed into the oil in a jug before; and then tenderly applied to the cut-up potatoes with a loving hand. Another thing I love about these potatoes, is that alongside their garlicy scrumptiousness, they develop an irresistible crispiness while they are roasting: meaning they they remain soft and floury on the inside, but with a beautiful crunchiness to the exterior. I always make sure that a sliced side of each potato shape is resting on the baking tray to ensure that this process occurs. 
image

image
Here they are, before and after roasting. (no, they're the wrong way round, just noticed now - sorry guys.) Just olive oil, a bit of salt and pepper, and garlic. that's all you need. So never mind the fact that it's raining - get out the rusty old barbecue guys. You need an excuse to try these out for yourself. That said, you don't have to do these with barbecues... I do them all year round. Honestly, doing these will certainly save you alot of freezer space too...you won't ever feel the need to buy shop-bought wedges or potato shapes ever again. ;)  

Sorry, what's that? What's that I hear you say? You DO want to do them for yourself?
Well, here is a quick little guide to making YOUR OWN gorgeous garlicy potatoes then :) but don't worry too much about the amounts I've given - these are just a guide only.
To make Ganache-Elf's gorgeous garlicy potatoes to serve 4 you only need...

  • about 6-8 big potatoes, or the equivalent of.
  • LOTS of garlic...well I use about a whole bulb, but it really depends on how garlicy you like your potatoes to be. :)
  • about 125 ml extra virgin olive oil (but normal olive oil will be fine if you don't have any. Just make sure it's olive oil :)
  • salt and pepper.
Method.

  • Preheat oven to 190c/fan oven 170c. Wash the potatoes and then cut them into wedges, or, if they are small, perhaps quarter them. Place on a baking tray.
  •   Mix together the crushed garlic and the olive oil, then pour over the potatoes. Try to make sure the garlic bits are distributed evenly amongst the potato pieces.
  •  With a spoon toss the potatoes in the garlicy oil. Add a bit more oil if necessary – you want them to be well coated and oily, with no dry parts. Once you have done this, position the potato pieces on the tray cut side down. Season well with plenty of salt and pepper.
  •  Roast in the oven for about 45 – 50 minutes. After about half an hour take them out of the oven and turn any pieces that have developed a nice crispy bottom with a spoon – position them again so that another cut side is facing down for extra crispiness. ;) (Usually, these will be the ones that are on the edges of the baking tray…the ones in the entre might not yet have formed a crispy skin and so it’s better to NOT turn these ones as if you do you might risk damaging the crispy bit that is beginning to form. ;) If the potatoes seem a little dry, or if they are sticking too much to the tray, drizzle over a bit more oil before returning to the oven.
  •  Keep a good eye on the potatoes towards the end of the cooking time - if they are browning too much you might need to place them at the bottom of the oven.
  •  Dish up the potatoes into a serving dish: it’s best to perhaps use a spoon or sharp-edged metal spatula to remove them from the tray so that you don’t lose any of those lovely crispy skins! Scrape or pour any oil left in the tray over the potatoes in the dish, and serve immediately while they are nice and warm. :) And before the temptation to break off a few of those crispy bits and eat them there and then becomes too overwhelming. ;)