Bread...it's something many of us do take for granted, I think. When you make bread yourself it really does make you realise...bread is AMAZING. Who would have thought, with just a bit of flour and salt and that cool little micro-organism that we all know as yeast...a soft-centred, gorgeous-smelling, crusty golden loaf can be created.
There's loads of things I love about bread-baking. For one thing, it's just so fun. The vigourous kneading of bread dough has to be, without a doubt, one of the true joys of home-baking, for me anyway. And then there is the knocking back stage; which involves giving your inflated dough a vicious punch with your fist before it is moulded into whichever shape you are in the mood for, really. Perhaps a great big cob or bloomer; perhaps the traditional loaf shape, or maybe cute little rolls? Or even, if you are feeling creative...the list of possibilities is just endless. Turtles and crocodiles are fun.
And, as with every thing else you bake for yourself...there is, truly, nothing quite like the taste and smell of homemade bread. It's not something which you should try out if you are in a hurry - the rising takes time, after all, as does the kneading and the shaping, if you want the best results. But if you do just one thing today...try to make some time. Instead of just sitting in front of the box flicking channels in the vain hope you will find something tolerable to watch; or perhaps going out for that jog which you had promised yourself you were going to do, no matter what the weather decided to throw at you...why not retreat into that warm, wonderful space which is the kitchen, and make some magic happen. The TV and the jog can wait until tomorrow, but just rolling up your sleeves and getting stuck into bread-baking is something which you will certainly not regret doing. There will be no sore ankles from running, or unpleasant feelings of guilt resulting from wasting all that time just sprawled in an armchair thinking...gosh, there really is nothing on the telly...why am I still even sitting here? Ahh, well, moving now is just a bit too much of an effort. No...instead, there will only be a marvellous feeling of impeccable smugness; and the most gorgeous, mouth-watering, enticing aroma to go with it. You knead to do it, trust me. Oh well ok Ganache-Elf I think you may stick to your ganache-making and not try and crack awful jokes.
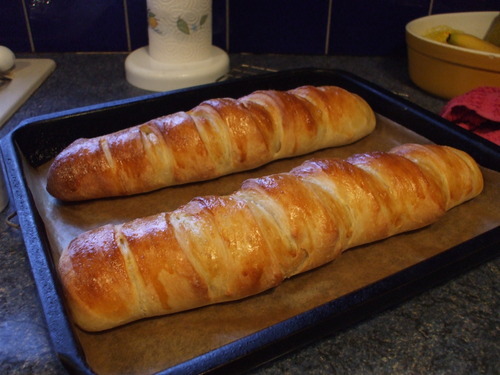
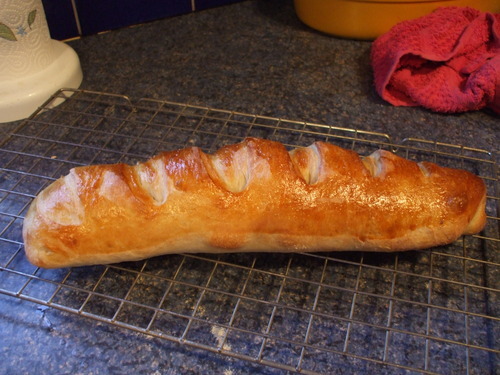
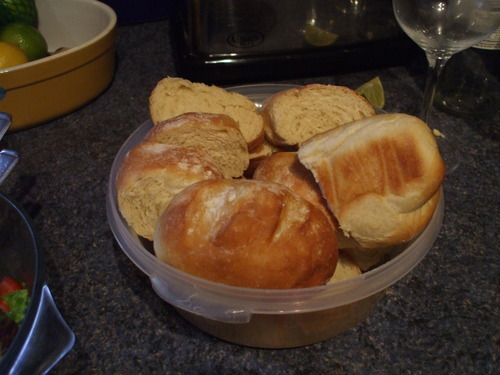
But before we resume, I thought I'd just share with you my recipe for basic bread dough...this is possibly the standard dough that I make at least once a week; for it is just so yummy and can be moulded into any shape that you like. Here, I've done some baguettes and little individual rolls, and given you a few tips on how to shape them. It's a good idea to try this out first before moving onto making other shapes for your loaf. :)
Ganache-Elf's guide to making beautiful bread. :)
You will need...
- 450 g strong white bread flour. I use Hovis or Odlums. :)
- 7 g sachet fast-action yeast/1 1/2 tsp instant yeast.
- 1 tbsp caster sugar.
- 1 tsp salt.
- 4 tbsp olive oil/melted butter, plus extra for greasing.
- a little milk to glaze.
- Sift the flour and salt into a mixing bowl and add the sugar. Stir together and then stir in the yeast as well. Make a little well in the centre.
- Measure out 300 ml tepid water ina measuring jug. I usually use two thirds cold water from the tap, and then the other third from a recently boiled kettle. It needs to be warm, but not hot to the touch: you should be able to comfortably stick your fingers in it.
- Pour the olive oil into the well in the flour and then add most of the water. Using your hands, mix the flour and the liquid together, stirring and lifting until they start to come together into a soft dough. It shouldn't be too sticky, but it should not be too dry, either: slightly moist to the touch and nice and soft. If it feels too dry and floury add a little more water. Add a very small amount of flour if it feels very sticky. Sprinkle a very small amount of flour on a worksurface.
- Turn the dough out onto the floured work surface. Now it is time to knead the dough (yayyyy.). You need to do this for roughly about 10 minutes. If you have never kneaded before...don't worry, it's not difficult to master at all. Pin the end of the dough nearest you down with one fist and then take hold of the other end of the dough with your other hand. Keeping the side nearest to you pinned down, stretch the other end of the dough and then fold it in on itself and gather into a ball. Slam it down hard on the surface. Repeat this process over once again - try to settle into a nice rhythm. ;)
- After 10 minutes or so, your dough should feel smooth, supple and elastic. Oil a clean bowl with some olive oil. Roll the dough into a smooth al and place in the bowl. Cover with greased clingfilm.
- Now it's time for your dough's first rising. :) leave it in a warm, draught free spot for about 1 1/2 - 3 hours, depending on how warm the day is. I usually pop mine on the table in the conservatory on a sunny day, or in my kitchen, or by the fire or the radiator if it's cold. It should have doubled in size when it's ready and feel inflated and springy if you gently prod it with your fingertip.
- Line two large baking trays with baking paper. Give the risen dough a big punch with your fist to deflate the air. Then scoop it out onto a very lightly floured surface and knead lightly for about 2 minutes.
- Divide the dough into three equal pieces.
- Roll one of these pieces into a rectangle, about 10 x 20 cm. (Don't worry if it's not really exact - mine rarely are. ;) ) Roll the rectangle up from the long end, as tightly as you can, so you have a long sausage-cylinder sort of shape. Place it on the baking tray.
- Repeat with one of the other pieces of dough, so that you have two baguettes. Place it on a tray.
- If you want to make some little rolls, divide the final piece of dough into balls about the size of a large apple. Cup your hand and then roll each ball of dough in your palm to make it smooth and well-rounded.
- Arrange the rolls on the other tray. You can space them apart, or you can place them close to eachother so that when they expand they will touch one another and be lovely and soft-sided. ;)
- If you like, make deep, long cuts in the tops of the loaves/rolls so you have that slashed effect like you see on Cuisine de France baguettes! ;)
- Cover with greased clingfilm again and leave to rise until they have risen once again and have doubled in size. Be very careful when you life the trays as the risen dough will be very fragile and it is very important you don't knock out any air at this stage!
- Preheat the oven to 210 c/190 c fan.
- Very gently brush the loaves/rolls with a little milk. Dust with a little flour if you like.
- Bake the tray with the rolls for about 10-15 minutes, and the baguettes for 15-20 minutes. When they are done, they should be well-risen and golden, and should sound hollow when tapped on the base.
- If you like your bread crust seductively soft, wrap the rolls/baguettes in a clean tea towel and then place on a wire rack to cool. If you prefer a crisp crust, it helps to put a deep roasting tin at the bottom of the oven before baking, so that steam is created.
- Now all the hard work is done and you can sit down and enjoy the fruits of your labours. The bread is absolutely heavenly eaten warm from the oven - slice the baguettes into pieces as big or as little as you like and split the little rolls down the side. The use them as an accompaniment to pasta, for an awesome Subway-style sandwich, or just simply on their own, slathered in butter, olive oil, peanut butter, jam, Nutella...whatever takes your fancy really. ;)
- The bread is best eaten within 24 hours of baking, but in the rare event of there being any leftovers, you can easily freeze any remaining pieces/rolls in tightly-sealed freezer bags; taking them out and heating through in a microwave/preheated oven as required. ;)