At first glance it might seem that I am just a happy, normal girl who loves to bake and walk her dog. However, I have suffered with an eating disorder since I was 13. It was only in May 2014 when I realised that this Voice in my head was slowly but surely trying to kill me. And so began the long, hard, and painful journey which is recovery...

I want My Cocoa Stained Apron to be a special place...a place for reflection, memories, shared stories...and of course a little bit of cocoa-staining ;) Recovery might be the hardest thing you ever choose to do in this life. But it is also the bravest and best decision you will ever make.:)

Showing posts with label plain chocolate. Show all posts

Saturday, 18 July 2015

Dappled cupcakes!!:)

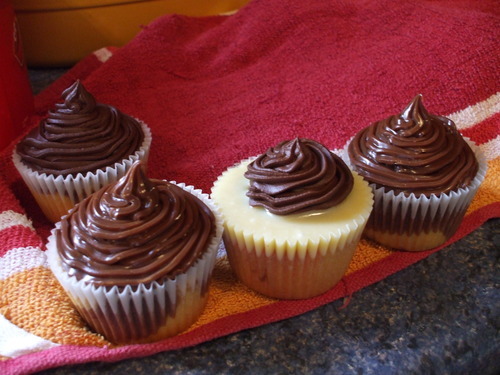
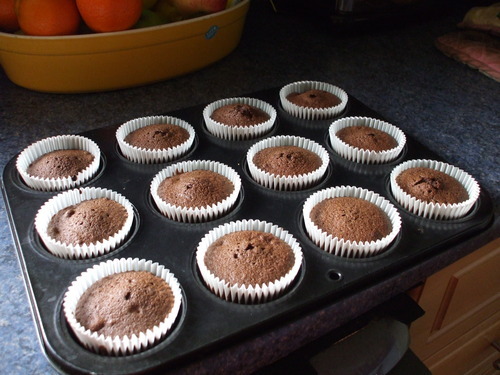
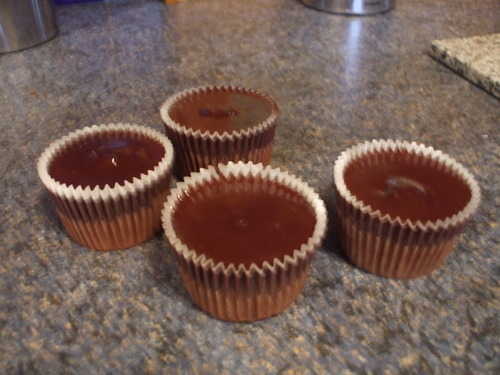
Yes!!! Yet MORE cupcakes were made in the kitchen of Ganache-Elf today!! And you know, the best thing about these is, that they look ever so exquisite, with a delightful, dainty prettiness to them which makes them all but irresistible to anyone who you might consider lucky enough to ask to sample one of your heavenly delights - well, despite all of that, they are remarkably simple to make, and don't need any pricey ingredients. Just check to see if you have some little choccies in the house for decorating!! ;) I used cadbury dairy milk buttons, but it is, of course, entirely up to you which ones you use - as is the way which you choose to apply the most heavenly concocoction ever created by humankind, surely (that being GANACHE of courese. ;) to your buns. Swirls? Smiley faces? A polka dot or chessboard patterns? The possibilities are as endless as your imagination!! Ganache in itself, once mastered, is never really any hardship to make - don't let the fancy-sounding name fool you if you are unfamiliar with the delights of ganache-making. But anyway, never fear - the recipe is included below complete with Ganache-making instructions!! ;)


  • 125 g butter/margarine, softened
  • 150 g caster sugar
  • 2 large eggs
  • 150 g self-raising flour
  • About 1 tbsp cocoa powder
  • 1/2 tsp vanilla essence/extract
  • 2 tsp milk 
For the ganaches...
  • 4 tbsp single cream
  • 100g white chocolate, chopped
  • 100 ml single cream
  • 100g plain chocolate, chopped
  • a few chocolate dairy milk buttons (or whatever small chocolates you prefer )

Method:)
  • Preheat the oven to 180c/fan 160. Line a muffin pan with 12 muffin cases.
  • Beat the butter or margarine in a bowl until really soft, then add the sugar, the eggs, and the flour. beat well for about 2 minutes until smooth and well blended.
  • Transfer half the mixture to a clean bowl and add the vanilla essence to one of them.

  • Distribute alternative spoonfuls of the different coloured batters amongst the 12 paper cases, filling them about three quarters full. When you're done, take a little thin skewer and swirl it round in each case to get that gorgeous, swirly marbled effect.
  • Bake the cupcakes for about 17-20 minutes, until well-risen and springy to the touch - if you press the top of one gently with a fingertip, it should spring back. If an indention is left bake for a few more minutes and then test again.
  • Leave in the muffin pan for about two or three minutes, and then move to a wire rack to cool. While they are cooling make the ganaches, starting with the dark chocolate ganache. ;)
  • Make the dark choc ganache by melting the 100g plain chocolate with 100 ml single cream, on a very low heat in a small saucepan. Stir until smooth and then refrigerate for about 1 ½ - 2 hours, checking after 1 ½ hours…you don’t want it very hard, just a nice spreadable consistency.
  • Next make the white choc ganache: in a small heatproof bowl set over a pan of simmering water, melt the white choc with the 4 tbsp single cream. Stir now and again and watch it very closely – the white choc will temper easily if it is overheated. As soon as the choc has melted remove from the heat and stir until nice and smooth. Refrigerate for about 1 hour – 1 ½ hours, checking after an hour, until the ganache is thicker and more spreadable.
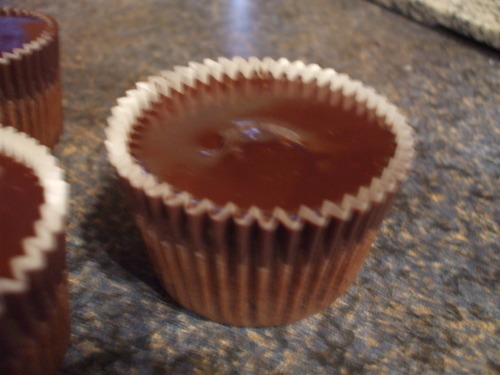
  • When the cupcakes are completely cold, decorate them with the two ganaches...in whatever way you heart desires. To get swirls or rosettes of course, you will need an icing bag or small piping bag fitted with a star-shaped nozzle. I created flowerheads and circular patterns upon my own batch, and then added a few buttons to some of them. Very pretty, very cute, and very, very yummy, of course. <3 xxx

Monday, 30 March 2015

Chocolate oat cookies!! :)

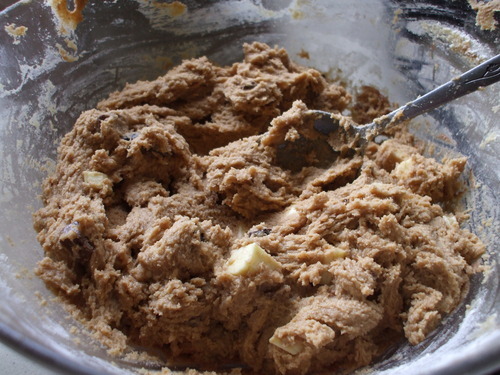
As you all know I am somewhat partial to the odd oaty cookie with my hot choc...but of course I am equally a fan of the classic chocolate chip cookie with its thick studs of plain, milk or white chocolate, and the chewy, scrumptiously sweet cookie dough. And so, on this wet, windy March day here in Ireland, I had plenty of time to bbe as experimental with my baking as I liked, and so my mission hereby was, of course, to see if i could unite both oaty and chocolate chip cookie in one delightful little biccie. The resulting cookies still had the pleasing crunchiness of my favourite oaty treats, but were made ever the more irresistible by the addition of an assortment of chocolate chips., and the flavouring of the cookie dough itself with just a wee bit of melted dark choc... ;)


And need I mention these little bites accompany tea/coffee/hot choc ;) all too well??? <3 xxxx

Ingredients (for about 20 yummy cookies! :) <3


  • 75 g plain chocolate
  • 1 large egg, beaten
  • 125 g butter, softened
  • 125 g light muscovado sugar
  • 100 g porridge oats
  • 1 tsp vanilla extract
  • 125 g plain flour
  • 1/2 tsp baking powder
  • 1 tbsp cocoa powder
  • 250 g plain chocolate, chopped into small chunks or chips.


Method :)
  • Preheat the oven to 180c/160c fan. Line two or three baking trays with baking paper. 
  • Soften the butter in a bowl with an electric mixer or a wooden spoon until very soft. Tip in the sugar and beat until light and fluffy.
  • In a jug, beat the egg lightly with a fork. Add  the vanilla to the egg and mix well.
  • Gradually, bit by little bit, add the beaten egg into the creamed mixture, scraping down the sides of the bowl every now and again, until it is all nicely incorporated.
  • Place the 75 g plain chocolate in a heatproof bowl set over a pan of simmering water. Allow to melt, stirring occasionally. Remove from the heat once melted and let it cool for a few minutes. 
  • Sift together the flour, baking powder and cocoa. Gently fold this into the creamed mixture along with the oats and melted chocolate. Use a large metal spoon to do this, twirling it up, across and down through the cookie dough in a figure-or-eight pattern. Finally, mix in the chocolate chunks or chips.
  • Now you need to transfer balls of the cookie dough to the prepared trays. Scoop up a dessertspoonful of cookie dough and place on a tray, shaping it into a rough ball shape using your fingers or the spoon. Repeat with the rest of the cookie dough until it is all used up. Make sure the balls are spaced well apart to allow room for spreading.
  • Bake the cookies for 12-15 minutes.  They should still be slightly soft, not hard. 
  • Leave them on the trays for about 5 minutes once you've removed them from the oven, and then carefully transfer them to a wire rack with a metal spatula. And of course, any remaining cookies (if any!!! ;) can be stored in an airtight tin for up to a week. :) xxxx

Saturday, 14 February 2015

Nana's Mississippi Mud Pie! :)

A million apologies!!! I haven't posted a recipe in ages...so sorry about that ;)

I've been meaning to post this one for a gooo-d while, haha. It is my Granny's positively ancient recipe for Mississippi Mud Pie, and it goes without saying, it is just the best...that crunchy biscuit base, that sticky, gooey chocolaty filling, and then a scattering of divine little chocolate eggs on top...it's simply irresistible. It's a non-bake version - all it requires is a bit of mixing, a bit of smashing, a bit of melting - and then a bit of chilling in the fridge for it to set properly. Don't expect the filling to be very hard, though - it should be seductively squishy and soft. The marshmallows assist greatly in this. ;)

The choccie eggs are optional, of course, but I think they are just so adorable on top, and maybe you would even consider making this as a special Easter treat in about a month and a bit's time ;) haha...I know I'm a little premature, writing this, but hey, I saw a Christmas ad on the TV the other day so I don't think I need to feel too guilty. ;) Unless, of course, I have negatively impacted on anyone's intentions to give up chocolate for Lent.... ;)
Ingredients :)

  • 280 g digestive biscuits
  • 150 g butter, diced
  • 400 g plain chocolate
  • 200 g marshmallows
  • 40 g soft light brown sugar
  • 4 tbsp full-fat milk
  • 375 ml whipping or double cream
  • Sugar-coated eggs to decorate.. <3

Method:)

  1. Grease a 22cm round springform tin and line the base with baking paper.
  2. Crush the biscuits in a freezer bag to fine crumbs. Place the butter and 50g of the plain chocolate in a saucepan. Melt very gently over a very low heat. 
  3. Coarsely grate up another 50 g of the plain chocolate. Let the melted butter and chocolate cool a little before adding the crushed biscuits and the grated chocolate.
  4. Mix together well and then transfer to the prepared tin, pressing it up the sides slightly. Leave to chill while you make the filling.
  5. Roughly chop the remaining 300g of the plain chocolate and place it in a heatproof bowl placed over a pan of simmering water on the hob. Allow to melt, stirring now and again with a wooden spoon.
  6. While the chocolate is melting, place the marshmallows in a separate saucepan and add the 4 tbsp milk. Place on a very low heat and allow to melt, stirring now and again with a wooden spoon.
  7. Whip the cream until it just begins to hold its shape and soft peaks have formed. Fold in the light brown soft sugar. Sift through the sugar with your fingers before you add it to the cream, breaking up any clumps.
  8. When both the chocolate and the marshmallow mixtures are melted, pour the melted marshmallows in the chocolate and mix together well.
  9. Allow to cool for a few minutes, and then stir in the whipped cream. Mix in well.
  10. Allow to cool for about 10 minutes in the fridge, and then transfer onto the biscuit base. Smooth out and then chill in the fridge for at least 4 hours, or overnight.
  11. When the pie is ready, place it on a plate and remove the tin - I usually unclip the sides and leave it sitting on the tin base as it is often quite difficult to remove it from this without blemishing the mud pie's smooth surface. :)
  12. Scatter over a few little chocolate eggs, and your muddy creation is complete. Serve on its own or with ice cream or cream. :) xxxxx 

Wednesday, 7 January 2015

Black forest gateau!!!

This is yet another post I dedicate to a special reader <3 it's my own version of the famous Black Forest Gateau - that spectacular, extremely rich, and tantalizingly tempting chocolate cake which originates (I think? ;) ) in the Rhinelands of Germany, and which marries sweet sticky cherries, lashings of whipped cream, and, of course, a substantial quantity of some form of chocolate based icing (haha...well at least the Ganache-Elf's version does. ;) ) in one beautiful, show-stopping cake.


Now if you are a purist baker, you might not approve of my adaptation of Deutschland's most famous - and,arguably, yummiest - dessert. Cherry liquer is often used in Black Forest Gateua, as are fresh cherries - not glace ones!! Haha, I suppose this is sort of a budget Black Forest Gateau, right? But is there any compromise on taste and aesthetic appeal? No, of course not. ;)

Ingredients :)

For the cake:

  • 200 g self-raising flour
  • 225 g caster sugar
  • 225 g margarine/butter, softened
  • 4 large eggs
  • 4 large tbsp cocoa powder
  • 2 tsp baking powder
  • 1-3 tbsp full-fat milk
For the filling and icing - 

  • 300 ml single cream
  • 100 g plain chocolate
  • 75 g glace cherries. halved
  1. Make the sponge first: preheat the oven to 180 c/160 c. Grease two 20 cm sandwich tins and line the bases with baking paper.
  2. measure the butter/margarine into a large bowl and beat with an electric mixer until very soft.
  3. Place the 4 tbsp cocoa powder in a small separate bowl and add about 5 tbsp hot water to get a chocolatey paste of about the same consistency as margarine.
  4. Add the eggs, the caster sugar, the flour, the baking powder to the softened butter and then add the cocoa. Mix well with an electric mixer for about 2 minutes; before pausing the mixer and scraping down the sides of the bowl with a large metal spoon. Resume mixing for another minute until smooth and well-blended.  
  5. Spoon up some of the batter and let it fall back into the bowl to check it is of a nice, soft, dropping consistency. Add 1 - 3 tbsp of milk, a tbsp at a time, if it seems a little on the thick side. 
  6. Divide the batter equally amongst the two tins and smooth the surface with the back of a spoon.
  7. Bake for 20 – 30 minutes in the preheated oven until the sponges are well-risen and spring back beneath the fingertip when pressed gently on the top. If an indent is left when you do this, bake for a few minutes more before testing again.
  8. Leave in the tin for a few minutes before turning out onto a wire rack, peeling off the paper and leaving to cool.
  9. Make the dark choc ganache by melting the 100g plain chocolate with 100 ml of the single cream, on a very low heat in a small saucepan. Stir until smooth and then refrigerate for about 1 ½ - 2 hours, checking after 1 ½ hours…you don’t want it very hard, just a nice spreadable consistency.
  10. When the gancahe is ready, whip the remaining 200 ml  cream until it forms soft peaks - be careful not to overbeat. 
  11. Stand one of the cooled sponges on a plate. Spread the whipped cream generously over its top. 
  12. Divide the halved glace cherries, cut side down, in the layer of cream, pressing them down gently as you go. Try to distribute them at regular intervals so a nice even pattern can be seen when you cut it. Place the other sponge on top of the whipped cream.
  13. Use a palette knife to swirl most of the ganache over the top of the cake, reserving just a little for piping.
  14.  Use the remaining ganache to make pretty swirly rosettes , using a icing bag fitted with a fluted nozzle, on top of the cake. 


Friday, 2 January 2015

Chocolate tiffin truffles. :)

It was Christmas 2011 when I first made these divine little chocolate treats, having come up with the idea myself of combining two of my big sister's favourite ever sweet things - those being, chocolate and chocolate tiffin, of course. ;). they make such a gorgeous little gift, for Christmas (ahem...I'm sorry, I know I am like way too late now :( ) or for a birthday or anniversary etc...or if you just want to make something extra special for a loved one or dear friend. And of course the wonderful thing about these is they look so pretty and dainty - the ganache has a lovely shine to it, and if you take care when cutting the truffles into neat little squares, the result really does look quite professional indeed. And they are small enough to just pop into your mouth whenever you feel like a little chocolate hit or nibble.

Ingredients :)


  • 125 g digestive biscuits, crushed
  • 75 g rich tea biscuits, crushed
  • 3 tbsp golden syrup
  • 2 tbsp cocoa powder 
  • 100 g butter/margarine, diced
  • 25 g sultanas
  • 25 g hazelnuts (optional)
  • 25 g maltesers (optional)
  • 200 ml single cream
  • 200 g plain chocolate, roughly chopped
Method :)
  1. Grease a 20 cm deep square cake tin and line with baking parchment.
  2. Put the butter/margarine in a saucepan with the syrup. (Use a heated spoon to make measuring the syrup a bit easier. :) )
  3. When the butter has melted, stir in the cocoa powder and then the biscuit crumbs and the sultanas (and the nuts if using. )
  4. If you are adding in maltesers <3 then wait a little while before stirring them in or the milk chocolate will all melt on you. (but would that necssarily be a bad thing? ;) )
  5. Mix together well and then turn intpo the prepared tin, smoothing the surface.
  6. Put in the fridge until it is set and hardened. 
  7. For the ganache,Put the cream in a saucepan with the plain chocolate. Place the pan on a very low heat, stirring occasionally, until the chocolate is completely melted and the ganache is smooth and glossy. 
  8. Pour the ganache over the tiffin base, gently tilting the tin if necessary so that it is completely covered with a smooth, shiny layer of ganache. 
  9. refrigerate again once more until the ganache is firm and set.
  10. Use a very sharp knife to cut out little squares. You can cut them as big or as small as you like, though I usually like to cut mine quite small - about the size of the little chocolates you get in a box. 

Sunday, 7 December 2014

Roll and Munch Buns. :)

So I had my triumph with NEO cake. (as in, actually inserting Neos into one form of baked produce. HERE is the recipe... ;) ) And it's funny, but around the same time as I wrote that old post about my fake(ish) Neo cake - the one that I entitled as such, but which didn't actually contain Neos inside the actual sponge or icing - I also told you about my NIBBLE buns. Which were normal chocolate buns with a little Cadbury Nibble gently inserted onto the top of each when they were still warm from the oven. (HERE is the recipes for both!! ;) )

But what if I went one step further in this process, so that we would have a nice chunky caramel deep inside a chocolate bun...? But this time there weren't any Nibbles in the cupboard...someone must have nibbled them all before I got to them. ;) But I had Rolos and Munchies, which I like just as well, needless to say. ;)
 A word of warning, though. I thought about a tube each of rolos and munchies would be enough. How wrong was I...in a tube these days you only get a meagre ten rolos. :( So in the end I ended up using about four tubes - two of rolo, two of munchie. Buy plenty of them, anyway. It's always nice to have a few spare to munch on. ;)

Roll and Munch Buns. :)


  • 2 tubes of Rolos
  • 2 tubes of Munchies
  • 125 g softened butter/margarine
  • 150 g light muscovado sugar
  • 125 g self-raising flour
  • 2 tbsp cocoa powder
  • 2-3 tbsp full-fat milk / single cream
  • 2 large eggs
  • 200 ml single cream
  • 200 g plain chocolate


  • Preheat oven to 180c/fan 160c; line a muffin pan with 12 paper muffin cases.

  • Sift the cocoa powder into a bowl. Add the butter, eggs, sugar, and flour, and beat well with an electric mixer for about three minutes until smooth and well-mixed.  After two minutes, stop the mixer and scrape down the sides of the bowl with a metal spoon or spatula before mixing for the remaining minute.
  • Add enough milk to achieve a nice soft dropping consistency.Scoop some of it onto a spoon and then let it drop back into the bowl to check this: it should slide or drop down easily enough and not be too thick. 
  • Spoon the mixture into the paper cases until they are all equally filled. 
  • Place a Munchie/Rolo on the top of each and gently press it in, right to the bottom. Smooth over the top with a teaspoon. 
  • Bake the buns for about 20 minutes until well-risen. The sponge should spring back when lightly pressed with a fingertip, with no indentation left. if there is bake for another couple of minutes before testing again.
  • Remove from oven once they are cooked and leave in the muffin pan for about 3 – 5 mins, then transfer to a wire rack to cool.
  • Now push another Rolo/Munchie gently into the very top of each soft, still warm cake. Don't push down too firmly this time. Leave the buns to cool completely while you make the ganache.
  • Make the dark choc ganache by melting the 200g plain chocolate with 200 ml single cream, on a very low heat in a small saucepan. Stir until smooth and then refrigerate for about 1 ½ - 2 hours, checking after 1 ½ hours…you don’t want it very hard, just a nice spreadable consistency which is suitable for piping. 
  • Pipe generous swirls of ganache on the tops of the cooled cakes. And then of course add the crowning glory...add yet ANOTHER rolo/munchie on each glorious ganache mountain (or maybe even volcano? ;) It's  an explosion of sticky caramelly deliciousness I like to think. ;) )
  • And if you really want to get the ball rolo-ling and have just that bit extra caramel munchie-ness, chop up any leftover rolos/munchies with a sharp knife into small pieces and scatter over your buns for a glitzy pretty look (and additional yumminess!! ;) ) 

Saturday, 15 November 2014

An AUTHENTIC NEO cake (even Benny and Maisy want a wee slice... ;) )

Do you recall my much, much earlier post with the rather grand title of NEO cake, which I wrote a few months back during the summer? Now I'm not saying that I was unhappy with the cake, or anything - it was everything a good chocolate cake should be; so no problems on that score. Though it has to be said, as I published that particular post, I felt a teeny-tiny sense of guilt...why? Well, I suppose I thought the post title was a little misleading. Due to the fact that, despite being adorned with Neos on its top and sides, the actual sponge of the cake - light, chocolatey and utterly scrumptious as it was - was sadly devoid of all trace of these beautiful little biccies.
 BUT today yet another development took place in the never-ending saga of Ganache-Elf's bakery. That being, of course, the infiltration of approximately a hundred grams of Neo into a divine vanilla and chocolate marbled sponge. So yes today, I am feeling rather smug indeed. I'm just kicking myself for not having made such an attempt before now...but trying out your own recipe for the first time ever is always - for me anyway - both an exciting and extremely nerve-wracking experience. Hwat if the Neos all sank to the bottom of the sponge? Or if they all stuck to the sides and bottom of the cake tins? Or if they went hard and brittle or squidgy and soggy? The very thought of permitting my beloved Neos (for yes, as I have specified before, Oreos and any biscuit in the guise of an Oreo (J-Os, Neos, etc.) are most definitely on my top 10 list of biscuits and anything of dunking potentiality. ) to such a terrible fate makes me shudder with repulsion. So I suppose yes, I did have some sort of, erm, excuse for not endeavouring to make an AUTHENTIC NEO CAKE sooner. Anyhow, today, my stash of Neos were destinied for a somewhat more spectacular fate than just being dunked in hot choc, as I believe the pics below fully testify. ;) 

No, your eyes aren't deceiving you - those little black specks in that sponge are indeed chopped Neos. ;) I chopped them into little pieces the size of my little fingernail. Just be careful when you do this of course, for as with all culinary tasks that require knives; but also because the Neos seem to have a whole mind of their own when they are being broken up in this way. Or maybe it was just the way I was cutting them (rather tenderly, as I almost felt bad breaking up them up..) but with each chop the broken up chunk of Neo often would go halfway across my chopping board. A couple fell upon the floor, much to my disconcertation. (but not to my two little furry friends'...who saved me the trouble of picking them up, needless to say. ;)

(well they were also awaiting their dinner too as I just happened to be making my Neo Cake around doggy feeding time so hence the cow eyes and the pitiful countenances...but they weren't going to turn their noses up to a wee bit of Neo of course. ;) ) 
And so, I had finally succeeded into getting my all-time favourite biscuits actually into my baking in the very literal sense of the word. But of course, to be completely Neo-fied, another 100 g of Neos were applied to the exterior of the cake too. And so, if your Oreo (or equivelent of. ;) ) addiction is as serious as mine is, I think you are going to like this cake. So please feel free to try out the recipe for yourself as outlined below. ;) 

To make an authentic, no-nonsense NEO Cake (or even perhaps, you are using actual Oreos, so that should be OREO Cake? ;) you will need...

  • 225 g softened butter/margarine
  • 225 g caster sugar
  • 225 g self-raising flour
  • 2 tbsp cocoa powder
  • 4 eggs
  • 2 tsp baking powder
  • 4 tsp full-fat milk
  • 1 tsp vanilla extract/essence
  • 100 g Oreo/Neo/J-O biscuits (I used original, but of course, there is absolutely nothing to stop you from using Double Stuff, Double Choc, Vanilla, Chocolate Creme...etc/ ;) (they are all the Oreo flavours I have thus discovered so far...are there any others in existence? If so please do let me know...partially for the spreading of baking ideas amongst my readers of course...but also, of course, because Ganache-Elf would dearly love to try them out for herself. ;)

  • 200 g plain chocolate, broken into chunks.
  • 200 ml single/double cream
  • 100 g Oreos/Neos/J-Os etc. :) (This amount is a guide only...don't be shy, add more if you think more is required. :)
Method. :)

  1. First, make the sponge. Preheat the oven to 180 c/fan oven 160 c. Grease a 20 cm sandwich cake tin and line the bottom with baking paper.
  2. Chop 100 g of the Oreo biscuits carefully into pieces about the size of your fingernail.
  3. Put the softened butter, the sugar, baking powder, flour and eggs into a bowl. Beat well with an electric mixer until smooth and well blended. Add a few drops of water, if necessary, to create a soft dropping consistency.
  4. Transfer half of the cake batter into a separate big bowl. Sieve in 2 tbsp cocoa powder and stir in the milk. Fold gently in with a metal spoon.
  5. Add the vanilla to the plain cake batter and fold in.
  6. Distribute the chopped biscuits amongst the two different cake mixtures. I put slightly more Neo in the vanilla batter, simply because I think the black pieces against the yellowy sponge looks ever so pretty. :) )
  7. Fold the biscuit pieces in with a metal spoon. 
  8. Transfer large spoonfuls of each mixture into the prepared tins. Dot the spoonfuls alternatively around each tin until each mixture is used up completely. Then use a skewer to swirl around the surface of the uncooked sponge to create a pretty marbled effect.
  9. Bake for 20 – 25 minutes in the preheated oven until the sponge is well-risen and springs back beneath the fingertip when pressed gently on the top. If an indent is left when you do this, bake for a few minutes more before testing again.
  10. Leave in the tins for a few minutes before turning out onto a wire rack, peeling off the paper and leaving to cool.

  • Next, make the dark choc ganache by melting the 200g plain chocolate with 200 ml single cream, on a very low heat in a small saucepan. Stir until smooth and then refrigerate for about 1 ½ - 2 hours, checking after 1 ½ hours…you don’t want it very hard, just a nice spreadable consistency.
  • when the sponges are completely cold, place one on a plate spread a thick layer of ganache on the top. Place the other sponge on top of it and the cover its top with another layer of ganache.
  • Spread the remaining ganache around the sides of the sponges, so that the whole cake is coated in a gorgeous thick layer of chocolate ganache. ;)
  • Use the remaining 100 g (or more..) of Oreos etc. in order to ensure you have absolutely no scruples whatsoever in claiming your cake as being, well and truly, a real Oreo Cake in every sense of the word . As you can see from the pic, I scattered a load of crushed Neos on the top of my cake and then applied whole ones to the sides as well (I split them in half so that you end up with two flat black discs which more easily stick to the sides. ) And then...? get a spoon, a knife and a big, big bowl...and try to decide what is going to be the est way to eat your well-deserved slice of Oreo/Neo etc cake. Which part to tackle first...the soft sponge, to silky ganache layer, or perhaps the actualy crowning glory of Neos itself? Or maybe even you are like me and like to remove your whole Neo piece from your piece and save it till the very last. ;) Anyway, whichever way you choose to have your cake and eat it,enjoy. I feel safe enough in saying that you are going to.  ;) xxxx

Monday, 3 November 2014

Chocolate-studded cookies.:)


I know these might look suspiciously similar to my Crazily Chocolatey double choc chip cookies (if you haven't baked them yet then please please pleaseeee consider doing so...check them out HERE if you feel so inclined ;) ), but no, I can assure you that these are a totally different cookie altogther. For starters, the cookie dough itself is entirely different. It is much sweeter as yes, there is a very cheeky amount of gorgeous light brown soft sugar in this recipe. (I adore this type of sugar...it just lends such a delicate caramelly flavour to the completed product. Almost always before I mix it with the other ingredients when I bake with it, I sift through the sugar grains with my fingers, primarily to break up any hard little clumps you occasionally get in it when it's been densely packed...and also to give myself some sort of excuse to inhale that fabulous sugary aroma. :) They aren't quite as dark as the other cookies, either, as there is less melted chocolate in the cookie dough. But rest assured, all ye chocaholics (yes I am including myself in this category, rest assured...) for this is undoubtedly very much made up for in the very, very, very generous amount of chocolate chips - some of which are reserved for studding in the tops of the cookies before baking. So what we end up with is a scrumptiously sweet, chewy, chocolatey cookie with lots of delightful chunks of heavenly milk and dark chocolate within, and on top of, each one.
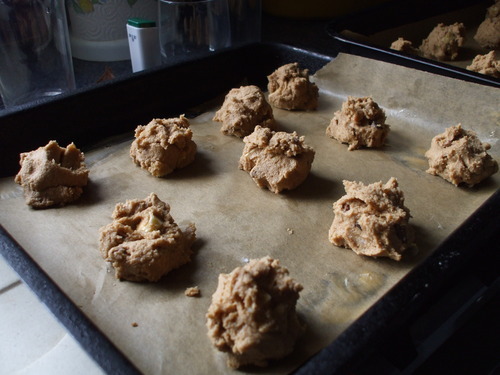
 Like my Crazily Chocolatey Cookies, these biccies will have a slightly crack, rugged appearance, which all adds to their charm. And as always, feel free to increase the amount of chocolate chips if you so desire. ;)

Ingredients

  • 255 g light brown soft sugar
  • 125 g butter, softened
  • 1 large egg, beaten
  • 1/2 tsp vanilla essence/extract
  • 225 g plain flour
  • 30 g cocoa powder
  • 75 g plain chocolate, broken into pieces
  • 1 tsp bicarbonate of soda
  • 1/2 tsp salt
  • 100 g milk chocolate, chopped into large chips
  • 75 g plain chocolate, chopped into large chips
Makes about 20 big cookies.:)
Method:)
  • Preheat oven to 190c/fan 170. Grease two large baking trays and line them with baking paper.
  • Cream the butter in a large bowl with a wooden spoon or electric mixer until very soft. Add the sugar and mix together well until light and fluffy.
  • Bring a small saucepan of water to the boil on the hob. Place the 75 g plain chocolate in a heatproof bowl/dish and balance it over the simmering water. Allow to melt, stirring occasionally. Once melted remove from the heat and allow it to cool for a few minutes.
  • Mix the vanilla with the egg in a jug and gradually beat into the creamed mixture.
  • Sift in the flour, cocoa, bicarbonate and salt. Mix together with a large metal spoon. Mix in the melted dark chocolate.
  • Set aside about one third of the chocolate chips for studding the tops of the cookies. Add the remainder to the cookie dough and mix together.
  • Using a dessertspoon, scoop balls of cookie dough onto the prepared trays. Press the reserved chocolate chips gently into the tops of the cookies, but don't push them in too far - just enough so that you can still see them peeking out. ;) Space the balls of cookie dough well apart from one another so that they don't join up when they bake. These cookies are quite substantial so give them plenty of room to grow to their maximum potential. ;) 
  • Bake the cookies in the preheated oven for 10-12 minutes: they should have increased in size and should have a slightly cracked appearance. They will be fragile to the touch at first: but this is normal so don't fret. Leave them on the trays for about 4 or 5 minutes.
  • Use a metal spatula (or, as we in the Snelgrove house call it...the "fish slice" :o [no I don't know why exactly...as it is not used to slice fish under any circumstances...I don't believe in mixing crockery for savoury and sweet recipes ;) ]) to carefully transfer each cookie to a wire rack. And then of course, we have the usual dilemma: of whether to let them cool completely before consumption, so one can appreciate their delightful chewiness; and to not have to worry too much about the terrible risk of the cookie disintegrating; having been unceremoniously dunked into some form of hot liquid... or the other option of eating them when they are warm and gorgeously soft...with the chocolate chips having not yet hardened...yes, they are still gooey and molten and oozing, like miniscule exploded bombs of divine chocolate stickiness. Solution? I suggest you have both one now and later, so that the qualities of both cookie states can be adequately comprehended. After all your hard work with your wooden spoon and chopping board (all that chocolate chopping does take time, I know, I appreciate that all too well ;) ), it's too tiring and stressful a decision to have to be faced with for sure. ;) 

Tuesday, 28 October 2014

colourful cute cupcakes... :)

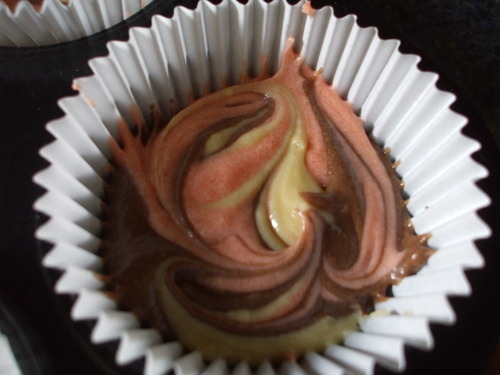
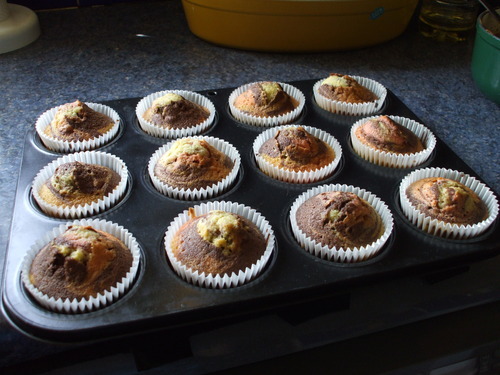
There's something just so, irresistibly adorable about the cupcake. Surely, they have to be the daintiest, prettiest, and undeniably cutest members of the baking world? Of course, as with many things, appealing and aesthetic qualities can be greatly enhanced with a little bit extra of tender loving care. And so is the case with these little beauties.
I mean, just look at them. ;)
image
image
image
image
image
image
image

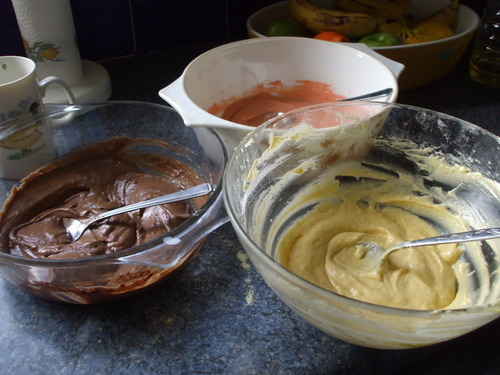
So even before the divine white and dark chocolate ganaches are applied, the extraordinary beauity and enticing qualities of these miniature gateaux has already been well established. All thanks to a little colour coordination on the part of the baker. Mine were pink, yellow and brown, but of course it's entirely up to you and what kind of mood you are in. On Paddy's Day this year I had green and yellow ones in keeping with the Irish theme. And then, of course, when they are topped with the two different kinds of ganache, the delightful attractiveness of your colourful creations is made wonderfully complete. As you can see from the pic above, varying the way in which you actually apply the ganache...a little dark rosette on smooth white coating in one, one big dark swirl on another, or vice versa...augments their charm ever further. Though once more I must stress that my way is NOT the only way. feel free to experiment with different types of ganache and the ways in which you choose to decorate your cupcakes. I think a glace cherry or a malteser, for example, might look very sweet stuck on top of a dark chocolate ganache swirl, surrounded by very fune shards of grated milk chocolate or sprinklings of icing sugar for a snowy effect.   
Anyway, on to how to make your very own marble-lous cupcakes. ;)
Ingredients:)
  • 125 g butter/margarine, softened
  • 150 g caster sugar
  • 2 large eggs
  • 180 g self-raising flour
  • few drops of red food colouring (or whichever colour you like ;) )
  • About 1 tbsp cocoa powder
  • 1/2 tsp vanilla essence/extract
  • 5 tbsp full-fat milk + extra for the cocoa batter
For the ganaches...
  • 4 tbsp single cream
  • 100g white chocolate, chopped
  • 100 ml single cream
  • 100g plain chocolate, chopped

Method:)
  • Preheat the oven to 180c/fan 160. Line a muffin pan with 12 muffin cases.
  • Beat the butter or margarine in a bowl until really soft, then add the sugar, the eggs and the vainlla. Beat well for about 2 minutes, scraping down the sides of the bowl after a minute so that it is all nicely incorporated.
  • Sieve in the flour and pour in the 5 tbsp of milk. Gently fold in with a big metal spoon.
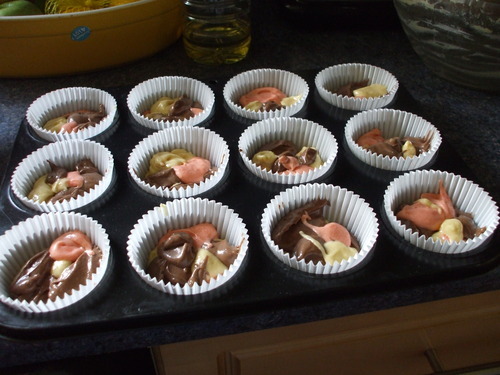
  • Now it's time to make your cupcakes all pretty and colourful. ;) Depending on how many colours you want, distribute the mixture evenly between two, three or four bowls. (or five, or 6...rainbow cupcakes?! well there's an awesome idea. ;)
  • For the cocoa-flavoured batter: If you are doing just three or two colours, sieve the 1 tbsp of cocoa powder into one of the batters and add about 2 tsp (or more if necessary) milk to get a nice soft dropping consistency. (if you have just two batters perhaps add a heaped tbsp of cocoa and 3 tsp of milk so its chocolatey enough. ;) ) for more than three colours, add a little less cocoa and milk - if you have six colours, say, you'll only need about 1/2 tsp. (It's not an exact science, so don't worry too much about it. My advice would be to aim for about 1 tbsp for 2-3 olours, 3/4 tbsp for 4-5, 1/2 for 6...etc. ;)
  • For the other coloured batters, simply add a few drops of your chosen food colouring to a batter. Leave one batter plain if you want a yellow colour.
  • Distribute alternative spoonfuls of the different coloured batters amongst the 12 paper cases, filling them about three quarters full. When you're done, take a little thin skewer and swirl it round in each case to get that gorgeous, swirly marbled effect.
  • Bake the cupcakes for about 17-20 minutes, until well-risen and springy to the touch - if you press the top of one gently with a fingertip, it should spring back. If an indention is left bake for a few more minutes and then test again.
  • Leave in the muffin pan for about two or three minutes, and then move to a wire rack to cool. While they are cooling make the ganaches, starting with the dark chocolate ganache. ;)
  • Make the dark choc ganache by melting the 100g plain chocolate with 100 ml single cream, on a very low heat in a small saucepan. Stir until smooth and then refrigerate for about 1 ½ - 2 hours, checking after 1 ½ hours…you don’t want it very hard, just a nice spreadable consistency.
  • Next make the white choc ganache: in a small heatproof bowl set over a pan of simmering water, melt the white choc with the 4 tbsp single cream. Stir now and again and watch it very closely – the white choc will temper easily if it is overheated. As soon as the choc has melted remove from the heat and stir until nice and smooth. Refrigerate for about 1 hour – 1 ½ hours, checking after an hour, until the ganache is thicker and more spreadable.
  • When the cupcakes are completely cold, decorate them with the two ganaches...in whatever way you heart desires. To get swirls or rosettes of course, you will need an icing bag or small piping bag fitted with a star-shaped nozzle. The cupcake in the front right of the pic above was first covered by a smooth layer of white ganache, before a small rosette of dark ganache was added on top. But don't worry if you don't have one. Undisputed prettiness is guaranteed whichever way you choose to finish off your cute cupcakes. ( As is, I am sure, the likelihood that all your friends and family will be won over entirely by the charming appeal of these edible, colourful little delights. ;)


Friday, 12 September 2014

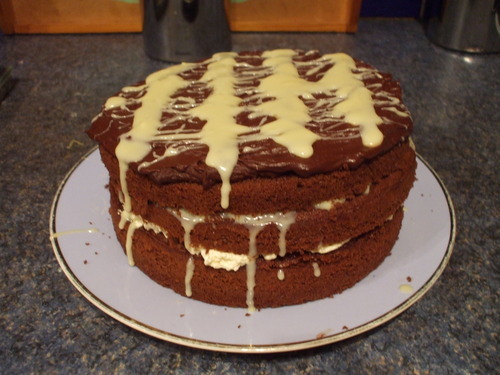
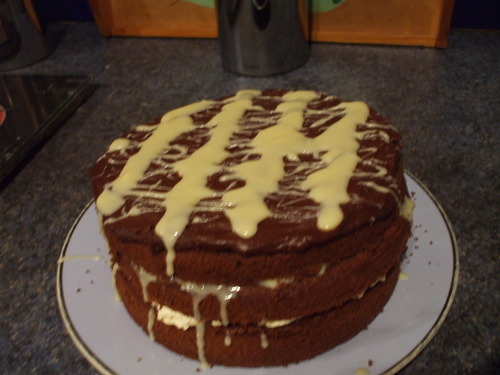
Now that's a biggg cake. :0 double choc gateau. :)

imageimage
imageimage
image
image


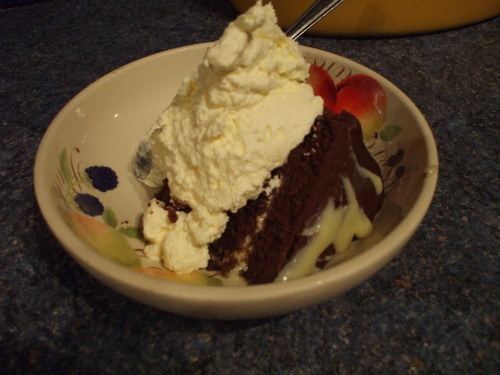
I wanted to make my little brother something extra special today, as this weekend he is moving out to live in Dublin for his first year of college :( yes, it will certainly be quite a sad weekend for Ganache-Elf…but before I go all sentimental on you, let’s talk about this cake. What with the whipped cream and two different types of ganache, healthy it most certainly is NOT. But delicious? Of course. And it looks awesome when it’s all assembled, so make sure to put it on the table before cutting into it so you can bask in all the admiring “oooh”s and “aah”s thus evoked.
For the cake:
  • 225 g margarine/butter, softened
  • 225 g caster sugar
  • 4 large eggs
  • 200 g self-raising flour
  • 25 g cocoa powder
  • 4-5 tbsp hot water
  • A few drops of milk if needed
  • 2 tsp baking powder
For the filling: 125 ml whipping/double cream
For the ganache(s ;) ):
  • For the white choc ganache: 100 g white chocolate and 4 tbsp single cream
  • For the dark choc ganache: 150 plain chocolate and 150 ml single cream
Method
  • Preheat oven to 180c/fan 160c. Grease 2 sandwich tins that are 20 cm in diameter. Line the bases with baking paper.
  • Blend the sifted cocoa powder with the hot water in a large bowl to get a thick chocolatey paste. Add the margarine, sugar, eggs, flour and baking powder and beat well with an electric mixer for about 3 minutes until smooth and well-blended. After two minutes pause the mixer and scrape down the sides of the bowl with a metal spoon or a spatula so it’s all nicely incorporated.
  • Spoon up a little of the mixture and let it fall back into the bowl to check that it is of a nice dropping consistency – it should slide easily back into the bowl. Add a few drops of milk if required.
  • Divide the mixture equally amongst the two tins and smooth the surfaces with the back of a spoon or a palette knife.
  • Bake for 20-25 minutes until the sponges are well-risen and springy to the touch when pressed gently with a fingertip: if a slight indentation is left when you remove your fingertip, then bake for another few minutes or so before testing again.
  • Remove from the oven and leave in the tins for about three minutes before turning out onto a wire rack. Wait another minute, then gently peel off the baking paper. Leave to cool completely.
For the filling and ganaches. ;)
  • Make the dark choc ganache by melting the chocolate with 150 ml single cream, on a very low heat in a small saucepan. Stir until smooth and then refrigerate for about 1 ½ - 2 hours, checking after 1 ½ hours…you don’t want it very hard, just a nice spreadable consistency.
  • Next make the white choc ganache: in a small heatproof bowl set over a pan of simmering water, melt the white choc with the 4 tbsp single cream. Stir now and again and watch it very closely – the white choc will temper easily if it is overheated. As soon as the choc has melted remove from the heat and stir until nice and smooth. Refrigerate for about 1 hour – 1 ½ hours, checking after an hour, until the ganache is thicker and more spreadable. (Ganache-Elf tip: I actually chilled my white choc ganache only just long enough for it to set slightly...but it was still a little on the runny side; which meant when I sandwiched the cakes together a little trickled down the sides of the cake, which I thought looked quite pretty. :) )
  • Whip the 125 ml whipping/double cream until soft peaks form – but be careful not to over whip.
  • Next compare your two sponges – if one of them is not quite as well-risen as the other, take that one and place on a plate. (if they are the same it doesn’t matter which. ;) Spread the whipped cream over the sponge on the plate.
  • Take the other sponge and very, very carefully, slice it in half horizontally. Be very careful doing this: you want the two slices to be as even as possible. Be very careful handling them too as they will be quite fragile once you've cut them.
  • Then place one of these slices, cut side down, onto the layer of whipped cream. 
Now it is time to apply the ganache. :) I am going to outline the way I did to get the resulting cake in the pics above...but I just want to stress to you that this is most certainly NOT the only way you can do it...there are lots of pretty and decorative ways in which you can finish off your gorg gateau. ;)
  • Take the white choc ganache and spread it on top of the cake so that now you have a layer of sponge, then cream, then sponge, then ganache. Reserve a small amount of the white choc ganache for drizzling and decoration.Then take the third and final sponge and place that, cut side down, on top of the white choc ganache. 
  • Take the dark choc ganache then and spread it over the top of the cake with a palette knife, swirling to get a pretty decorative effect. Reserve some of the ganache for decoration.
  • Now to add some pretty finishing touches to turn your cake into the ultimate showstopper. ;) Here are some ideas to get you started...
  1. Drizzley effect: as in the pic above, after you've finished layering on the dark chocolate ganache, drizzle over the reserved white chocolate ganache to get a stripey lacey effect - use a teaspoon to do this. Put only a small amount of ganache and lift it high over the cake, using swift light movements so that only a very small amount of ganache falls upon the cake to create fine zigzag lines.
  2. Flakey effect: Crush one (or two...or three...etc.) Cadbury flakes, Galaxy ripples or Cadbury Twirls (as fine or as chunky as you like: or have a mixture of small and big flaky bits.) Scatter over the top of the cake.
  3. Rosettes of ganache: Pipe rosettes of ganache (dark or white - or use a mixture of the two :) ), using a piping bag with a fluted nozzle,on top of the cake. Just make sure the ganache is of the correct consistency for piping.
  4. Grated chocolate: coarsely grate a generous amount of white, dark or milk choc - or a mixture if you like - over the top of the cake. It helps to chill the chocolate before doing this.


Saturday, 6 September 2014

Anyone would think you bought these in the shops. ;)

Muffin cases are often to be found amongst the various other items in the shopping trolley on Friday, when Mam and I make our weekly trip to Tescos. I'm always making cupcakes, it is true to say. Firstly, because they are just so popular with everyone...everybody loves being given a little box of adorable homemade cupcakes, smothered in lots of pretty iceing. And they are (well, sort of, depending on what you put on them I guess. ;) ) so portable too, so handy for being popped in packed lunches or for grabbing out the tin for a quick bite when you're on the go. And of course...cupcake making is just so fun, so rewarding, so enjoyable. I just love the creative side of cupcake-making...there are just so many different varieties, flavours, icings to choose from; and the way in which they are utilised or applied is all in the hands of the baker.  There's a cupcake for every mood and every occasion, I believe. If it's Halloween or Bonfire night...well I most certainly have an excuse to make my little spider cupcakes. Christmas time curtails the making of holly-leaf cupcakes, and in summertime only fresh strawberry-topped cupcakes will do. If I'm feeling a little sluggish, a coffee cupcake ticks all the right boxes; if I can't make up my mind as to whether I want a cupcake or a biccie, flapjack cupcakes help to solve my dilemma somewhat. And of course, if I am feeling in the need of both chocolate and cupcake in one...simarly, these cupcakes are very useful indeed in putting all my problems to bed. ;)image
image
image
image
I must admit, I do have qualms about giving these as gifts to people...not because I'm worried that they won't be appreciated, oh no. These cupcakes are everything which a chocolate cupcake-lover could ask for...a light chocolatey sponge WITH lots of chunky chocolate chips; topped with a beautiful smooth silky chocolatey icing. (that being ganache, of course.) Oh no, it's not that. It's just I worry that people might indeed assume I went to the shop to buy a few packs of these, and that I did not make them especially with them in mind. Applying the ganache when it is still runny, you see, means that you have a cupcake with a smooth covering of ganache that looks very pretty, but also meaning that they are often mistaken for shop-bought; when they are anything but. Perhpas the taste would give them away, though. I like to think that my homemade cakes taste much nicer than the shop-bought variety, after all, so one hopes that a difference can be distinguished. ;) Do try to use light muscovado sugar for these, by the way...it lends a lovely caramelly flavour to the finished product.:)
Ingredients
  • 125 g butter/margarine, softened
  • 125 g light muscovado sugar
  • 2 large eggs, beaten
  • 25 g cocoa powder
  • 100 g self-raising flour
  • 250 g plain chocolate
  • 150 ml single cream

  • Preheat oven to 180c/fan 160. Place 14 paper muffin cases in muffin trays.

  • Chop 125g of the plain chocolate into large-sized chips.

  • Beat the butter/margarine in a large bowl until really soft with a wooden spoon or an electric mixer. Add the sugar (see my tip from my triple choc chip cookie recipe about brown sugar and its occasional lumps! :) ) and continue to beat until lighter in colour and fluffy.

  • Beat the eggs lightly in a jug, then add about a quarter to the creamed bbbutter and sugar. Mix well, scraping down the sides of the bowl with a metal spoon or spatula every now and again to ensure it’s all mixed in with not bits sticking to the sides. Continue this process, adding the egg a quarter at a time until it’s all used up.

  • Sift in the cocoa powder and the flour. Replace your mixer/wooden spoon for a large metal spoon and fold the flour and cocoa gently into the mixture. Fold in the chocolate chips next.

  • Spoon the mixture into the paper cases, making sure it is equally distributed amongst them all.

  • Bake for 15-20 minutes, until risen and springy to the touch. Check after 15 minutes, testing by gently pressing the top of one cupcake with your fingertip – it should spring back when you remove your fingertip.
    • Leave the cupcakes in the muffin tray for about 5 minutes before transferring to a wire rack to cool. Leave to cool completely before you make the ganache. (this ganache is made a teency bit differently to the normal method…you just don’t chill it at all before adding to the cupcakes ;)

    • For the ganache: put the cream and the chocolate in a bowl over a pan of simmering water. Allow the chocolate to melt, stirring occasionally. Once the chocolate has melted remove from the heat and stir until smooth and satiny.

    • Pour a little ganache on each cupcake so that each one has a smooth, shiny covering. Refrigerate for a couple of hours until set.

Friday, 5 September 2014

Because one type of choc is never enough. ;) thus we have the triple choc chip cookie.

image
image
image

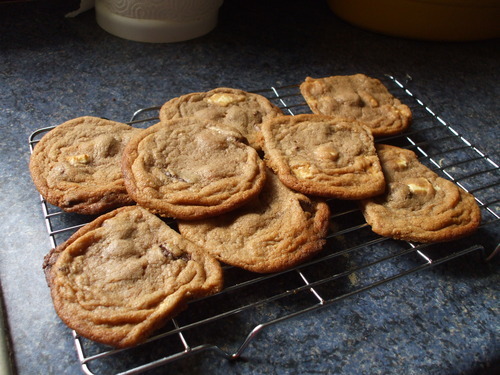
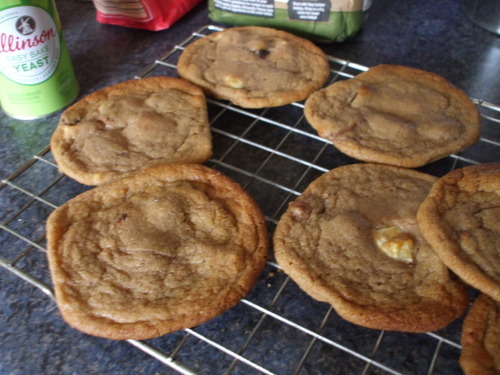
And now it is time to introduce my favourite EVER cookie, the triple choc chip. Of course being triple means that the three different types of chocolate, plain, white and milk, are all involved...all three are present in chip form, it's true to say, but 75 g of melted milk choc is incorporated into the cookie dough itself, too, which lends a gorgeous sweetness to the biccies themselves....probably the reason why I can never really resist them. I just adore cleaning the bowl of cookie dough while my little creations are baking happily away in the oven...and when they come out with the chocolate all melty and soft I can feel my heart melt in a similar sort of way. But don't forget to leave them to harden just a little before attempting to eat one! They will be very tender and fragile; so please please don't make the mistake of browning them to much. I have never baked mine any longer than 10 minutes; but I know all ovens are different.
I've given quantities for all the different chocolate types for the chips, but really you can fiddle about with them as you see fit...and don't worry, of course you can exceed the given amount if you so wish. I often find that along the way chocolate chips are lost, anyway...but all for a good cause, to keep the baker's energy levels up while she does all that stirring and beating and cleaning, you see. ;)
Ingredients
  • 120 g butter, softened
  • 120 g light brown soft sugar
  • 120 g caster sugar
  • 1 large egg
  • 1 tsp vanilla essence/extract
  • 200 g plain flour
  • 100 g milk chocolate
  • 75 g white chocolate
  • 75 g plain chocolate
Method
  • Preheat oven to 190c/fan 170 and grease two big baking trays. Line them with baking paper.
  • Beat the butter with a wooden spoon or an electric mixer until very soft. Add the sugars and beat well until fluffy and lighter in colour. (Ganache Elf tip. Perhaps this is just an Irish or Tesco thing, but I’ve noticed that in the packs of light brown soft sugar, especially if it comes in a tightly sealed bag, that there are often just a few small, hardish lumps of sugar amongst the finer grains. They’re easily broken up if you crush them between your fingers. So when you weigh out the borwn sugar, sift through it with your fingers to check for these lumps before adding it to the butter.
  • Beat the egg in a jug with the vanilla.
  • Place 75 g of the milk choc in a small bowl placed over a pan of simmering water. Allow to melt, stirring now and again till smooth. When melted remove from the heat and leave to cool slightly.
  • Chop the plain chocolate, the white chocolate and the remaining 25 g milk chocolate into large chips.
  • Pour about a third of the egg mixture into the bowl with the creamed butter and sugar. Mix together well, scraping down the sides of the bowl with a metal spoon or spatula every so often so that it’s all incorporated. Add another third and repeat the process until all the egg has been used up.
  • Sieve in the flour and gently fold in with a metal spoon, along with the melted milk chocolate. Then add in the chocolate chips.
  • Scoop up dessertspoonfuls of this heavenly cookie dough and place them, spaced well apart, on the prepared trays, shaping into balls with your hands or with the spoon. Aim for about 20 – 22 even-sized balls. (and leave some cookie dough for yourself of course. ;) )
  • Bake for 8 – 10 minutes until pale golden brown…make sure you check after 8 minutes to ensure they aren’t going too dark. They will be fragile and delicate at first…but don’t fret, they will harden on cooling ;) remove from the oven and leave on the trays for about 5 minutes, and then carefully transfer to wire racks using a metal spatula. Eat warm  (well eat at LEAST one anyway...don't forget the importance of sampling ;) ) and leave the rest to cool (may need to hide them) and store in an airtight tin when completely cold. They will keep for about 5 - 7 days.
  • image
    image

Tuesday, 26 August 2014

More brownies, more goo, more chocolate. ;)

image
image
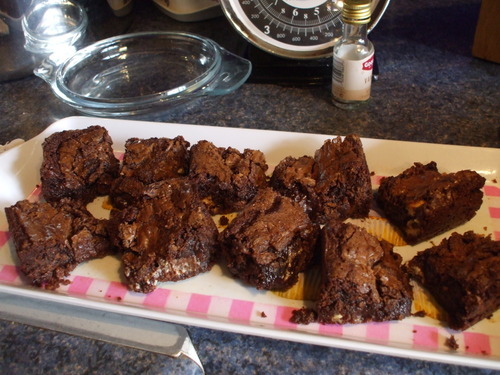
Yes, indeed. When Ganache-Elf decides to make brownies, there will inevitably be a large quantity of both chocolate and gooiness involved. Now I felt a little mean the last time I put up a post about brownies as there was no recipe featured...the reason being of course that the chocolate chunk brownies are not my own recipe! But these ones are, though, so I just HAD to share :) I like to call them fudgy double chocolate brownies, as they are exceedingly fudgy and contain both milk and white choc chips...and there is melted dark choc in the mixture, of course. Just remember the golden rules of brownie making...1.)be very, very careful not to overbake; and 2.) do let your brownies cool before cutting and removing from tin; to try and keep your brownies as neat and as even-shaped as their gooiness will permit; and 3.)do not let any of that lovely chocolate mixture go to waste under any circumstances...don't forget to clean that mixing bowl. ;)
Ingredients 
  • 150 g plain chocolate
  • 125 g butter, softened
  • 300 g caster sugar (preferably golden...but white is ok too though:) )
  • 2 large eggs, beaten
  • 1/2 tsp vanilla extract
  • 75 g plain flour
  • 2 tbsp cocoa powder
  • 75 g white chocolate, roughly chopped
  • 50 g milk chocolate, roughly chopped
Method...
  • Preheat oven to 180c/fan 160c. Grease and base line a deep 20 cm square cake tin. Put a pan of water on the hob to boil. 
  • Beat the butter in a big bowl until very soft, then tip in the sugar and continue to beat until light and fluffy. Use a wooden spoon or an electric mixer for this. :)
  • Mix the vanilla with the beaten eggs in a jug. Put the 150 g plain choc in a heatproof bowl and set it over the water on the hob once it's simmering away. Allow it to melt, stirring occasionally, until smooth. Once melted remove it from the heat and set aside to cool slightly.
  • Add a little of the egg mixture to the butter and sugar. Mix well, scraping down the sides of the bowl every so often with a spatula or a metal spoon so everything gets mixed nicely together. Add another small quantity of the beaten eggs, mix well once more, and then repeat  until all the egg has been used up. Scrape off all batter from your wooden spoon/mixer and then use a large metal spoon to fold in the melted plain choc. Sieve over the cocoa powder and the flour and fold in along with the chopped chocolate. 
  • Transfer to the prepared tin and bake for 20-25 minutes. A sugary crust should have formed on top of the brownies, but they should still be fudgy in the centre. Keep a very good eye on them towards the end of their cooking time...don't put the fudginess of your brownies at risk. :o
  • Leave to cool in the tin before marking into 16 squares...though of course, if a substantial amount of nibbling has been involved on the part of the baker...perhaps it would be best to mark out 15, 14, 12...? ;) dust with cocoa powder if you like for a pretty little finishing touch..oh, and if any little bits fall of the squares, you can either a.) attach them back to the square as they will become harder and firmer the longer you leave them, or b.) collect these little "stray pieces", squidge them into a ball, and "sample" your brownies for yourself. And hey don't feel guilty!! It's good practice for a baker to check that their produce is up to standards before serving to anyone else, right? ;) 
image